Second Grade Super Hero Portraits

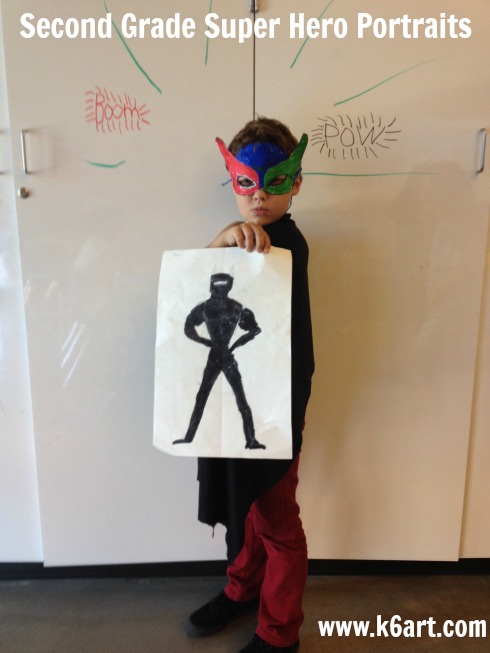
Jack's super hero self portrait

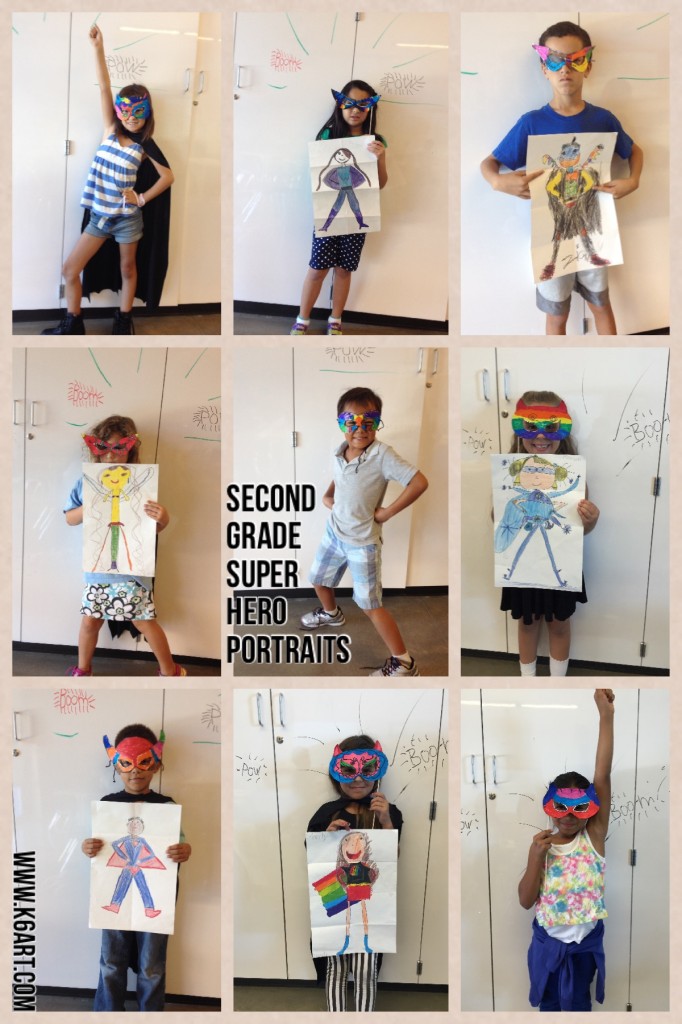
What child doesn’t want to have super powers? Our second graders just completed a two-part super hero self portrait project. First, they drew themselves as a superhero. Next, they created a super hero mask and photographed each other in super poses.

Students added boots, gloves, belts, masks, capes, tights, and more to their self portraits.

Students added boots, gloves, belts, masks, capes, tights, and more to their self portraits.

Draw yourself as a superhero

 Materials

  • Crayola Color Sticks or colored pencils
  • extra fine Sharpie
  • pencils/erasers
  • copy paper (for initial sketches)
  • 12″x18″ drawing paper
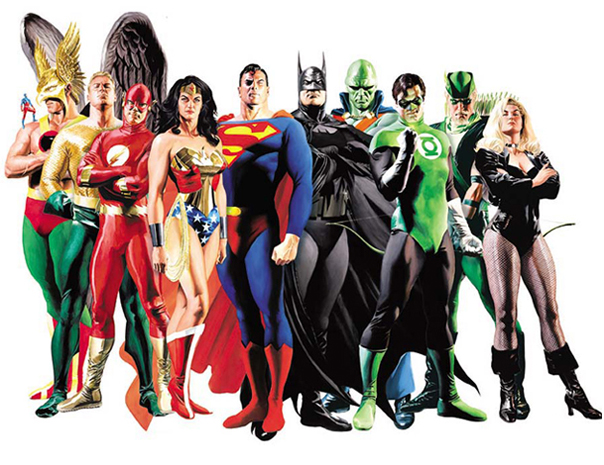
  • reference photos of superheroes

I used a paper folding technique to encourage students to fill the entire page. We first folded the papers the long way (‘hot dog’) to create a line of symmetry. Then we folded them the short way (‘hamburger’) to create a waist line. We opened the papers, the made another fold from the short edge to the waist line. We used copy paper for initial sketches and drawing paper for the final.

Students drew themselves in a strong stance. They added boots, gloves, masks, capes, and belts. Each student added a special logo on the chest. Some added special tools. They colored with color sticks and colored pencils, then outlined in Sharpie.

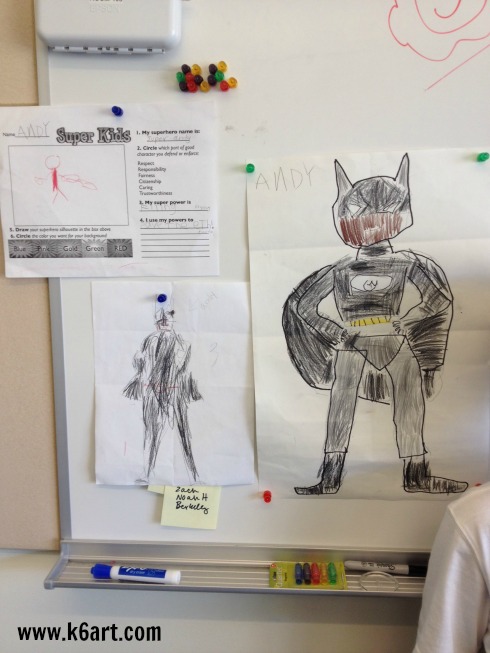
andy's 3 drafts

Andy created three drafts of his super hero.

Paper masks

We used the free downloadable mask templates from partysimplicity.com. Students colored them with marker. We cut them out and backed them with black construction paper so they would be strong enough to wear. Kids had the option of punching the masks and attaching yarn ties, or just taping on a bamboo skewer as a holder.

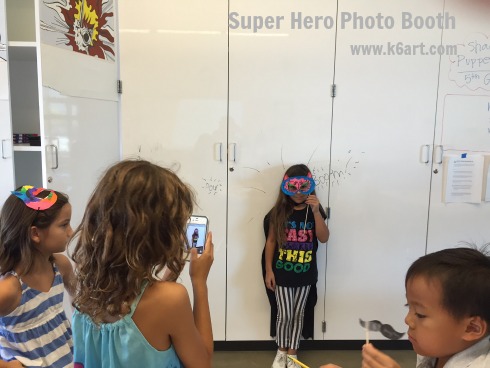
Students photograph each other as super heroes.

Students photograph each other as super heroes.

Photo booth

Students worked collaboratively to create photo booths. Each had a sign-up list and a waiting area.  One student was the photographer, another dressed kids in the cape, others made sure everything ran smoothly. We used an iPod and an iPhone, but you could use any digital camera.

Second grade results (by student photographers)

Second Grade Super Hero Portraits

Click here and here to see more examples from prior years.

We did this project in conjunction with the second grade classroom teachers as part of a unit on being courageous and taking risks.

Enjoy!

What’s your favorite self-portrait project?

Monster Silhouettes

IMG_3504

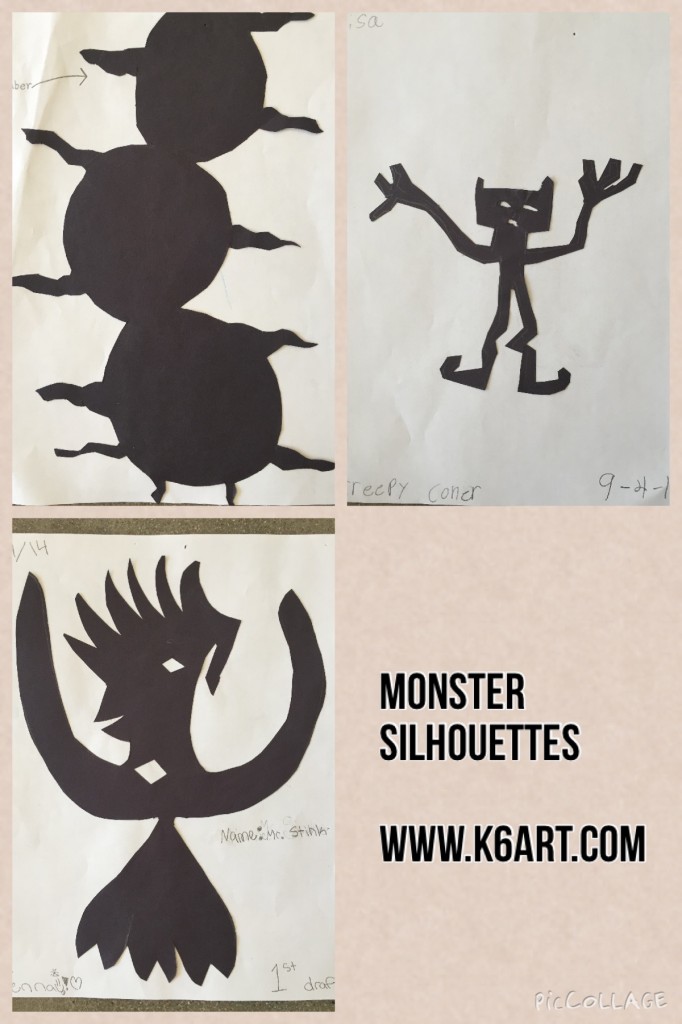
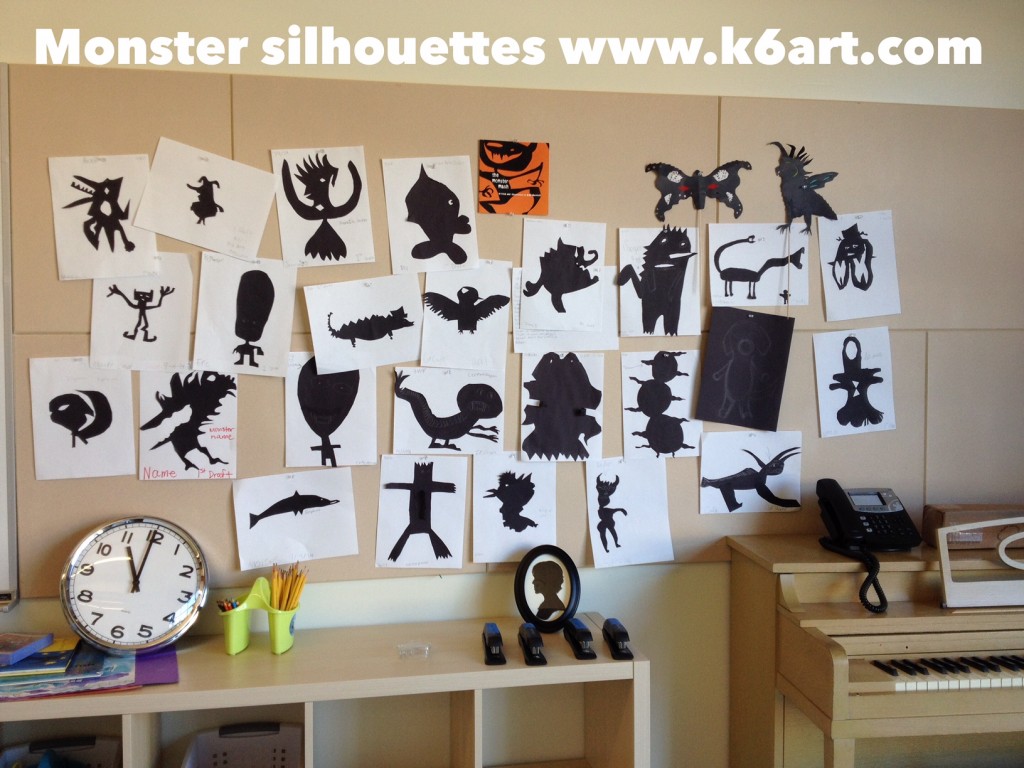
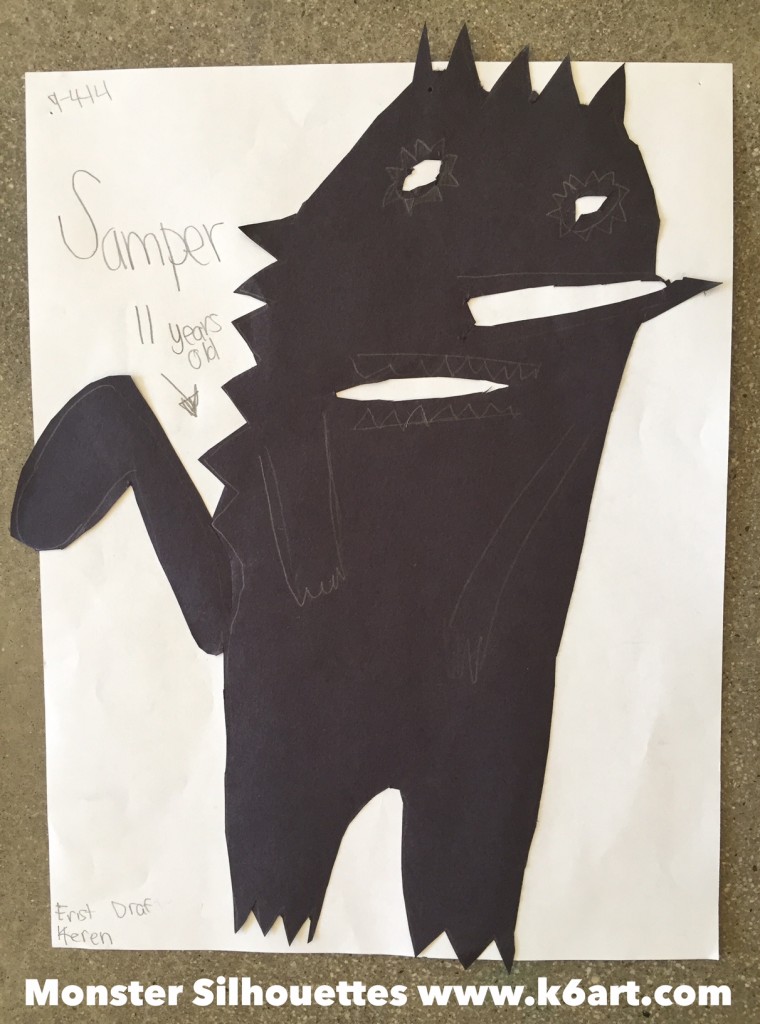
Our fifth graders just created these fabulous monster silhouettes. They learned how contour, organic shape and negative space contribute to an interesting design.

Materials:

  • black construction paper
  • copy paper
  • scissors
  • glue stick
  • pencils, erasers

‘Monster Mash’

Monster Mash

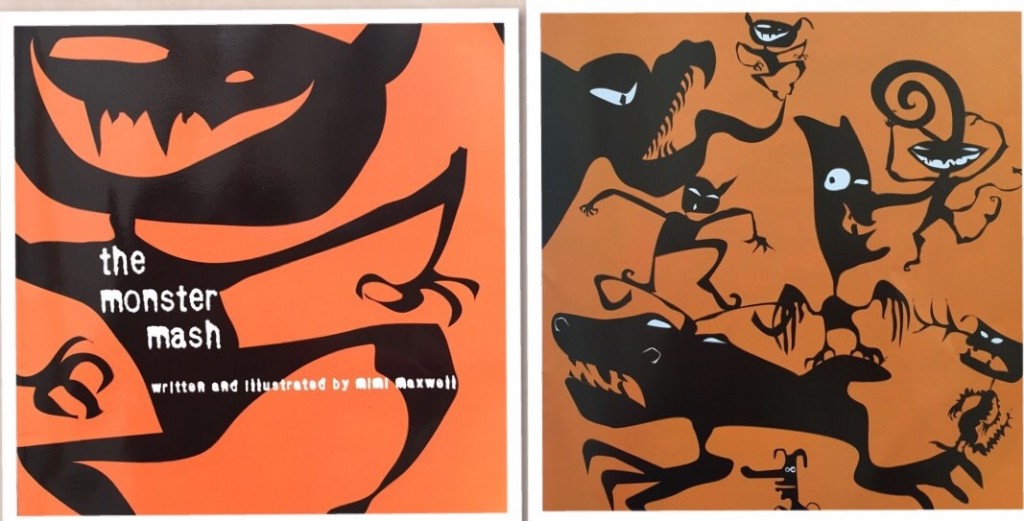
Illustrations from ‘Monster Mash’ by Mimi Maxwell

We began by looking at the illustrations in the book Monster Mash by Mimi Maxwell. The monsters are all in silhouette. We discussed organic (free form) vs. geometric shape. We also noticed the most interesting monsters had pointed or swirling body parts.  Many had cut-outs (aka negative space).

monster silhouettes

Fifth grade monster silhouettes.

IMG_3505

Fifth grade monster silhouette. Allow 90 minutes.

Create the monsters

Students did a couple of thumbnail sketches, then drew their monsters on black paper. Remind your students to design large monsters with interesting body parts and cut-outs. The most common problem is when a student draws a tiny, perfect monster that is too small to cut out.

Use glue stick to mount on copy paper.

I got this great lesson plan from art teacher Grace Hulse. Grace recommends this project as an introduction to a shadow puppet lesson. Click here to see more about Grace’s shadow puppet workshop at NAEA14.

Enjoy!

Kindergarten Art Centers

Our kindergarteners are enjoying art class! This fall kindergarten exploratory art is 60 minutes long. That’s a long time for a five year old, particularly in the first weeks of school. I’ve had a lot of success with a three-part lesson:

  1. Go to the rug and read a story
  2. Rotate through art centers
  3. Meet back on the rug and ‘share out’ what we liked and learned.

Art Centers:

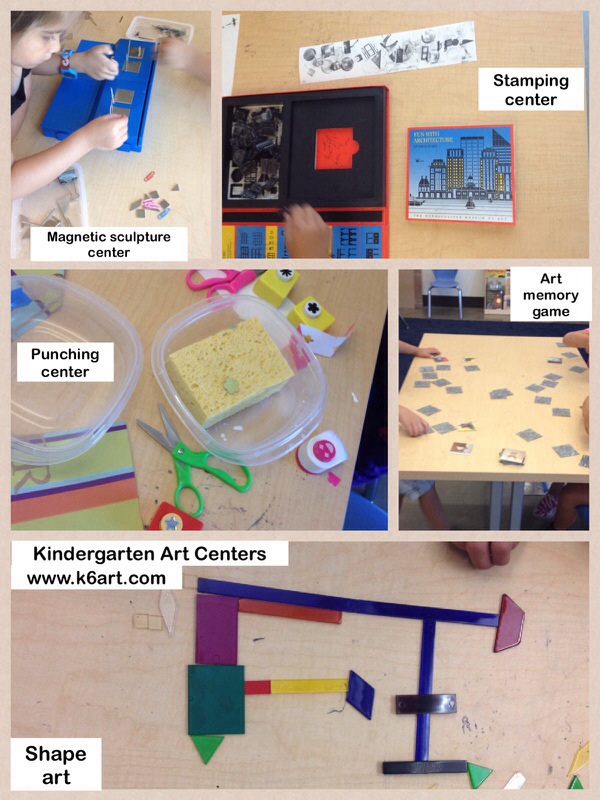
These centers are much more than fun: students learn about shapes and colors while exploring the clear acrylic shapes. They test their memory at the memo card game. Punching builds hand strength. Stamping with tiny stamps and gluing tiny shapes are great fine motor activity. Magnetic sculpture allows students to explore science and sculpture.

All centers were on a 10 minute rotation. We rotated through the centers for two days so everyone had a chance to explore everything.

Kindergarten art centers

Kindergarten art centers. We did these on a 10-minute rotation over two days.

Want to try these at home?

Click here to learn how to make your own magnetic sculpture center.

Click here to learn how to make your own glue sponge, perfect for collage.

Enjoy!

Do you have a favorite kindergarten art activity?

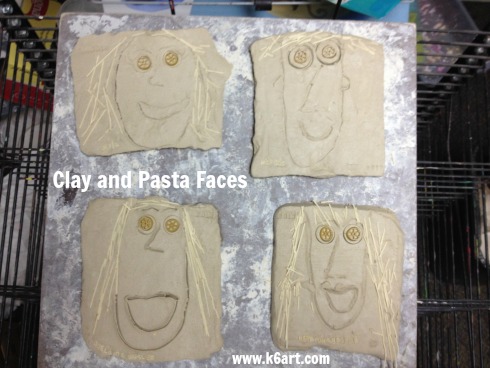
Clay and Pasta Portraits


clay and pasta faces

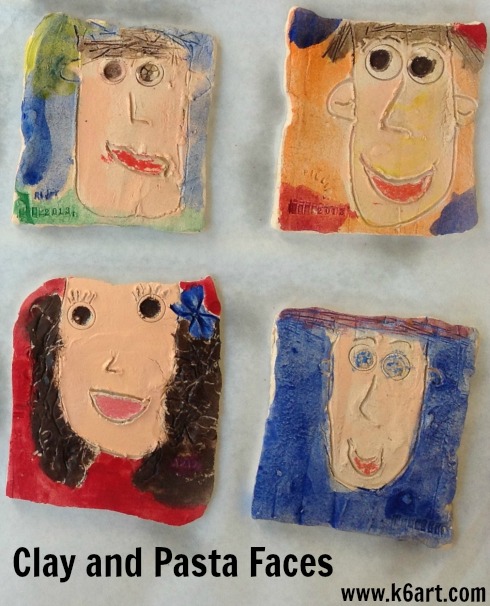
The first graders made these clay self-portraits earlier this year. They were fun to make, required a single firing, and surely will be treasured by the students and their parents for years to com.

Materials:

  • clay
  • marker or glue stick caps
  • dull pencils
  • alphabet pasta (available in the Hispanic foods section of Walmart, and through Amazon)
  • wagon wheel pasta
  • spaghetti
  • bow-tie pasta
  • ramen or egg noodles
  • optional: date stamps
  • tempera cakes (including peach)
  • Crayola multicultural paint
  • crayons
  • optional: ceramic spray gloss

Prep:

I used a multi-slab cutter to easily cut the clay block into identical clay tiles.

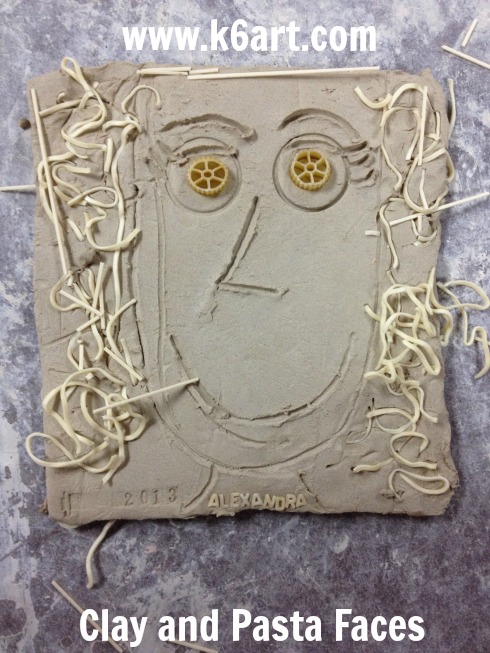
Alexandra's clay and pasta face

Making the face:

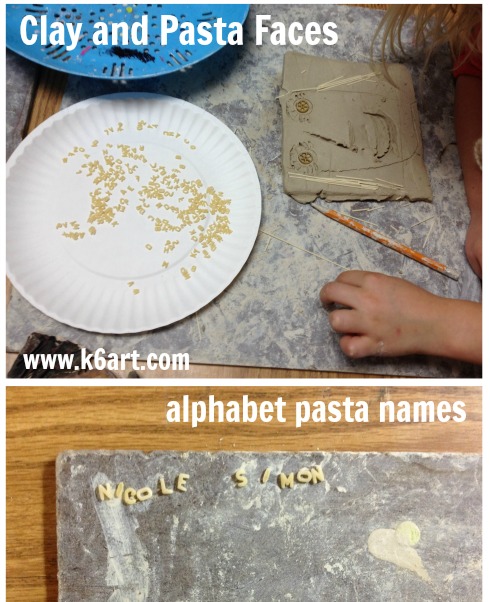
Students first used a dull pencil to draw the face, nose, smile, and neck. We stamped eyes with the glue stick caps. Then we added wagon wheel pasta for eyes. Curly-haired students pressed in Chinese egg noodles for hair; kids with straight hair pressed in broken lengths of spaghetti.  Some kids added bow tie pasta.

Next I passed out plates of alphabet pasta. The kids spelled out their names and pressed the letters into the clay.

Finally, I added the date with an old-school rubber date stamp from an office supply store.

Allow clay to dry, then bisque fire.

Note: we did not remove ANY of the pasta before firing – we just let it burn out in the kiln.

clay and pasta faces alphabet pasta

clay and pasta faces 3

Painting the clay:

After bisque firing, we painted them with tempera cakes. For the skin tones, I offered multicultural tempera as well as peach tempera cake. The first graders painted their faces in a snap.

Within a few minutes, the tempera settled into the porous bisque. Then the kids added mouths with crayon (or construction paper crayon). Some kids used crayon for the eye color and even for make up.

As a last step, I sprayed the clay portraits with glossy ceramic sealer.

Tips:

Live and learn – here’s what I found out:

  • don’t press to hard with the pencil when drawing the portraits. Some students cut right through the slab (but came away with nice face-shaped clay portraits!)
  • the pasta may attract rodents.
  • egg pasta leaves a yellow tint on the clay even after firing.
  • don’t press extremely hard with the wagon wheel pasta. If you do, the fired clay eyes will end up as a shallow well.

For more examples and ideas, see this post on last year’s clay self-portraits.

Enjoy!


Mixing Greens


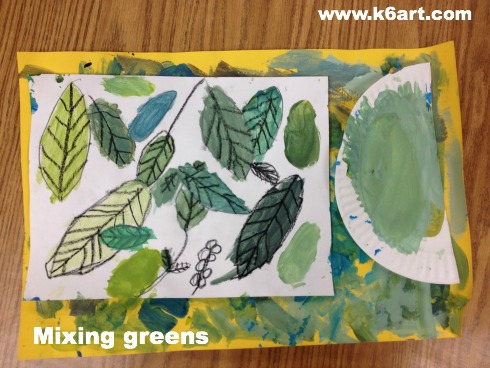
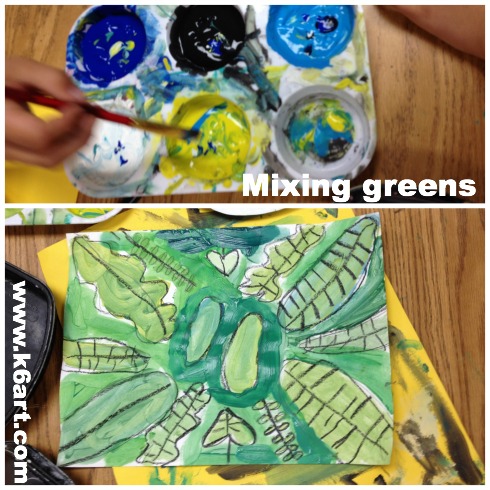
Students used tempera paint to create many shades of green.

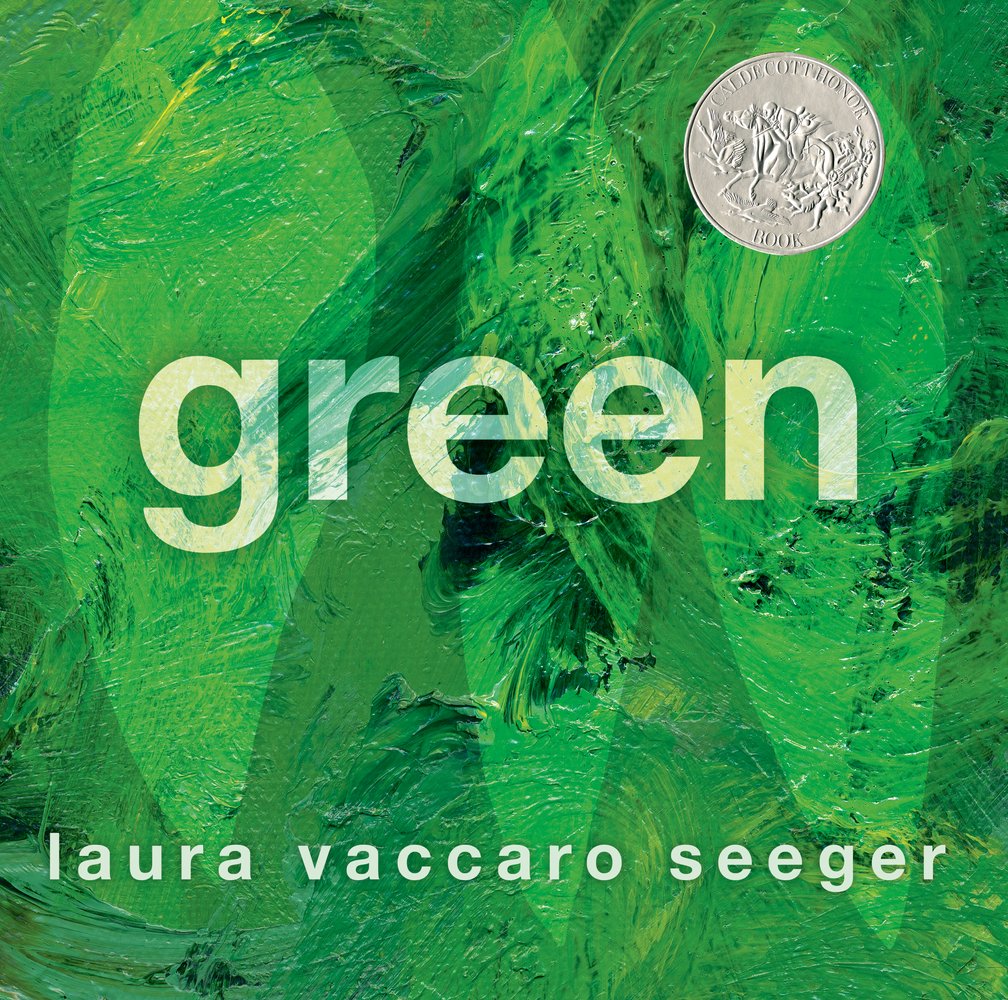
I received the book Green by Laura Vaccaro Seeger as a gift from a parent. This beautiful book (it won the Caldecott Honor in 2013) is filled with all things green.  It is the perfect tie-in to a color mixing lesson.

Green by Laura Vaccaro Seeger

Green by Laura Vaccaro Seeger, winner of the 2013 Caldecott Honor.

I read Green to my second grade art students.  They loved it – the book is full of die-cut holes and the kids enjoyed peeking through them. Can you see the die-cut holes in this video?

Materials:

  • white sulfite drawing paper (or other paper that will hold up to painting)
  • black crayons
  • paper placemats (we used 12″x18″ construction paper)
  • brushes
  • paper plates
  • tempera paint: blue and/or turquoise, yellow, black and white
  • black construction paper for mounting
  • scissors
  • glue sticks
  • colored construction paper (to create jungle animal collage)
Second graders used blue, turquoise, yellow, black and white tempera to mix shades of green.

Second graders used blue, turquoise, yellow, black and white tempera to mix shades of green.

Mixing greens

After reading the book, we got to work creating our own jungle. Students began by drawing a variety of leaves on their paper. They added veins and stems. They placed their white paper onto the construction paper placemats. Next, they scooped up a small amount of yellow paint onto their paper plates. They added dots of blue paint and mixed to create green, then painted a leaf.

The students experimented – adding white to create tints and black to create shades. Students were excited to create army green and blue-green. Seriously – they called each other over when they created cool new colors. They loved color mixing so much we had to do it a second session.

We did not use water for this project. The goal was to mix a wide variety of greens. If necessary, they brushed excess paint onto their placemats.

Create a jungle collage

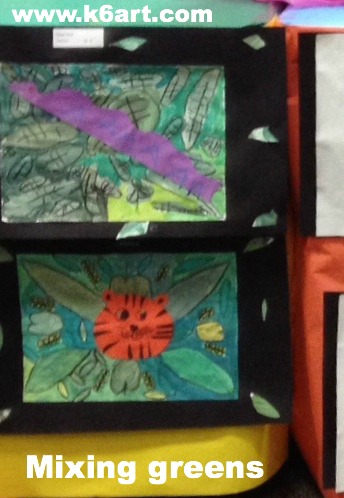
After the paints dried, we mounted the paintings on black construction paper. Students cut leaves out of their painted paper plates and used them to decorate the corners or create a border. Then they constructed jungle animals from colored paper and glued them on  top of the paintings.

mixing greens - jungle collage

This was a very successful lesson plan! The students enjoyed color mixing so much we could have done it for weeks.

Enjoy!

p.s. the project would be nice as an Henri Rousseau lesson plan.

Related Posts Plugin for WordPress, Blogger...