About Rina Vinetz

Hi there! I'm Rina. I teach K-6 art to 400 students at a public school near San Diego, California. I love teaching art and sharing with other art teachers. Thanks for visiting!

iPad Blended Self-Portrait


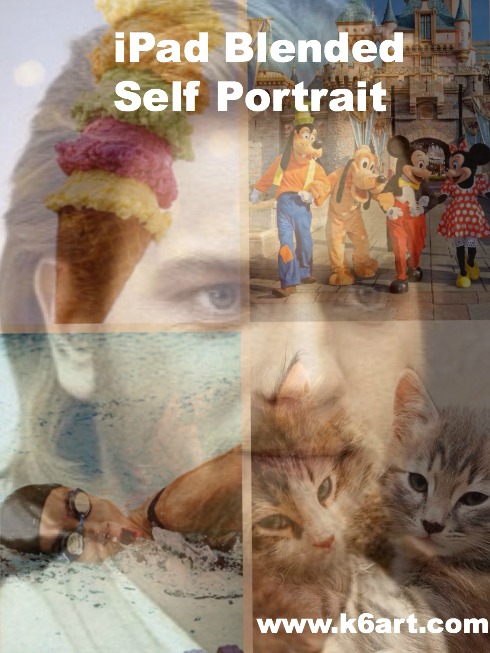
iPad blended self portrait

Our 6th grade did some quick blended self portraits using their iPads and two free apps: Pic Collage and Sketchbook X. The goal of the lesson was to learn the layers, free transform and opacity tools in Sketchbook X.
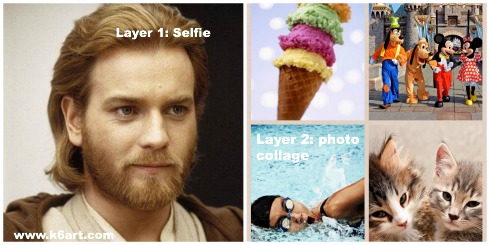
Obi-wan's favorite pet, vacation, activity and food are combined into a layered self portrait.

Obi-wan’s favorite pet, vacation, activity and food are combined into a blended self portrait. Allow one 40-minute class.

Step 1: Pic Collage App: create a photo collage of your favorite things

Students had to find four images representing

  • a pet (or dream pet)
  • favorite vacation (or dream vacation)
  • favorite food and
  • favorite activity or sport

The Pic Collage app allows students to add photos directly from the web without a Google image search. The students arranged them in a grid template, then saved to the iPad camera roll.

Step 2: Sketchbook X App: working with layers and free transform

In Sketchbook X, students created two layers. Layer one was used to shoot a selfie, and layer two was used to import the photo collage from the camera roll. For many students it was necessary to use the free transform tool to resize the photos to fill the screen. .

Step 3: Sketchbook X app: Adjust the opacity to reveal the blended self portrait

Students used the opacity slider in the first layer to reduce opacity and reveal the photo collage layer underneath.

I create a 10 minute video tutorial of the process.

https://www.youtube.com/watch?v=f7U1AbiahXA

Students saved their completed portraits to their camera roll, then turned them in to me electronically via Google drive.  Click here to read about how students turn in digital art.

Notes:

  •  Instead of finding photos on Google image, use students’ personal pet and vacation photos. Students could bring them to class as printed photos, or digitally via Google drive.
  • Want to skip Sketchbook X? Combine your photos with free photo blending apps, such as  iBlendy2 or Photoblend.
  • Video tutorial recorded with the AirServer app for Mac.

Enjoy!

Wayne Thiebaud: Geometric Desserts

Wayne Thiebaud Geometric Desserts

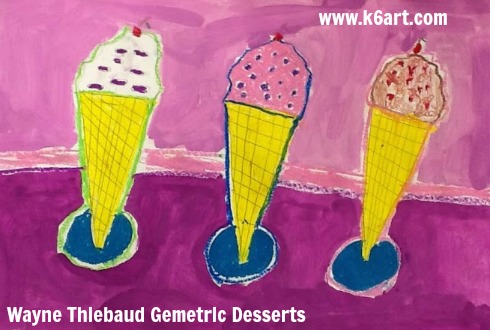
Who loves dessert? Everyone, including second graders. Each year I teach a Wayne Thiebaud-inspired dessert lesson. This year we created compositions focusing on repetition of geometric forms.

Dessert Geometry (and Common Core connections)

Studying Thiebaud's art is an opportunity to incorporate geometry into your lessons. Try and time your lessons to tie into to the math lesson in the general ed. classroom.

Studying Thiebaud’s art is an opportunity to incorporate geometry into your lessons. Try and time your lessons to tie into to the math lesson in the general ed. classroom.

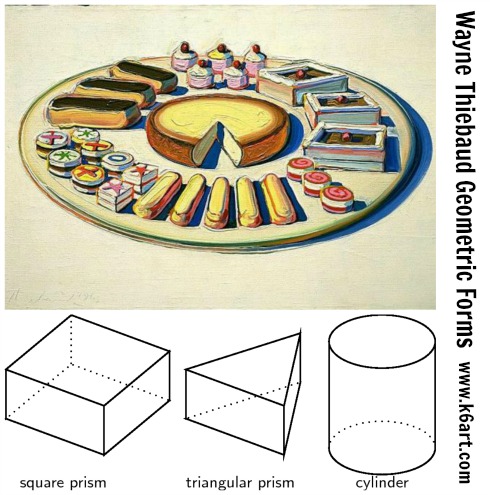
We looked at images of Wayne Thiebaud’s dessert art, and identified shapes and forms. Here are some of the forms we identified:

  • Sphere:  gum balls, scoops of ice cream
  • Right Triangular Prism: pie wedges, cake wedges
  • Square Prism: petit four (see above image)
  • Cylinder: layer cake
  • Rectangular Prism: Jolly Ranchers candy!!! (OK, Thiebaud didn’t paint Jolly Ranchers. A student came up with that one) 🙂

The second grade was studying 3D forms, so I timed the art lesson just after this concept was introduced in the general ed classroom. Click here for the second grade common core geometry standards.  You can also review the first grade common core geometry standards.

Here is a one-minute video I made featuring the geometric forms in Thiebaud’s art:

The Art Project

Materials:

  • light cardboard tracers: triangle, ellipse, circle, rectangle
  • pencils/erasers
  • white paper, 12″x18″
  • oil pastels
  • tempera cakes/water/brushes

Use teacher-made or student-made tracers (we used both). Students traced their templates with a pencil onto the paper. The composition were encouraged to fill the paper with a single type of dessert in a variety of flavors. It was OK to have the dessert coming off the page, and it was also OK to overlap.

(Note: I know some art teachers disapprove of tracers; I think the use of them in this project reinforces the tie-in to geometry and repetition).

Students then colored their desserts with oil pastels, adding details such as sprinkles, cherries, and chocolate swirls. They outlined the desserts with oil pastels. Finally, they painted the background with a single color of tempera cake.

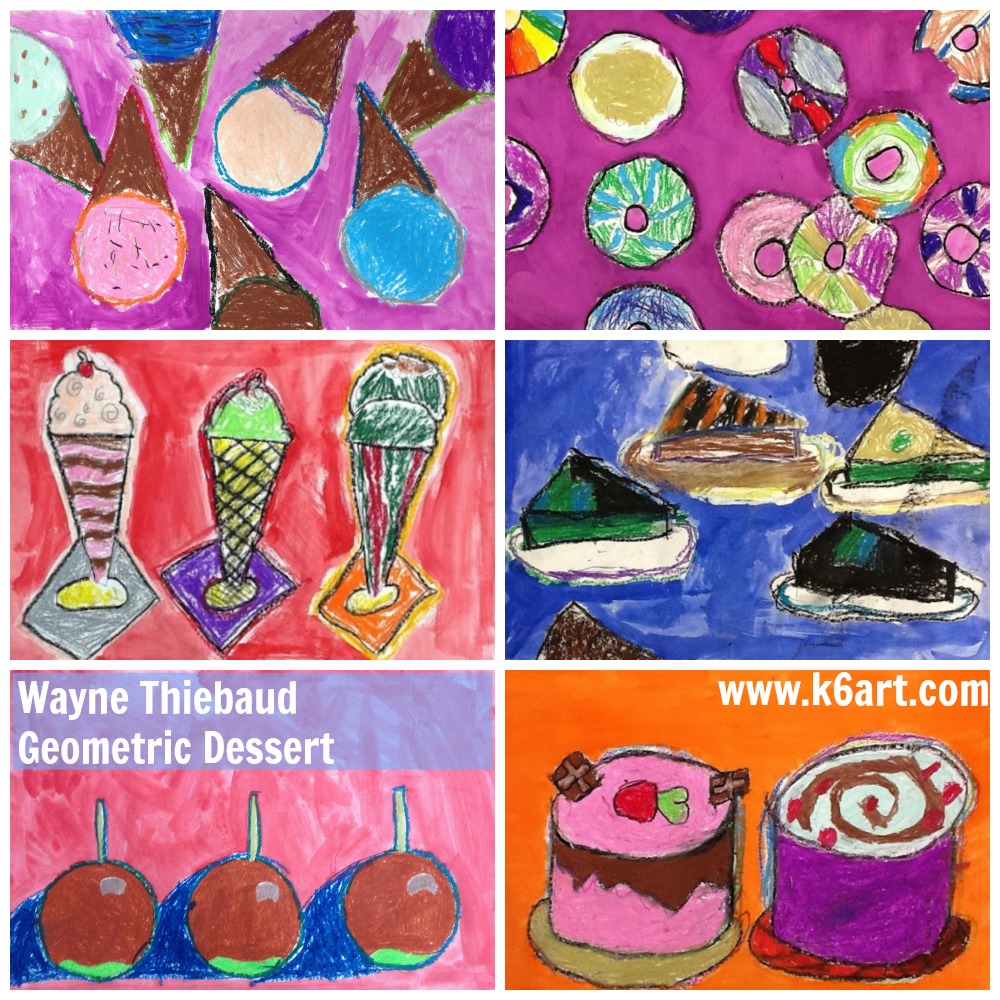
Second Grade results:

Second graders used circle, triangle, and ellipse tracers as a starting point for these artworks.

Second graders used circle, triangle, and ellipse tracers as a starting point for these artworks.

If your administration asks if you incorporate math (or STEM/STEAM) in your lesson plans, teach this one and happily reply ‘yes’. After all, shape and form are elements of art. This art project reinforces geometry in a fun way.

Additional Resources:

I wrote about these other Thiebaud projects on the blog:

The lesson was inspired by this lesson from the Parent Art Docents website.


Enjoy!


Have you ever incorporated math into an art lesson?

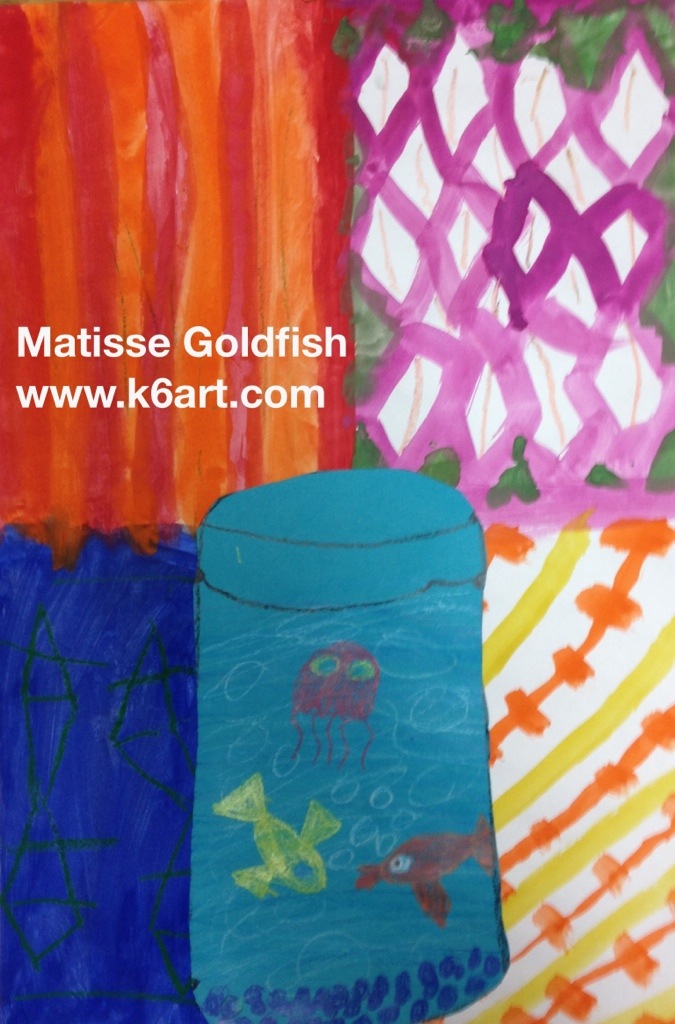
Matisse Goldfish

20140411-175346.jpg
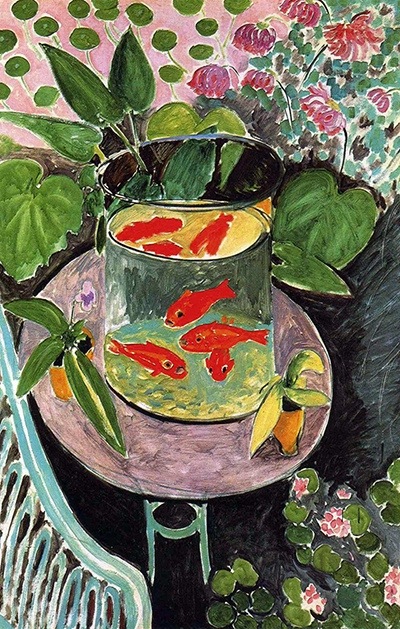
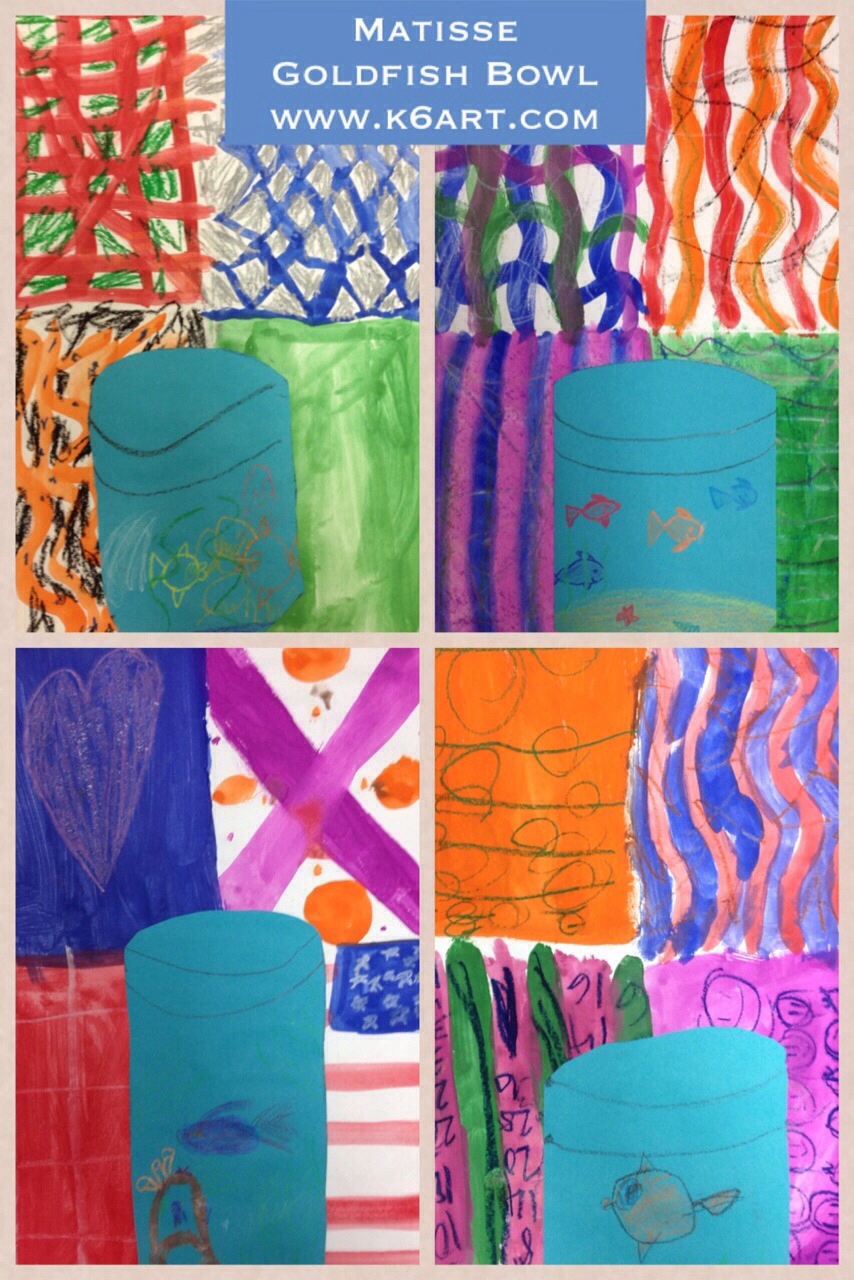
I love to create Matisse-inspired art projects with kids. Matisse’s paintings are full of color, pattern and energy. Here is a project that combines features of two of his famous paintings, Woman in a Purple Coat and Goldfish.
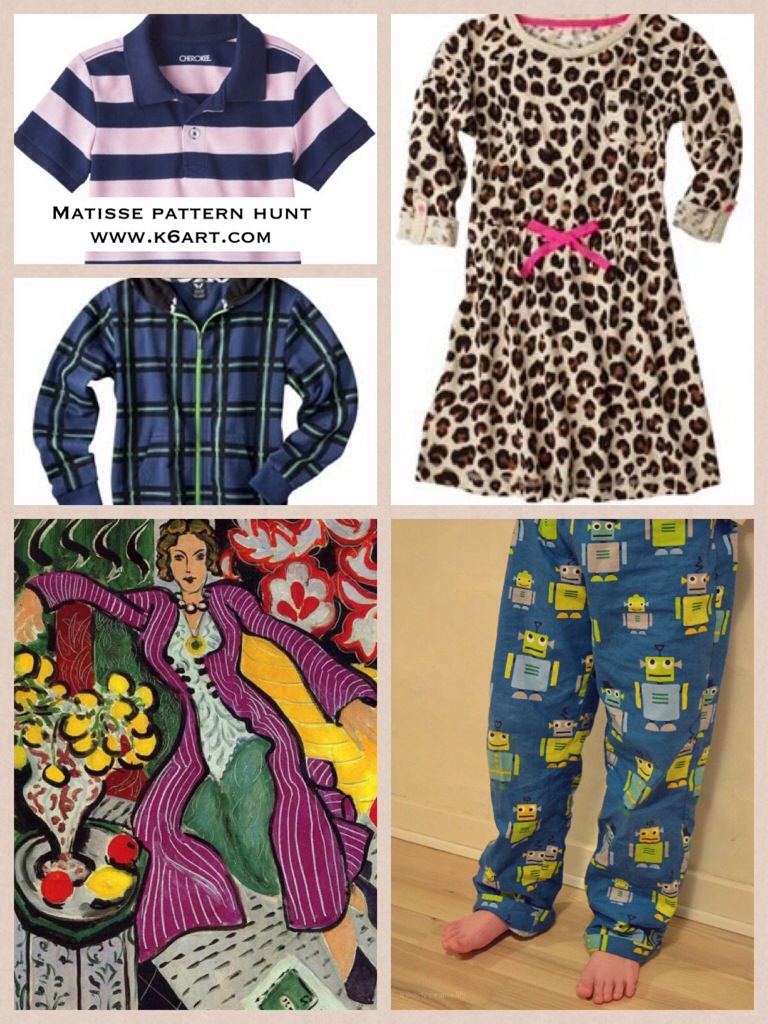
Day 1: pattern hunt

20140412-173143.jpg
We begin with a ‘pattern hunt.’ I look around the room and find kids wearing patterned clothing. They stand up and we discuss their patterns. Then we take a very close look at Matisse’s Woman in a Purple a Coat, and tally up all the patterns one by one. I can’t tell you how excited those first graders became when they identified the patterned curtains and wallpaper in the painting. They tallied up 13 patterns, including the fruit on the table.

Day 2: create patterned paper
Materials:
White paper 12″x18″
Tempera cakes
Water cups, brushes
Oil pastels or construction paper

20140412-175214.jpg
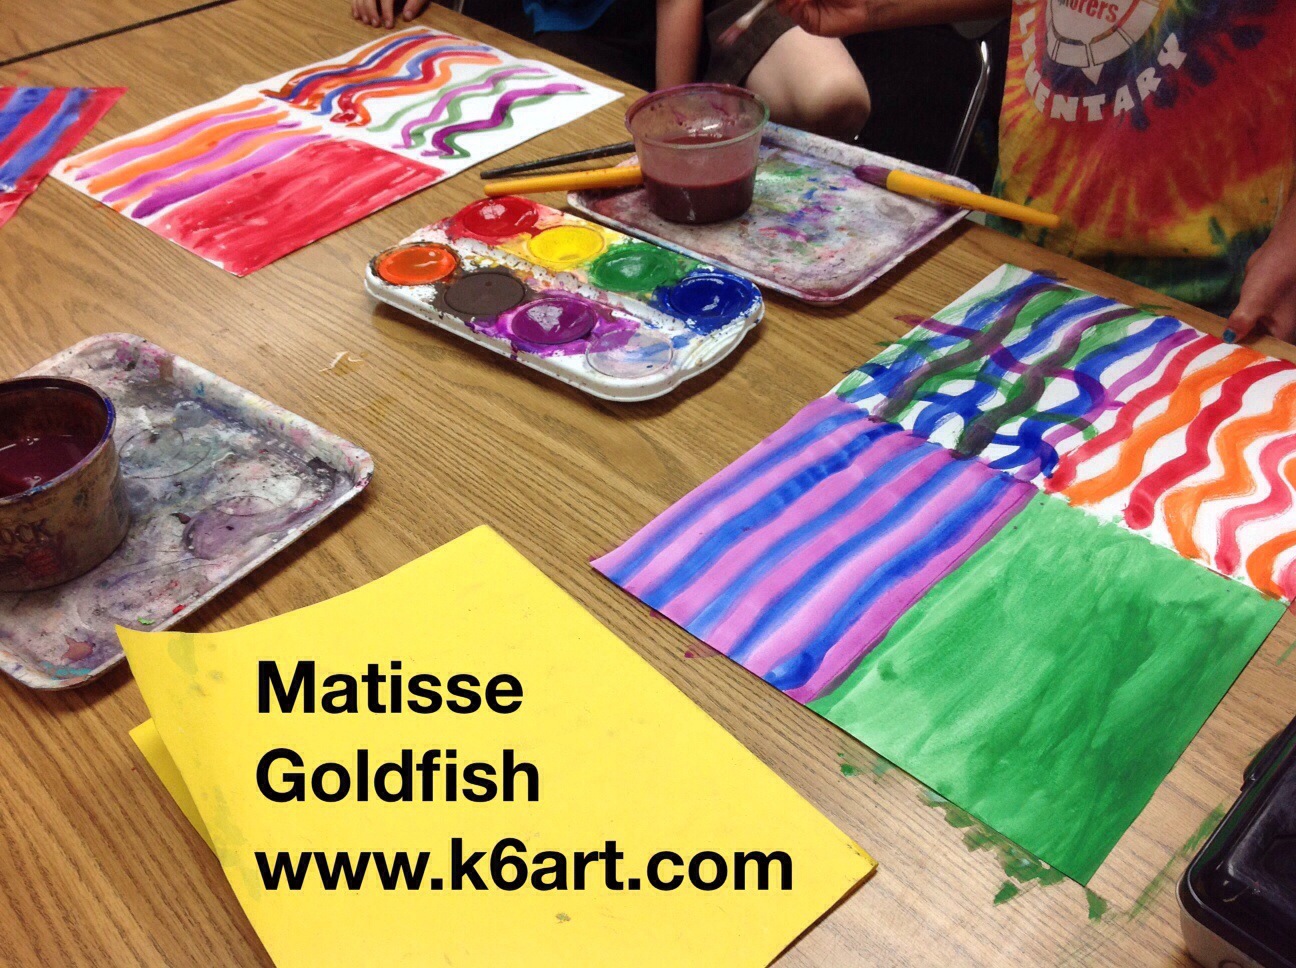
Here is a fast way to create four patterns. Fold the white paper into quarters and open. Using tempera cakes, paint one quarter a solid color. Paint the remaining quarters with patterned lines (wavy, zig zag, etc.). Now take oil pastels and create a pattern on the solid quarter. The tempera cake dries so quickly you can draw on it in just a few minutes. Add oil pastel patterns to the remaining quarters. Place on drying rack.

Day 3: create a goldfish bowl

>

20140412-224813.jpg
Materials
Blue paper, 6″x10″
Oil pastels (or construction paper crayons)
Scissors
Glue sticks
Turn blue paper vertically and draw a ‘rainbow’ at the top using a black oil pastel. Draw a ‘smile’ under the rainbow. Cut along the top line to remove the corners and create the look of a round vase edge.
Add goldfish or other aquarium creatures. Glue to patterned background paper with glue stick.

First Grade Results:
>

20140412-173748.jpg
Enjoy!

Do you have a favorite Matisse lesson?

>

Flipped Art Room – What I Learned at NAEA14

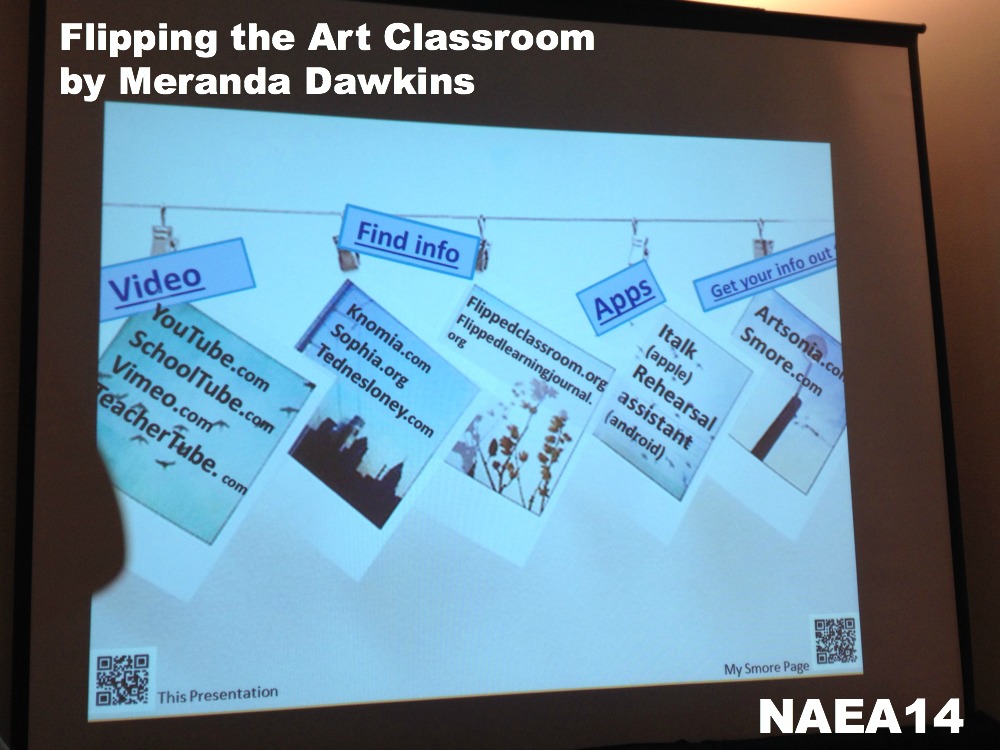
One of the best sessions I attended at NAEA14 had to be Meranda Dawkins ‘Flipping the Art Classroom’. Not familiar with flipped classrooms? Essentially, the teacher creates a video lesson which is viewed by the students at home. The next day, students come to school and do the assignment.

Meranda creates her own instructional videos and  does a ‘modified’ flipped art room: although she sends the lesson link home, she shows the videos at the beginning of class. After viewing, Meranda puts the video on mute and loops it during the rest of class.

This is great way to catch up a kid who was absent, or to help kids who don’t pay attention very well. It also benefits the art teacher who teaches the same lesson to multiple classes: you won’t leave anything out no matter how many classes you teach.

flipping the art classroom by meranda dawkins

Slide from Meranda Dawkins NAEA14 session. Scan the QR code at lower right to see all of Meranda’s lessons on smore.com

The big eye-opener for me was Meranda’s use of Smore to organize and send out her lessons. Smore.com is an online flyer design website.  I thought Smores were just a way to put out cute classroom newsletters. Not true! Meranda embedded images of Degas, a vocabulary check list and two instructional videos in this Smore.

Enjoy!

Have you ever flipped a lesson?

What I learned at NAEA14 part 1

I just spent four wonderful days at NAEA 14, here in my hometown of San Diego.  I attended a ton of sessions, including a pre-conference tour and a hands-on workshop. Here’s a peek at what I saw and learned.

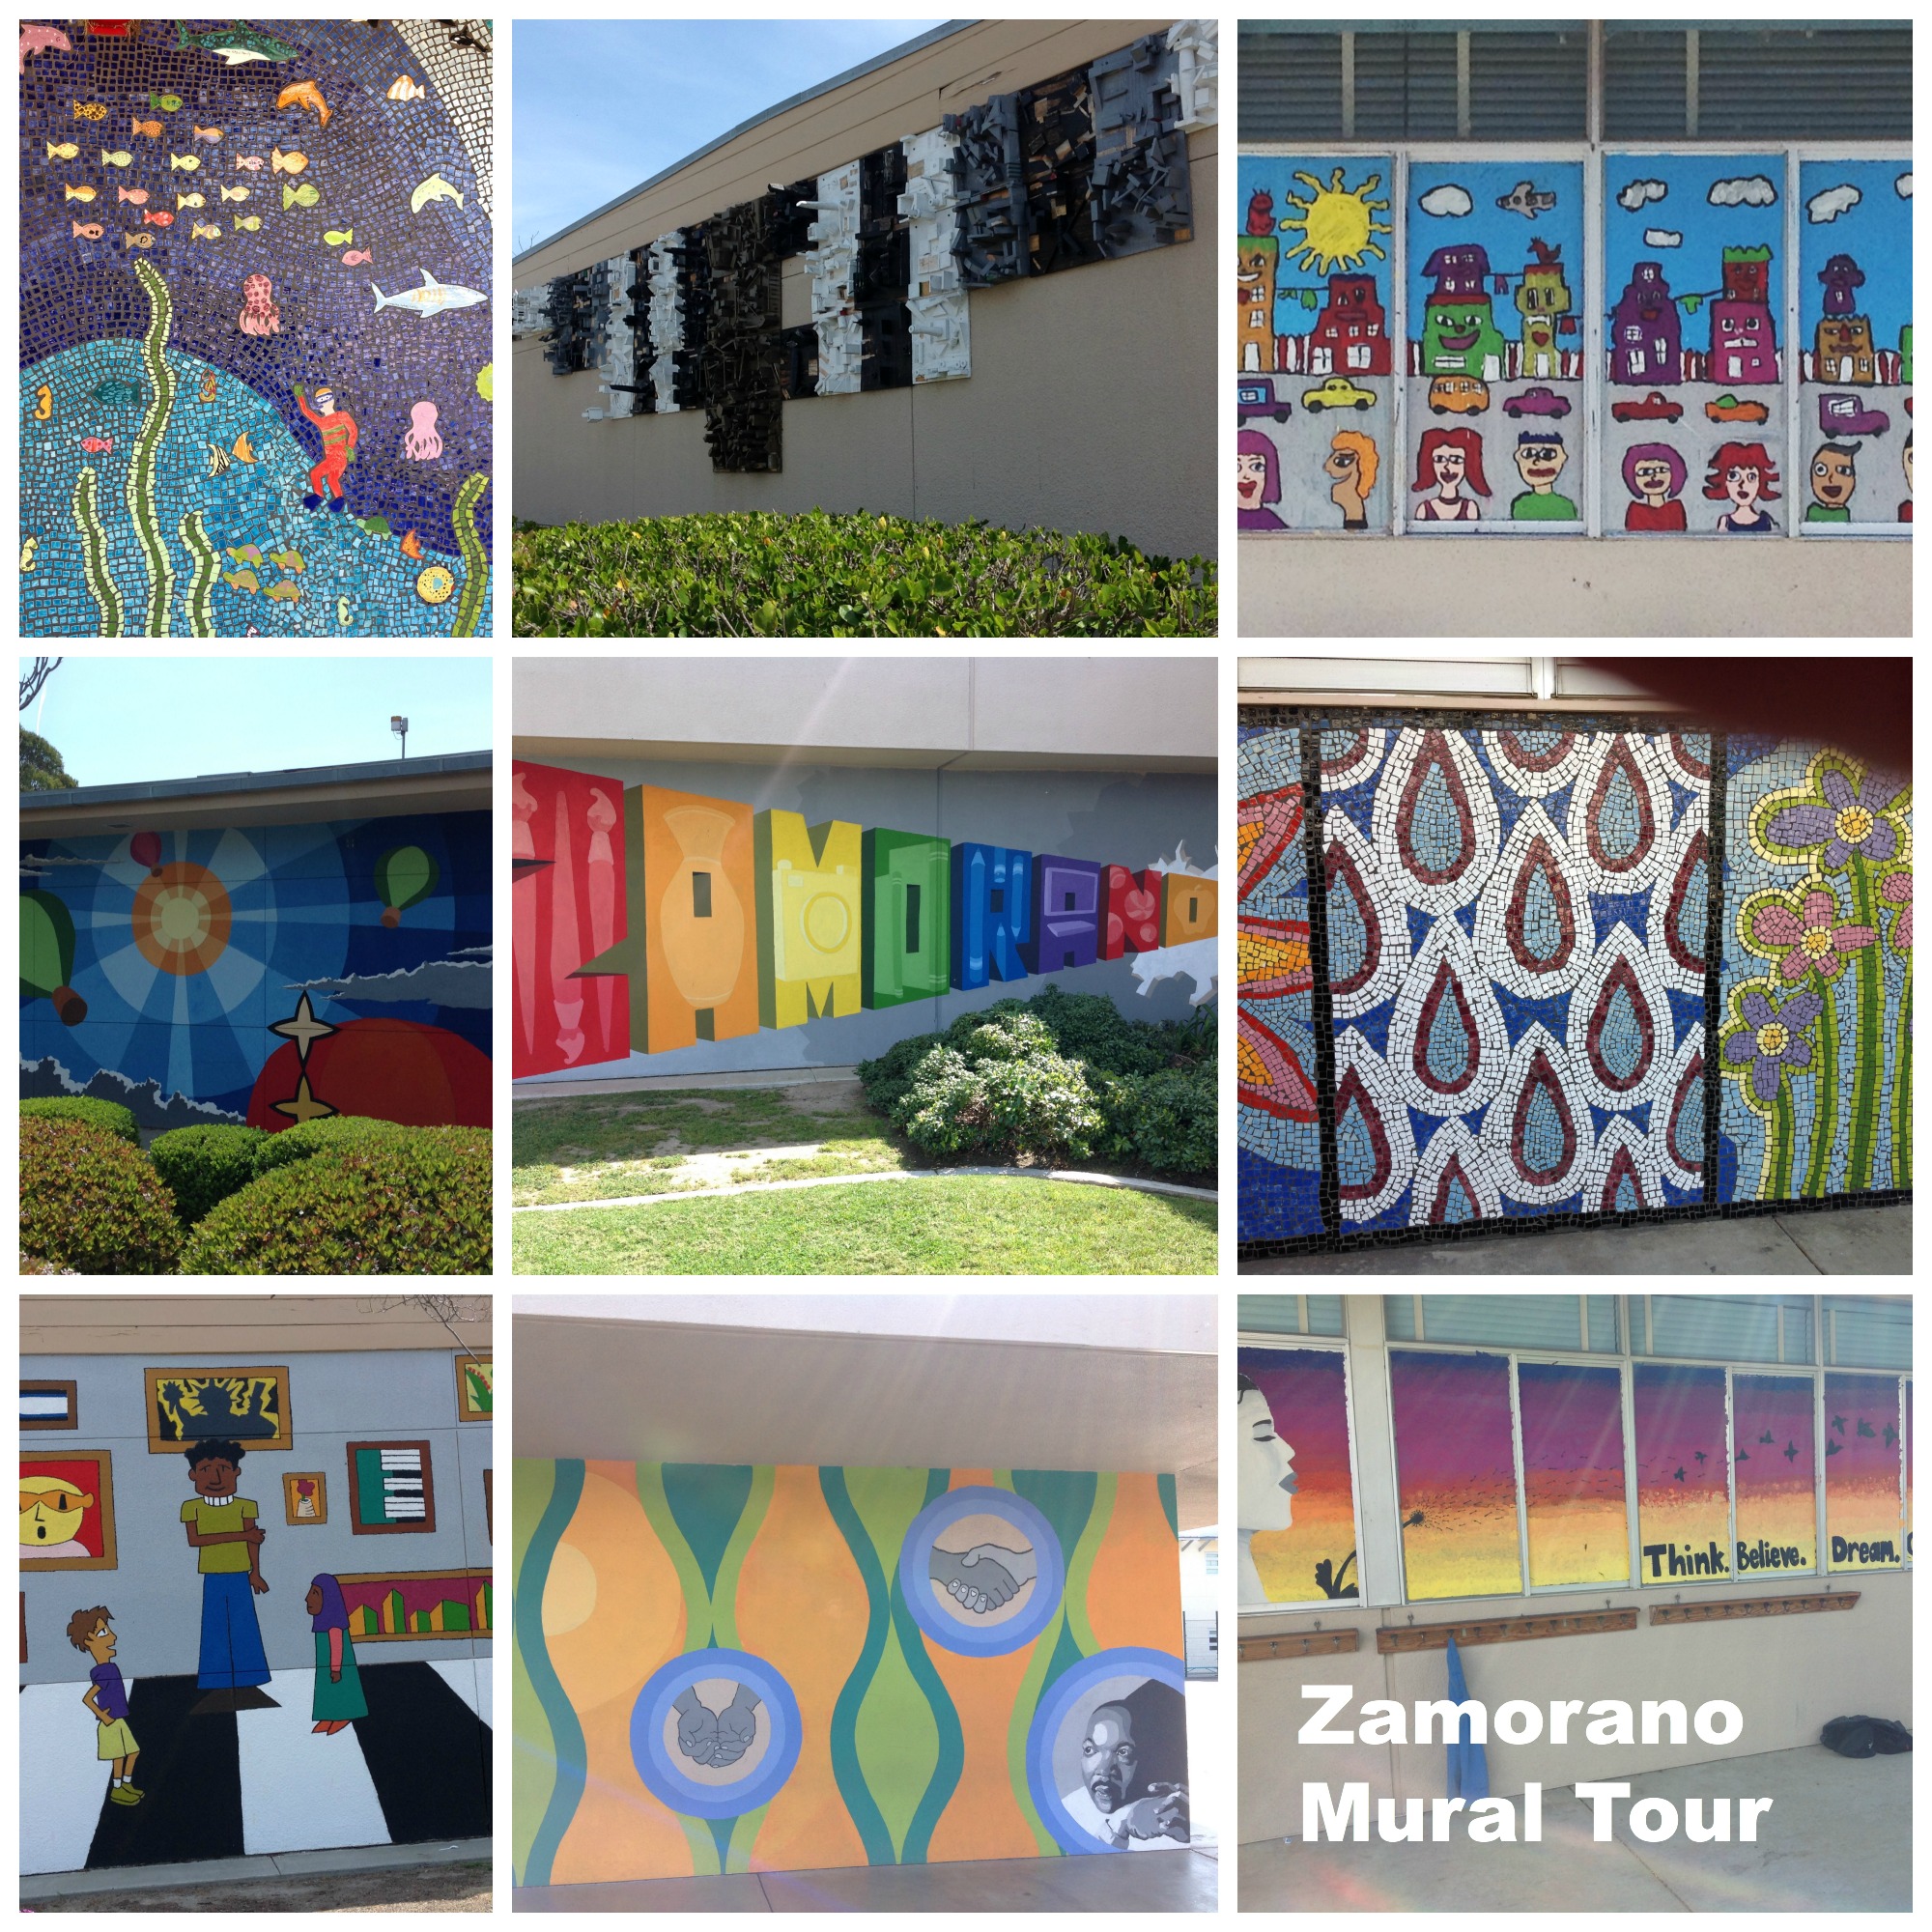
Friday, March 28: Pre-Conference Tour of Art Program and Murals and Zamorano Fine Arts Academyzamorano mural tour NAEA14 Art teacher/art ed blogger Don Masse led this tour of his public elementary school’s remarkable art program. Zamarano Fine Arts Academy employs five (!) visual art educators for 1400 (!) students from transitional kindergarten-grade 5. The school has a clay program, photography, fashion design, and much more. Don’s 5th graders create an annual ‘legacy’ mural…in addition, we saw many other outdoor artworks, including painted windows. See lots more of Don’s contemporary-art inspired projects at his blog, shite brite zamorano.


Monday, March 31 Shadow Puppets workshop with Grace Hulse

I have wanted to teach a shadow puppet unit for years, but never really knew how. Grace Hulse’s workshop was a great intro. Her Baltimore second graders put on a shadow puppet play every year.

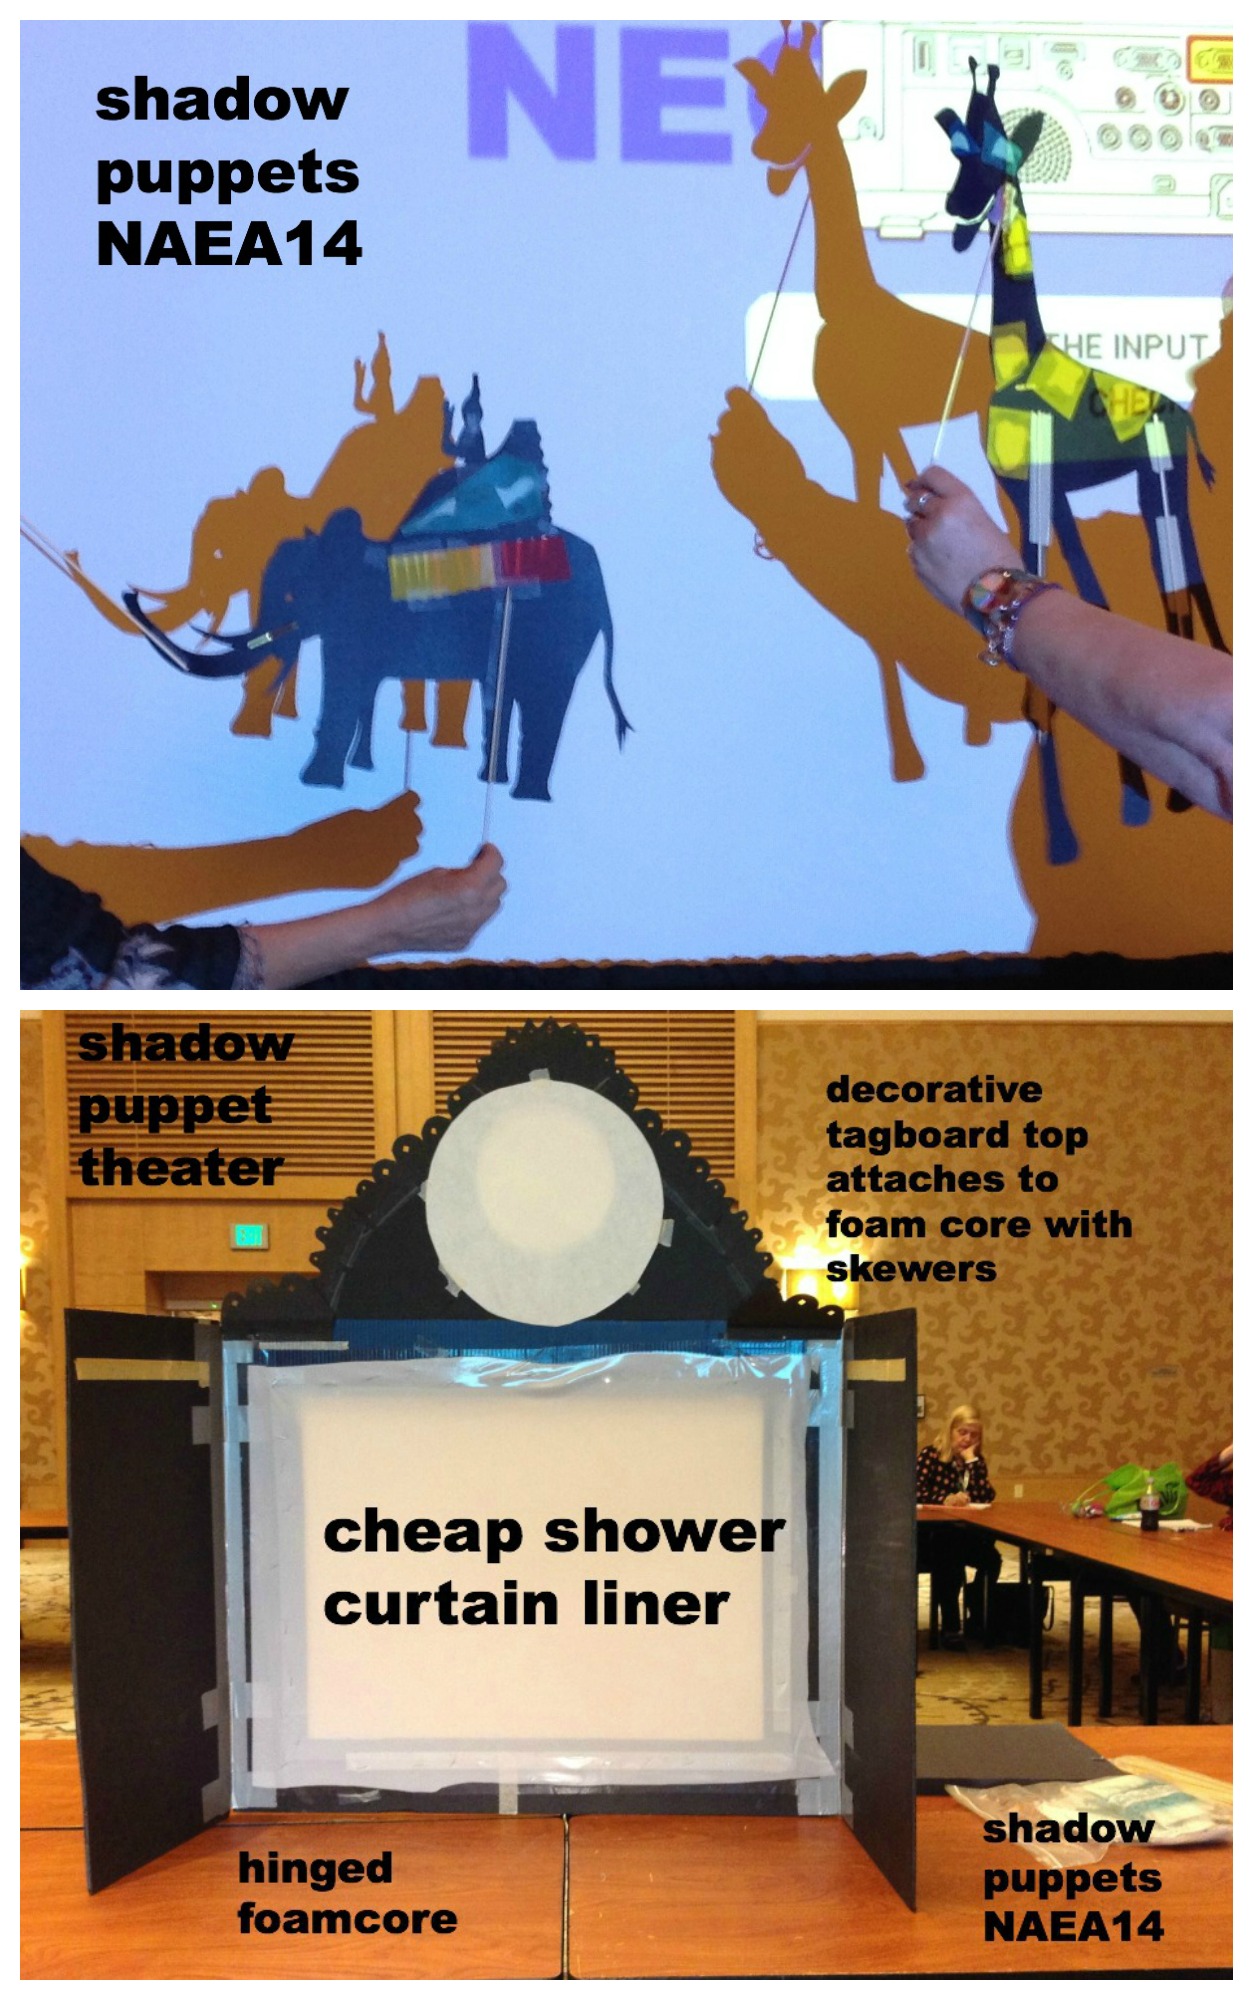
We cut black tagboard into interesting animal shapes. Ms. Hulse encouraged us to create openings in the puppets using craft knives and decorative punches. We taped lace doilies or colored vellum over the openings to add interest. We could create articulated limbs with small brads.

We also learned about inexpensive materials to make a small theater.

shadow puppets collageIf you want to learn more, Ms. Hulse highly recommends the book Worlds of Shadow: Teaching with Shadow Puppetry by David and Donna Wiesniewski (Note: you can get a good preview of this book on Amazon).

In addition, Ms. Hulse’s students created an iMovie trailer using photos of shadow puppet illustrations. Check out the Odyssey of Homer trailer on Vimeo.

Lucky you – Ms. Hulse has a public Prezi of her shadow puppet presentation.

More NAEA14 awesomeness coming up soon!

Enjoy!

Related Posts Plugin for WordPress, Blogger...