Plaster Masks 2013

plaster masks 2013

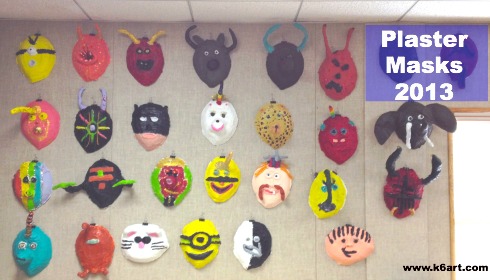
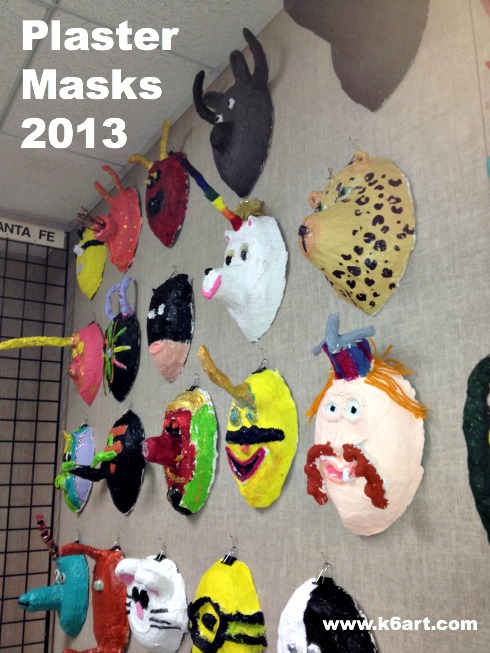
What’s the most popular, most anticipated project in the entire art program? Our plaster masks! Every year the 5th graders create masks using nothing more than plaster wrap and foil (and maybe a few yogurt cups). Painted and embellished with yarn and glitter, they hang in the art room until they star in the spring art show.

5th graders used plaster wrap and foil to create fanciful masks.

5th graders used plaster wrap and foil to create fanciful masks.

Plaster wrap is plaster-coated cotton gauze. It is similar to the material used to cast broken bones. Dip it in water, and it hardens within minutes.

Learning about masks

The week before the art project, we learn about masks. Masks can be used for plays and dances, for rituals, for protection, for celebrations (such as Halloween), or just for decoration. I bring in my entire mask collection from around the world. I distribute the masks between the tables, and we do a rotation so that everyone can try on all the masks. I show the kids all the students photos of the student masks from 2012. I also posted a link to all the masks at the Mingei Museum in San Diego, just in case they wanted to do some research at home.

Materials:

  • Plaster wrap (I get Pacon Plast’r Craft in 20 lb. boxes)
  • aluminum foil (I use pre-cut foil pop-up sheets – such a time saver!)
  • old yogurt cups
  • scissors
  • old plastic bowls (I use old Cool Whip tubs) for dipping, one for every two students
  • armature (I use plastic dollar store trays), or face form for mask making, one per student
  • newspaper for covering tables
  • 5-gallon bucket
  • acrylic paint
  • embellishments such as glitter and yarn
  • white glue
  • optional for hanging: medium size binder clips

(note: compensated affiliate links above)

Day 1: Cover the armature with plaster wrap

Cover the tables with paper. Fill plastic bowls 1/2 full with water. Cut plaster wrap into 2″-wide pieces and distribute. Pass out foil sheets.

If you are doing this project with dozens of kids, the logistics can be tricky. I wrote about this process last year. Click here to read more tips about working with plaster.

Start by covering the outside of the plastic armature or face form with foil (this keeps the armature clean so we can re-use it next year). Next, cover the outside of the armature with three layers of plaster wrap (dipped in water). After applying the wet plaster, students should smooth it with their fingers. Let dry overnight.

Don’t know how to apply plaster wrap? Check out this video from Artchoo!

Warning! Don’t Pour the Plaster Water Down the Drain!

At the end of class, DO NOT DUMP THE PLASTER WATER DOWN THE DRAIN (Never. That plaster will harden in the drain and cause a nasty, expensive clog). Instead, pour all the plaster water into the 5-gallon bucket and put it in a corner. By morning, the heavy plaster will have settled to the bottom of the bucket, leaving clear water at the top. Pour off the clear water. Don’t dump the plaster residue. Stick the bucket back in the corner until the next class.

Days 2-4: Add facial features and horns

Prep as you did for the last class. Pass out scissors.

Most facial features such as eyes, nose and lips can be made by adding wadded or rolled wet plaster strips. For a snout, use an inverted yogurt cup covered with plaster strips. Students can cut plaster into smaller strips if desired.

Horns can be made using twisted foil. Just shape the foil, and ‘tape’ it to the face using strips of plaster. Then wrap the horn in plaster strips, starting at the base of the horn. You can use this technique to make tusks, arms, etc.
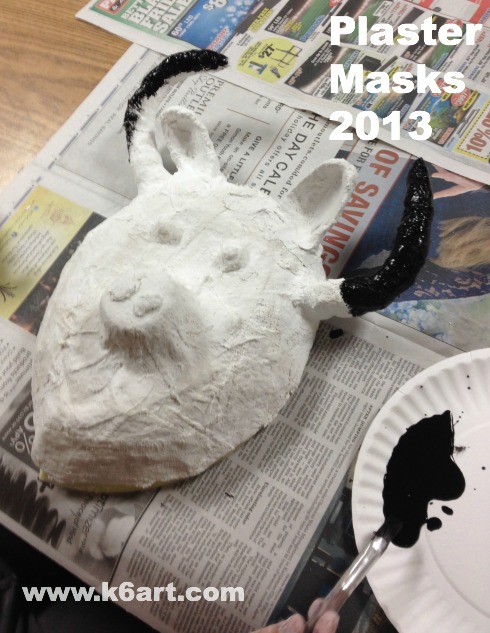
Horns are made from twisted foil covered with plaster wrap. Snout is an inverted yogurt cup covered with plaster wrap.
Horns are made from twisted foil covered with plaster wrap. Snout is an inverted yogurt cup covered with plaster wrap.


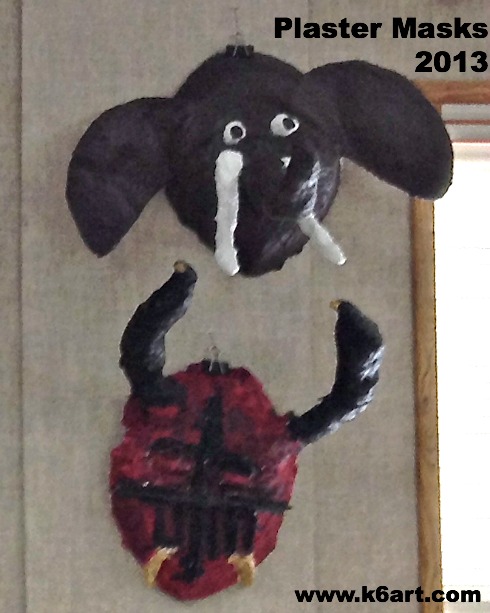
M's mammoth mask has ears made from paper plates covered with two layers of plaster wrap.

M’s mammoth mask has ears made from paper plates covered with two layers of plaster wrap. Trunk was made from yogurt cups, foil and plaster wrap. B’s villain mask has horns made from foil covered in plaster wrap.

Big elephant ears (and bird wings) were made using cut paper plates covered in two layers of plaster wrap.

I wrote about this last year. Click here to see more mask making photos.

Day 5: Paint

Remove the armature and throw away the foil covering. Paint mask with acrylic paint. (Note: I have had bad results painting plaster with tempera.  It cracked and flaked off. If you absolutely must use tempera, put some white glue in the paint).

Day 6: Decorate

Decorate the masks with yarn, glitter, etc. White glue works really well with yarn. Use hot glue to add heavier decorations.

Attach a binder clip to the top of the mask and pin to the wall.

Reflection:

I’m not going to lie – this is the most challenging project I offer to any grade any year, both for me and for the students. It is completely open-ended – they can make any sort of mask, and use any decoration I have in the art room. I have two parent volunteers most weeks for this project. It would be easier if I had more than 40 minutes per class, especially because I have to allow 7 minutes for clean up.


End of project plaster clean up

What to do with a bucket of plaster goo? After you have poured off all the clear water, scoop all the remaining plaster goo from the bottom of the bucket into an old cardboard box and throw the box away.
Enjoy!


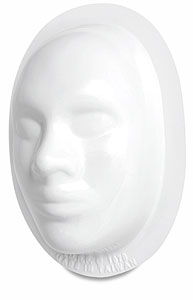
Face Form for Mask Making – $1.99 from: Blick Art Materials (compensated affiliate)


Note: this post contains affiliate links.

Plaster Fish Sculpture

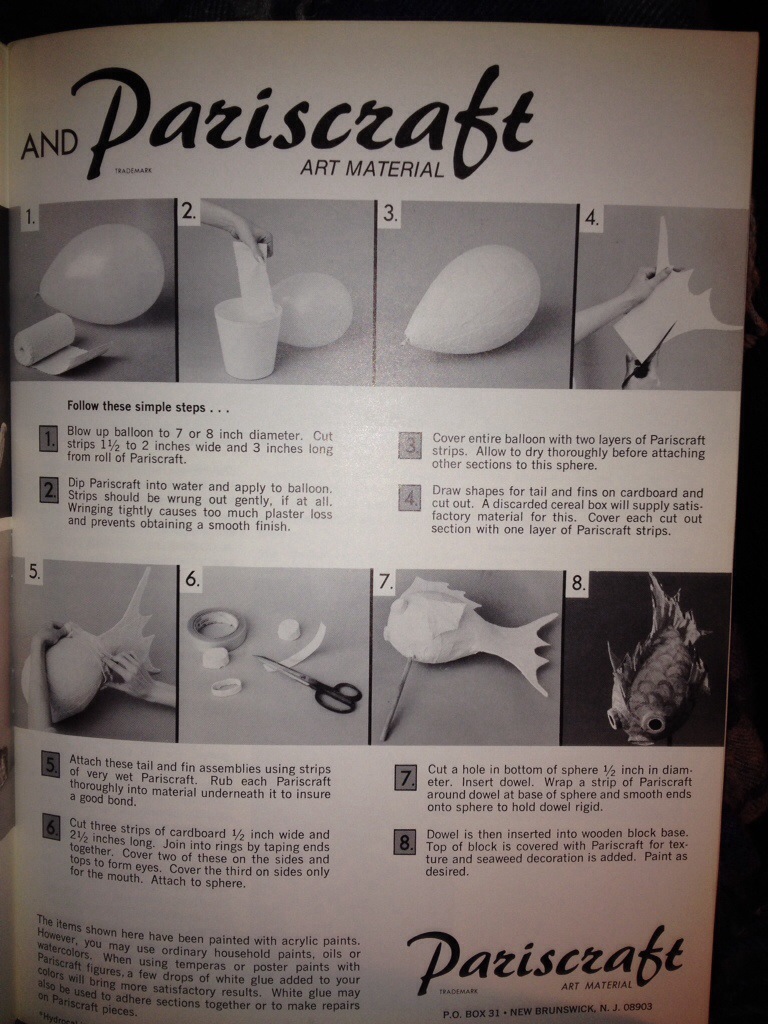
Vintage ad for Pariscraft plaster bandage fish sculpture. School Arts magazine, February 1972.

Vintage ad for Pariscraft plaster bandage fish sculpture. School Arts magazine, February 1972.

Check out these instructions for a plaster fish made on a balloon armature. This is an ad for Pariscraft plaster wrap I found in the February 1972 issue of School Arts magazine.

You’ll need the following materials :

  • Pariscraft or other plaster wrap
  • Balloon, 7-8″
  • Scissors
  • Old cereal box or light cardboard
  • Tape
  • Dowel
  • Wooden base
  • Acrylic paint
  • Old bowl for dipping

Doesn’t it look amazing? Can you imagine a display of these at the art show?

You can still get Paris Craft at Amazon. I have never used this brand – I’ve had great success with Pacon Plast’r Craft  plaster wrap. Click here to read my tips for handling plaster wrap in class.

Happy throwback Thursday! Stop by on Thursdays and see what else I’ve found in my stash of vintage art Ed magazines.

Enjoy!


p.s. Remember – never pour plaster water down the drain!


note: this post contains affiliate links


Helen Shirk Silhouette Necklace

helen shirk pinable

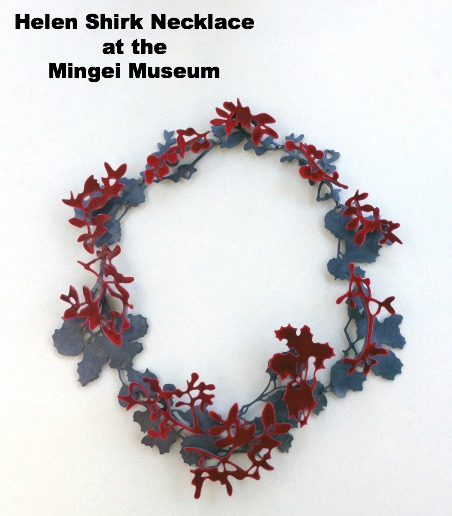
Helen Shirk is a San Diego artist and Professor of Art known for her metalwork and jewelry. I recently had the pleasure of viewing necklaces from Shirk’s Traces series on exhibit at San Diego’s Mingei International Museum. Even better – I got to participate in a Shirk-inspired paper jewelry activity taught by the Museum’s Education Department. The art project is so much fun – I just have to share their lesson!


'Crimson Glory' necklace by Helen Shirk, 2011. Steel, oxidized silver and china paint.

‘Crimson Glory’ necklace by Helen Shirk, 2011. Steel, oxidized silver and china paint.

We had two options for our silhouette necklace project: 1) a quick, 30-minute project using paper punches or 2) an hour-long project using real traced leaves. Both options focus on organic shapes and repetition.

Materials for both projects

  • black construction paper
  • card stock
  • glue sticks
  • yarn
  • scissors
  • tape

Project 1: 30-minute Punched Paper Silhouette Necklace

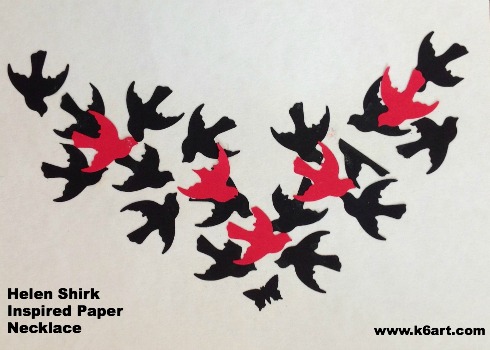
Additional material – paper punches in organic shapes (like these leaf , branchbutterfly, and dove  punches).

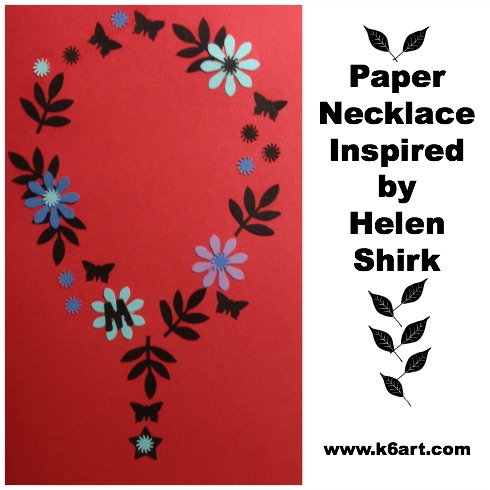
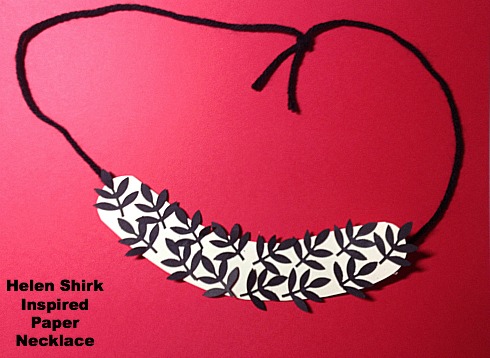
We punched paper shapes from black and colored papers, then glued them to a background and added yarn to form a necklace. Click here and here for the lesson plan, written by the excellent Education Department of the Mingei International Museum.

Shirk inspired necklace made with craft punches and card stock.

Shirk-inspired necklace made with craft punches and card stock. Teacher example.

Here is my Shirk inspired design!

Here is my Shirk inspired design!


Project 2: Traced Silhouette Necklace

Additional material: natural materials such as leaves, twigs and flowers.

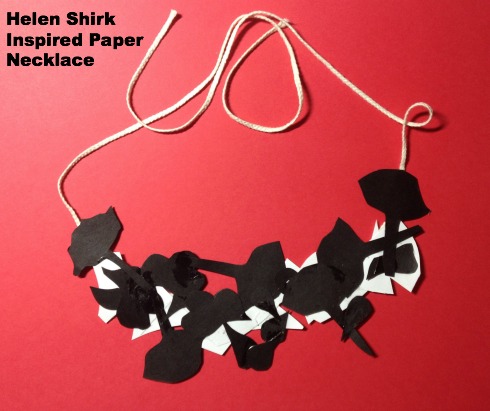
Students make tracings of each onto construction paper, then cut out and arrange into a necklace.  Click here for the Mingei’s curriculum guide including this project.

Hand cut paper necklace inspired by Helen Shirk's jewelry.

Shirk-inspired paper necklace made by tracing leaves onto black and white paper.  Teacher example.

Helen Shirk’s Trace necklaces are on display at the Mingei Museum through January 5, 2014 as part of the Allied Craftsmen Today exhibit. For more examples of Helen Shirk’s jewelry, click here.

I wrote about the Mingei’s Chihuly chandelier – click here to see their fabulous 30-Minute Chihuly Chandelier project.

Special Notice for San Diego Teachers and Parents:

  • Teachers: Do you want to take your class to the Mingei Museum? The Mingei provides free admission for all K-12th grade tours as long as they’re scheduled in advance.
  • Parents: The Mingei is free to San Diego county residents and military the third Tuesday of the month. Monthly Family Sundays offer admission and fun activities for just $5/family. Go to www.mingei.org for more details.

Enjoy!

60-Minute Holiday Collagraph Crayon Rubbings

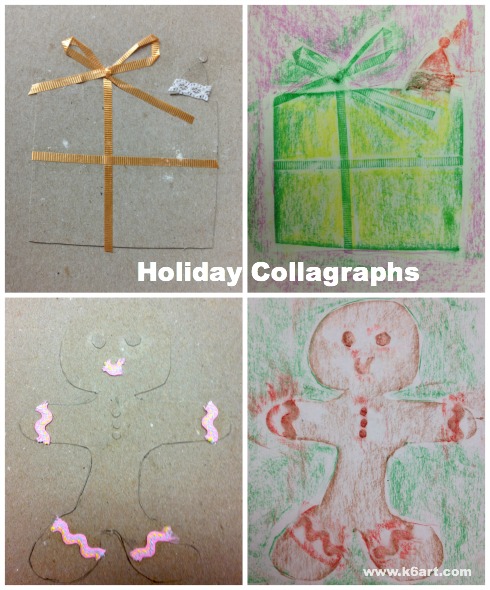
Textured curling ribbon tied in a bow looks great on this wrapped gift. The gingerbread man is trimmed in rick rack.

Textured curling ribbon tied in a bow looks great on this wrapped gift. The gingerbread man is trimmed in rick rack.

Need a fun and flexible holiday project? Try making you own collagraph crayon rubbings, using cardboard and scraps. The project takes about one hour and is adaptable to all sorts of holidays like Valentine’s Day and birthdays.

Materials:

  • light cardboard, 8.5×11″, two per student
  • scissors
  • pencil
  • glue stick
  • textured fabric trim such as ribbons, rick rack and lace
  • optional: hole punch
  • optional: ‘wavy’ craft scissors (like these scallop Fiskars Paper Edgers)
  • copy paper 8.5×11″ or other thin paper
  • peeled crayons

Create the collagraph rubbing plate

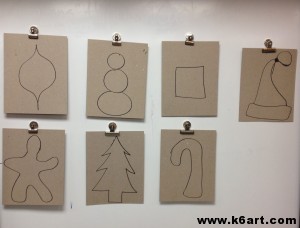
Students drew one holiday shape on cardboard, then cut it out.

Students drew one holiday shape on cardboard, then cut it out.

Select one holiday shape for the main part of the collagraph. Draw the shape on the first piece of cardboard and cut it out (note: for those students creating their own designs, emphasize that the design needs to be simple and stretched to the top and bottom of the page).

Glue the cut-out shapes to the second piece of cardboard using glue stick. You have now created a collagraph rubbing plate.

Now for the fun!

Cut decorations for your collagraph plate from your cardboard scraps and from fabric trim. Experiment with the craft scissors and the hole punch. Glue these decorations on top of and around your main shape. LAYERING IS GOOD! TEXTURE IS GOOD!

Now flip over the collagraph plate and place it face down on your chair. SIT ON THE CARDBOARD AND COUNT TO 30.  (It is so fun to do this step!) Now all the pieces are glued down are we are ready to rub.

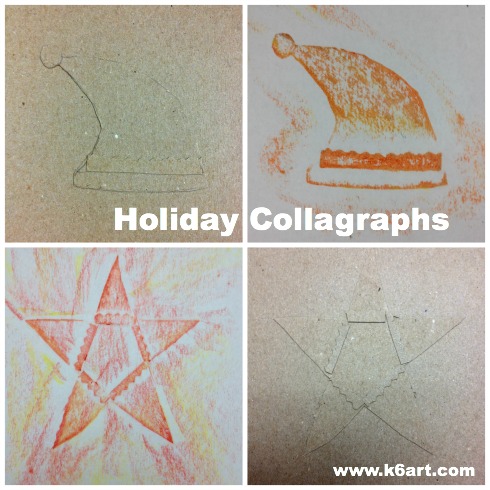
Santa hat and star, decorated with cardboard cut with Fiskar paper edgers.

Santa hat and star, decorated with cardboard cut with Fiskar paper edgers.

Creating the crayon rubbing

Place your collagraph face up on the table. Cover with the copy paper. Rub with a peeled crayon (note: it is helpful to have a partner hold the plate while the student rubs). Repeat with another crayon color.

Now trade collagraph rubbing plates with your neighbor. Or rotate tables so everyone comes away with a set of holiday cards.

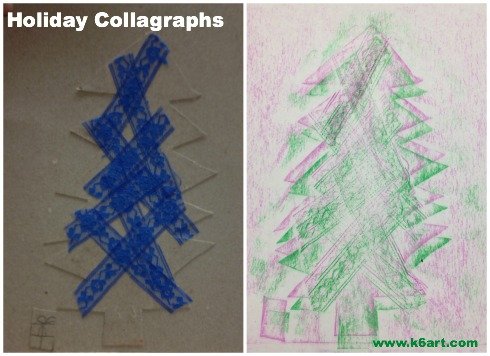
This students glued lace to her tree for texture. She did two rubbings with green and magenta crayons.

This students glued lace to her tree for texture. She did two rubbings with green and magenta crayons.

This technique would make awesome cards for birthdays – imagine a collagraph layer cake with rick rack candles. Imagine a textured doily rubbing plate for Valentine’s Day cards.

If you want to take this project a step further, you can roll printer’s ink on the collagraph and pull some prints. You can also color or paint the collagraph plate so it become an artwork.

Want more ideas? Check out my previous post on 30-minute collagraph printmaking.

Enjoy!


Do you have a fun way of making holiday cards?

Eiffel Tower Line Drawings

marz paris pinable

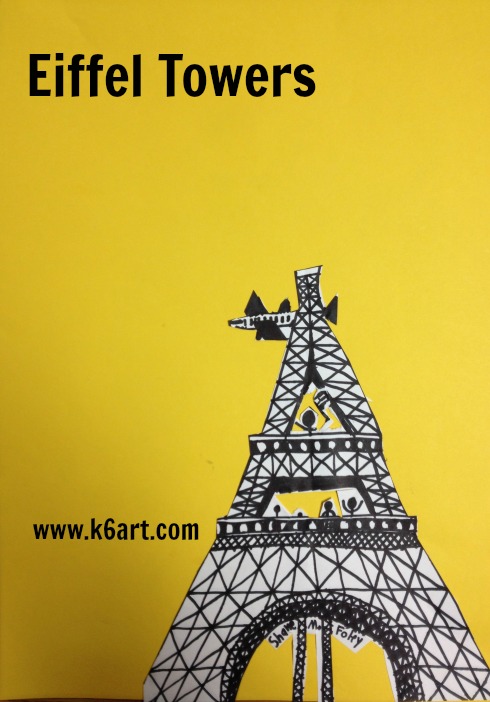
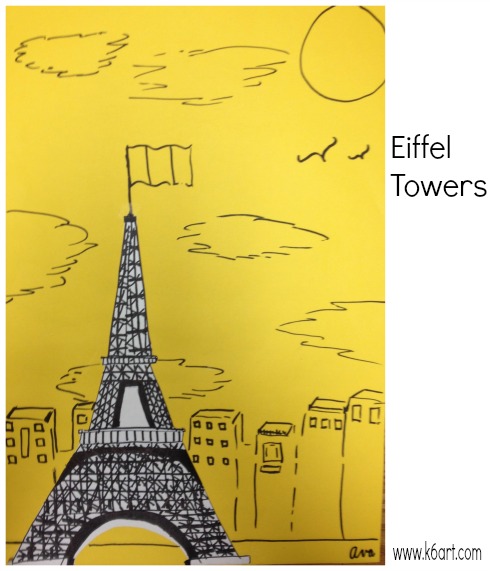
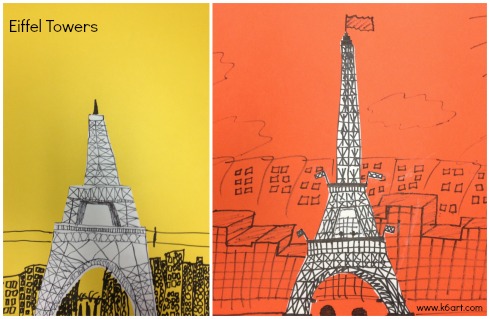
Guess what? The Eiffel tower is not hard to draw. Our sixth graders drew the Eiffel tower, then created a Paris scene in the style of American artist Marz Jr.

The Art of Marz Jr.

We looked at the Marz Jr. website and noticed that many of his illustrations feature detailed black line drawings of famous architecture, such as the White House, the Brooklyn Bridge, and the New York Stock Exchange.

The focal point is often black line on white, contrasted against a simpler black line drawing on a brightly colored background.


Marz Jr.'s illustration of the New York Stock Exchange.

Marz Jr.’s illustration of the New York Stock Exchange.

Materials:

  • white paper (we used copy paper)
  • Sharpies
  • construction paper, 12″x18″ – yellow, orange or light green
  • scissors
  • glue sticks
  • reference photos of the Eiffel Tower and Paris

Day 1: Drawing the Eiffel Tower:

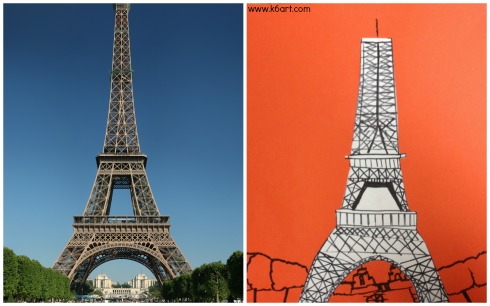
We began by looking at this close-up photo of the Eiffel Tower. I asked the students to look closely at the metal work, beginning at the bottom of the tower. The entire tower is made of metal ‘X’s!

They lightly folded copy paper vertically (‘hot dog’) to create a line of symmetry, then used Sharpie for the directed draw. We drew from the bottom up, starting with the ‘rainbow’ arch, to the first viewing platform, to the ‘legs’, to the second viewing platform, and then up to the top. X, X, X, X……..


marz paris 4

Day 2: Create Paris Scene, Cut and Collage

Using iPads, students looked at Google images of Paris. They used Sharpie to draw simple background scenes on colored construction paper, then cut out their Eiffel Towers and glued them on with glue stick.

marz paris 2


marz paris 3

The project took two 40-minute classes. It was a very successful project with no prep and minimal clean up.

The project was inspired by Marz Jr. projects in this post on the shine brite zamorano blog and this post at Deep Space Sparkle.

If you are really into Paris, check out my series of Paris-themed art (and cooking!) projects from art camp last summer. And definitely check out Cassie Stephens’ Paris unit on her elementary art blog.

Enjoy!

Related Posts Plugin for WordPress, Blogger...