30-Minute Chihuly Chandelier

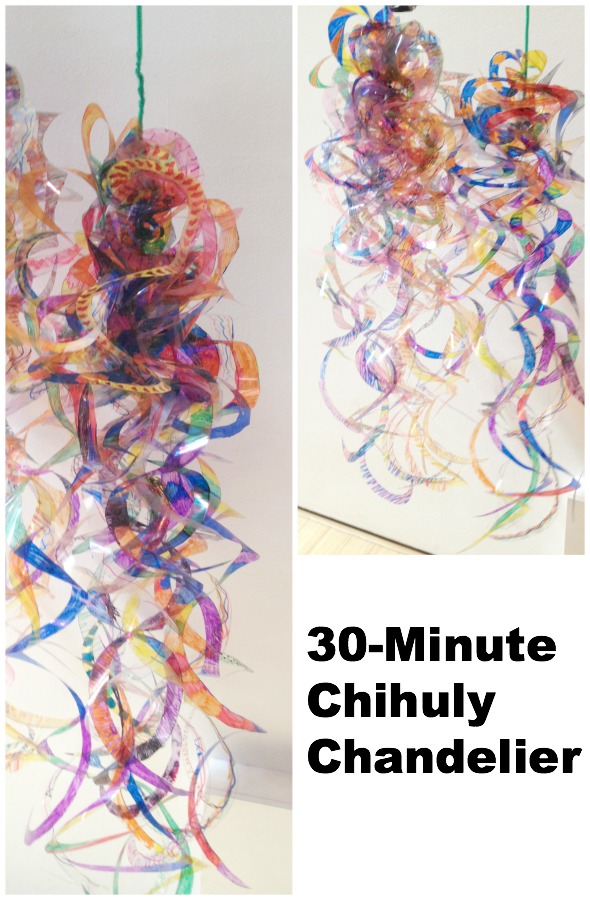
30 minute chihuly chandelier

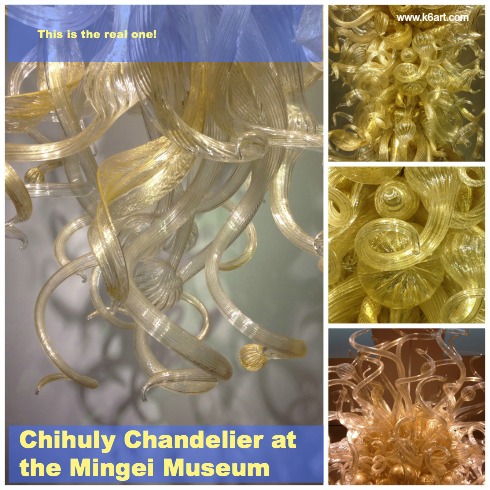
Dale Chihuly makes fantastic, organic-shaped glass sculptures.  They are in collections all over the world. This summer I saw the Chihuly chandelier at San Diego’s Mingei International Museum and participated in a group art project taught by art educator Jackie Hwang.

Mingei Museum Chihuly Chandelier

Materials:

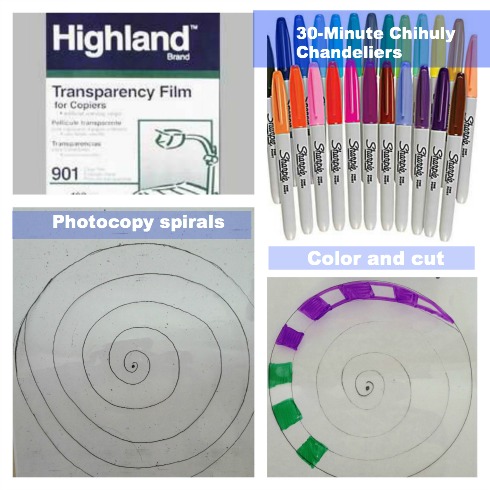
  • Overhead transparencies (like these  – make sure they are made for photocopiers)
  • photocopier
  • colored permanent markers (colored Sharpies or Art Color permanent markers)
  • scissors
  • pipe cleaners for assembling chandelier
  • UPDATE: single-hole punch
  • UPDATE: OPTIONAL rubbing alcohol and cotton balls

spiral acetate chihuly

Prep:

Jackie photocopied a spiral onto overhead transparencies. She made two sizes of spirals – a full sheet size, and a half sheet size containing two spirals.

The Art Project:

Families colored the spirals and cut them out, then turned them in to Jackie for assembly. Coloring time depended on the complexity of the design (but took FAR less than 30 minutes).

Assembly:

UPDATE: carefully punch each spiral on the tiny dot at the center of each spiral.

UPDATE: OPTIONAL: You may experiment with smearing the spirals with a cotton ball lightly dampened with rubbing alcohol. This will cause the colored sharpie to smear and blend. It’s a different look, and it takes extra time. Totally optional!

Jackie created the chandelier form using a mix of the large and small spirals. She used a couple of pipe cleaners to suspend the spiral clusters.

Jackie’s project is perfect for grades K-6. It would be super for art teachers on a cart, or art teachers that teach at multiple schools. You could fit the photocopied transparencies and all the other materials you need for this project in a tote bag.

Here is a 4-minute video of Dale Chihuly from the CBS morning show

Special Notice for San Diego Teachers and Parents:

  • Teachers: Do you want to take your class to the Mingei Museum? The Mingei provides free admission for all K-12th grade tours as long as they’re scheduled in advance.
  • Parents: The Mingei is free to San Diego county residents and military the third Tuesday of the month. Monthly Family Sundays offer admission and fun activities for just $5/family. Go to www.mingei.org for more details.

Coming up in the next post: two more Chihuly-inspired projects.

What’s your favorite Chihuly project?

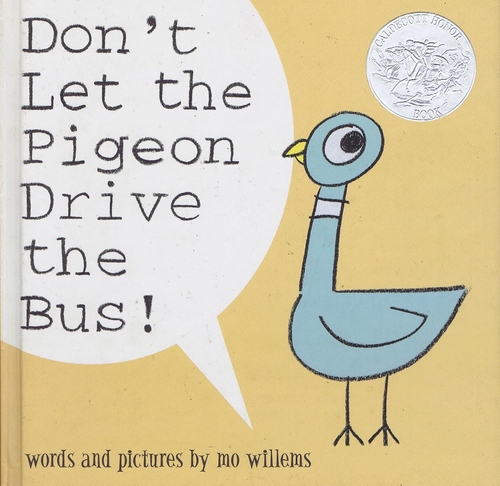
Don’t Let the Pigeon Drive the Bus!

don't let the pigeon

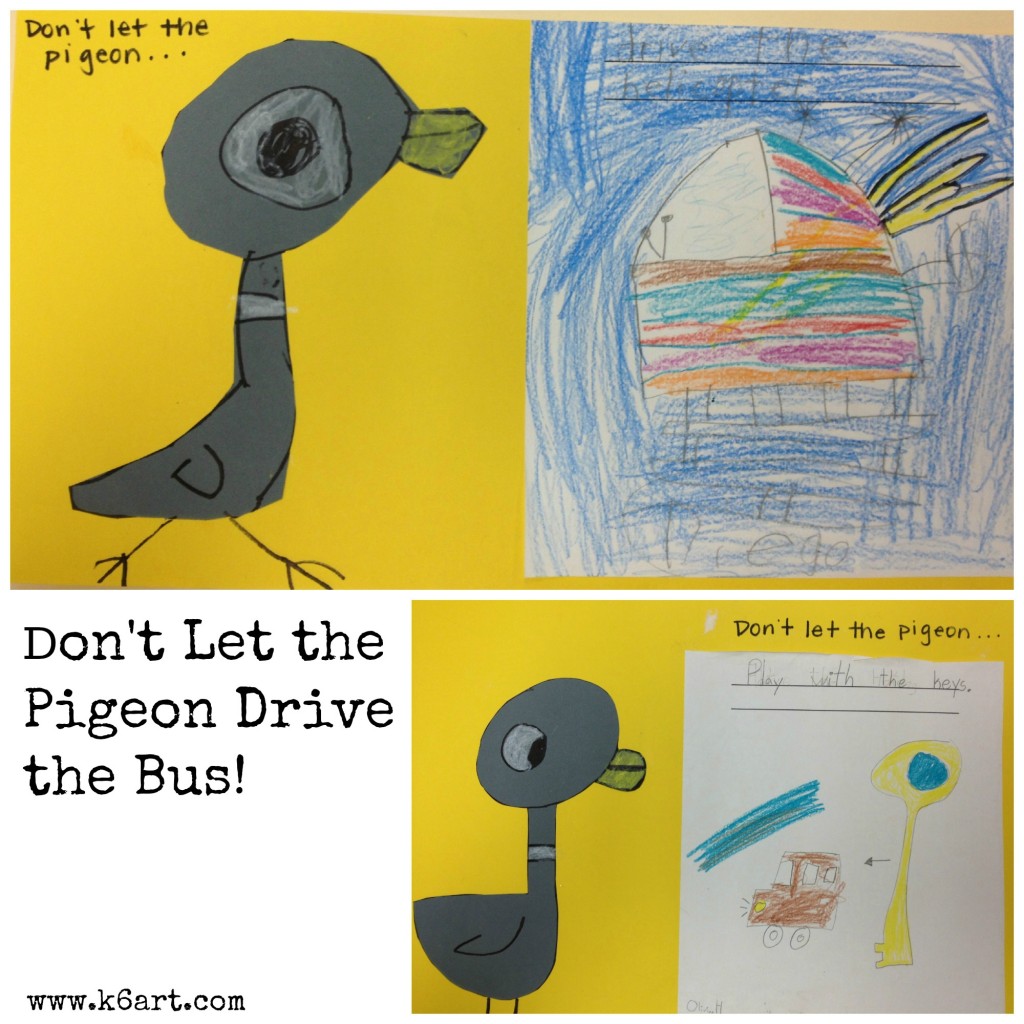
Don’t let that naughty pigeon drive your helicopter or play with the car keys!


Apparently I am the last parent on earth who hadn’t read Don’t Let the Pigeon Drive the Bus! by Mo Willems. I will use the lame excuse that my sons are teenagers, and that this hilarious book wasn’t yet written when they were in their prime story time years. I became enlightened when I saw this post on the Shine Brite Zamorano blog. 

This book is hilarious. The pigeon is simple to draw – he is a nice collection of circles and lines. I’ve included a YouTube video so you can do this project right now.

71ShXn7qtoL

http://www.youtube.com/watch?v=V10jhsNIMI8

Materials

  • 9″x12″ gray construction paper
  • yellow and white Construction Paper Crayons
  • Sharpie
  • 12″x18″ construction paper for background
  • scissors
  • glue sticks
  • copy paper, 8.5″x11″
  • crayons or markers

Day 1: Read book. Discuss naughty pigeon behavior! Pass out copy paper. Use your crayons or markers to draw something the pigeon should not be touching.

Day 2: Draw pigeon on gray construction paper using Sharpie. Note circular eye and pupil, egg-shaped head, and simple half circle for the body. Skip the legs. Color in the eye, beak and neck band with construction paper crayons.

Now cut out the pigeon. Glue the pigeon and drawing to a large piece of colored construction paper. Use Sharpie to draw legs on the paper.

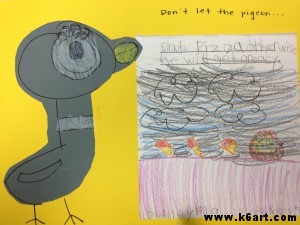
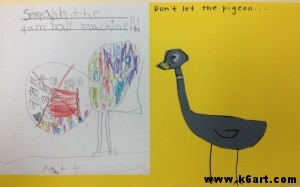
Hilarious first grade results:

‘Don’t let the pigeon eat pizza otherwise he will get greasy’

Don't let the pigeon smash the gum ball machine.

Don’t let the pigeon smash the gum ball machine.

This could definitely be modified for a sub plan: 1) show the video/read the book 2) do a directed draw of pigeon 3) have students show pigeon doing something naughty.

If you want to know a little more about author Mo Willems, check out this video:


Enjoy!


Sub Plan: Matisse Vase of Flowers

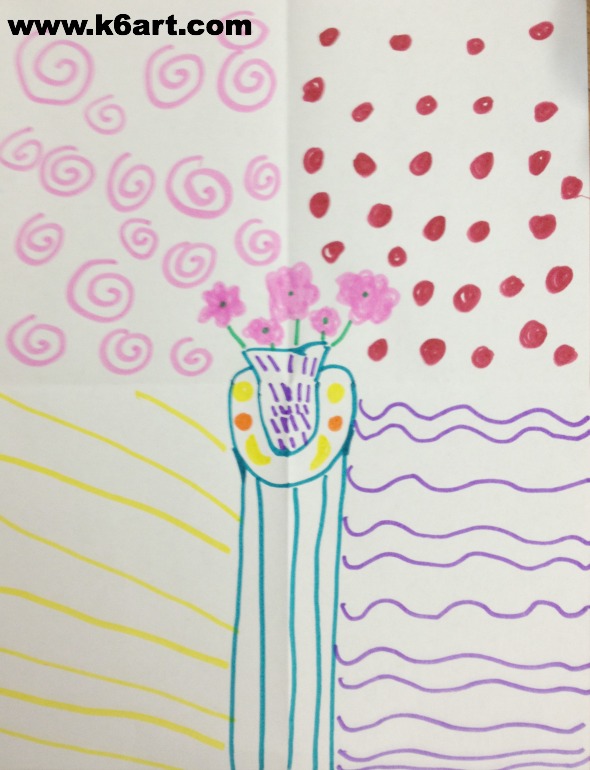
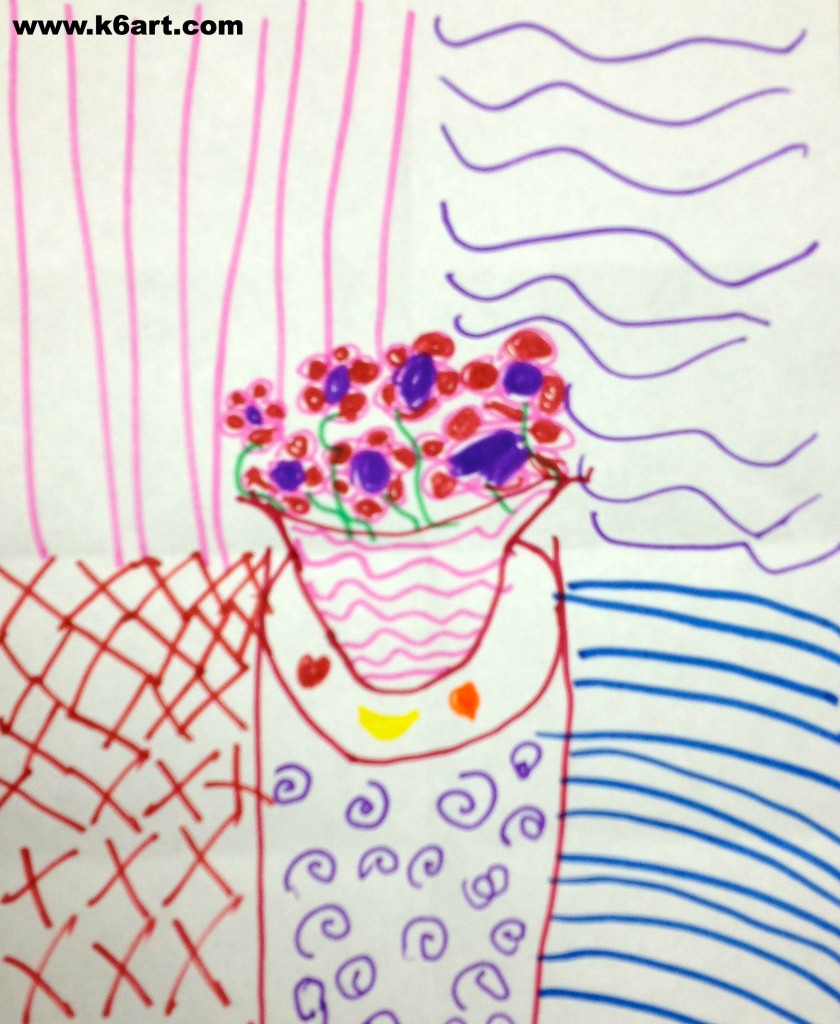
Here is a quick Matisse-inspired lesson suitable for grades K-1. All you need is copy paper and markers. It is just right for a substitute teacher, or anytime you need a low-mess 40-minute project.

matisse vase 2

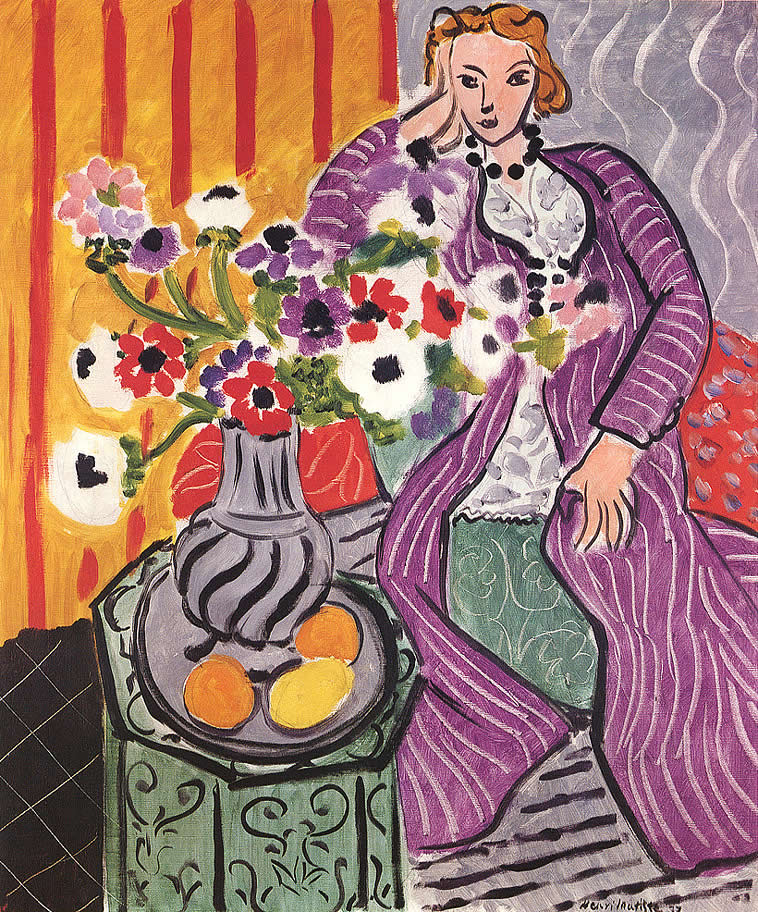
We began by looking at this painting by Matisse.

Matisse's Woman in a Purple Dress

Matisse ‘Purple Robe and Anemones’ 1937. Source: wikipaintings.org

We identified patterns in the artwork: I said, “thumbs up if you can see an orange striped wall…a vase with wavy stripes…a floor with black diamonds” etc.  We noticed Matisse used a lot of colors as well.  Next students folded the copy paper into quarters. I modeled how to draw of a vase of flowers on a pedestal in the very center of the paper.

Then the children drew a different colored pattern in each quadrant of the paper. They added a pattern to the pedestal and base as well. Some even added fruit to the pedestal, just like Matisse.

matisse vase of flowers 1

We had enough time to watch this cute video of When Pigasso Met Mootisse by Nina Laden (via Storylineonline.net).

Enjoy!


Do you have a favorite sub plan? 


Four New Art Project Ideas for Grades K-6

Looking for new art project ideas? Here are four new (to me) art project ideas from my fabulous creative colleagues, Kelly and Nancy.

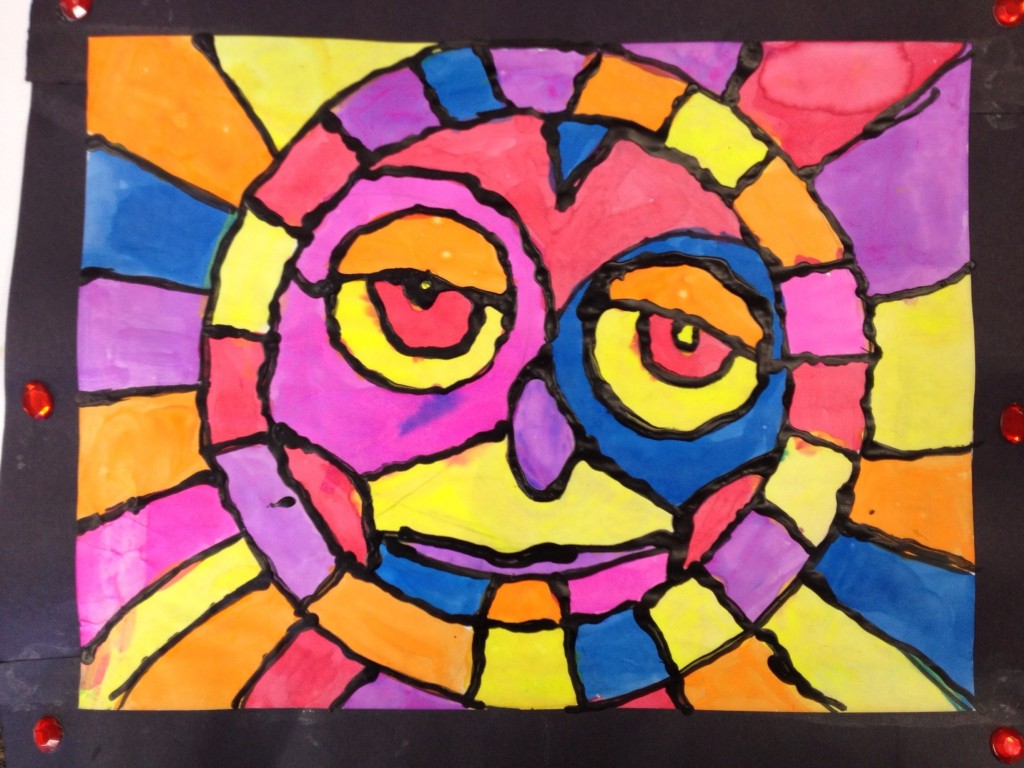
Kelly’s ‘Stained Glass’

'stained glass' sun

Kelly’s ‘stained glass’ sun made with watercolors and black glue.

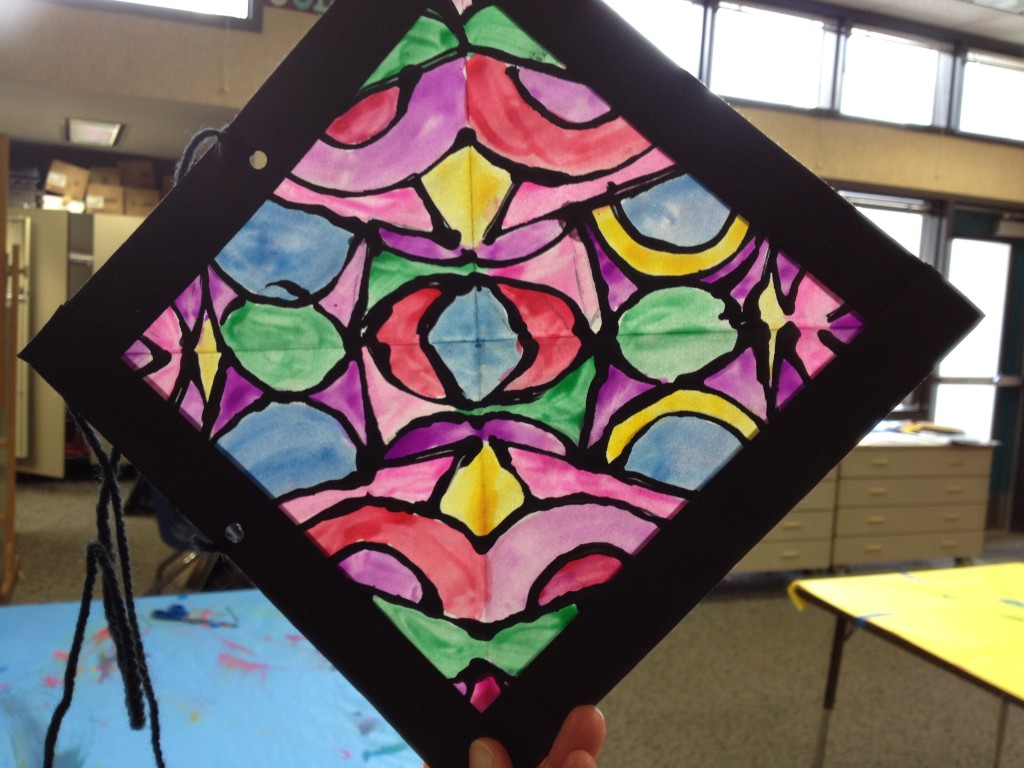
Kelly from Skyline School brought these beautiful ‘stained glass windows’ made with fluorescent liquid watercolor and black glue. As a final step, her students rubbed their artwork with baby oil and a cotton ball to make the paper translucent. Primary grades used a paper plate tracer to make the sun. Upper elementary made the geometric window (note: upper grade students used carbon paper to transfer their symmetric designs).

'Stained Glass' window 2

Kelly’s ‘Stained Glass Window’ made with watercolor and black glue.

A New Twist on Monet

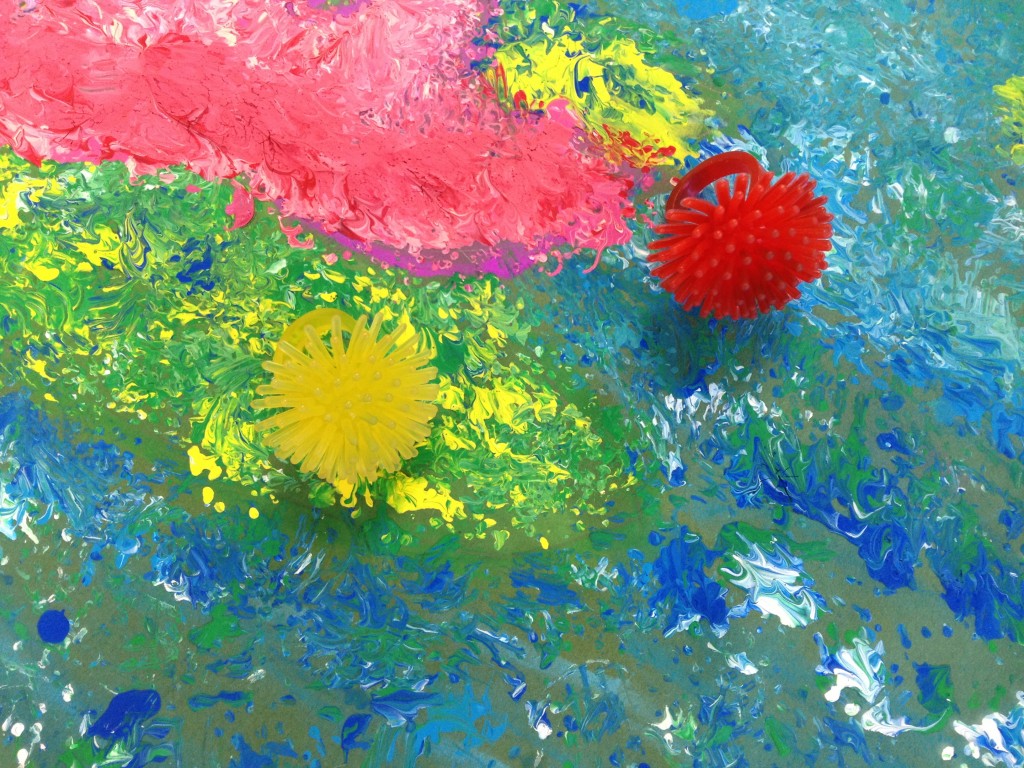
Kelly also brought these Monet water-lily paintings. Please zoom in on this painting – the paint texture is so interesting. Kelly didn’t offer a brush – her students applied paint with novelty rings purchased at Oriental Trading. These rings look like little sea urchins. If you try this, Kelly recommends pinching the ring instead of wearing it on her finger. Needless to say, her students LOVED this project!

Monet water lilies painted with novelty ring

Kelly’ s students painted their Monet-inspired art with a ring from Oriental Trading.

30-Minute Color Mixing

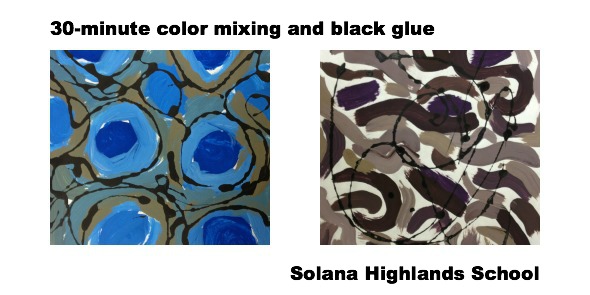
Nancy  teaches art at Solana Highlands School. She brought a color mixing project. Students used two colors plus black and white. After tinting, shading and creating a neutral, they drizzled black glue over the top. I love how much variety her students achieved. Some of these abstract compositions look like animal patterns. LOVE! Even more impressive: Nancy only has 30 minutes with her students. She does a lot of stations and table rotations to fit her projects in the tight time frame.

30-minute color mixing and black glue

Kindergarten Paper Quilts

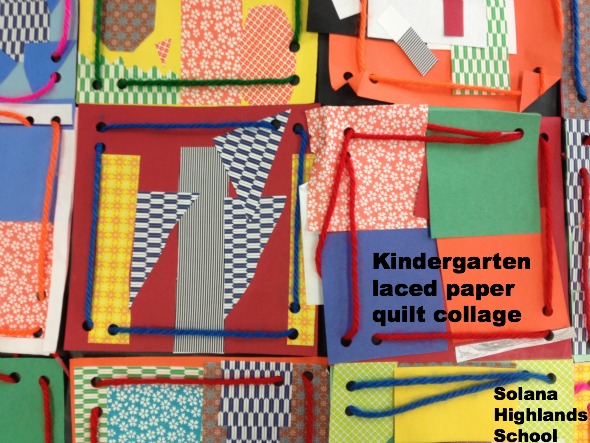
Nancy did these paper quilt squares with the kindergarten. The kindergarteners start with a 6″ square of paper. They collage first, then Nancy adds holes with a three-hole punch. Next class, the kindergartener lace the holes. Nancy glues the squares together into a quilt.

kindergarten laced paper quilt collage


As always, I am FLOORED by my colleagues creativity. They always have interesting, challenging, beautiful projects – and they teach them so well. Thanks to Nancy and Kelly for sharing your ideas.


Enjoy!


Creative Self-Portraits at Young Art Show


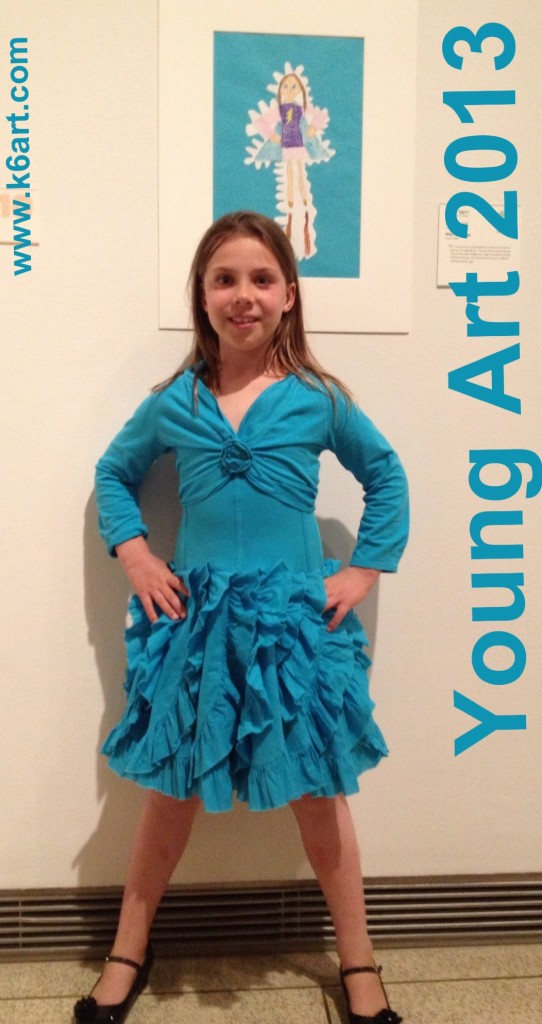
Young Art 2013 at San Diego Museum of Art

For over 80 years, the San Diego Museum of Art has held a juried exhibition of student art. This year’s show is all about identity. Young Art ‘The Story of Me’ is on display right now at the Museum at the Center for Community and Cultural Art. Learn more in this article.

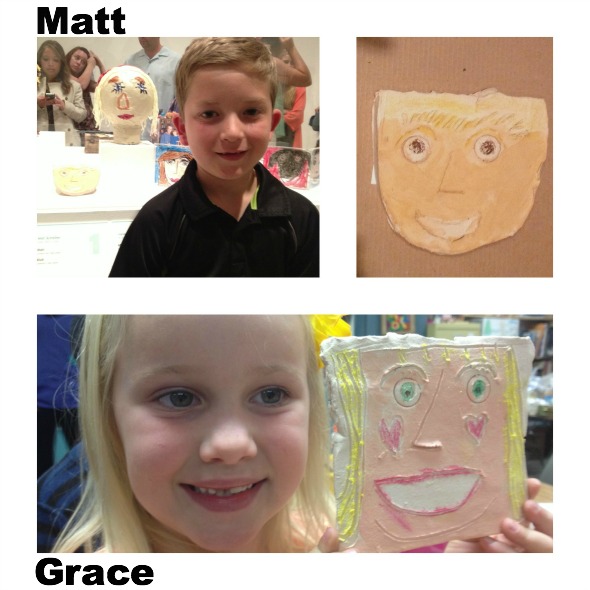
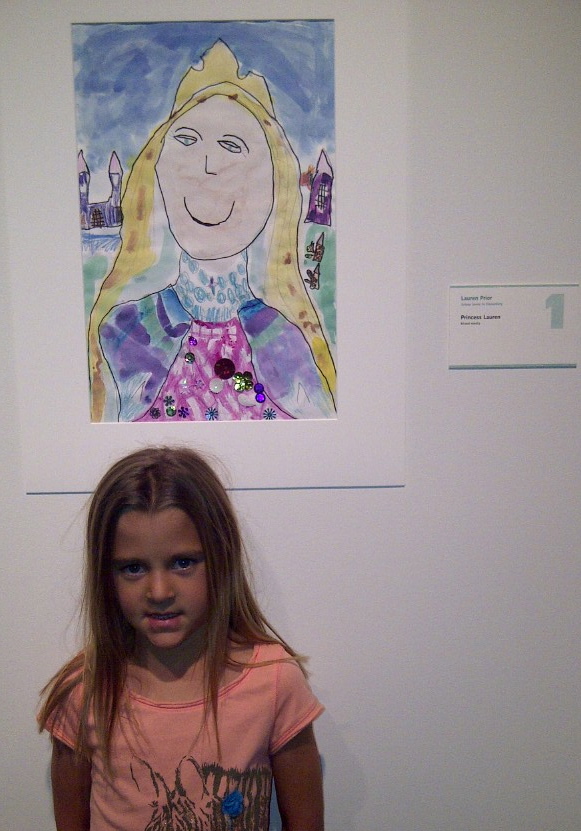
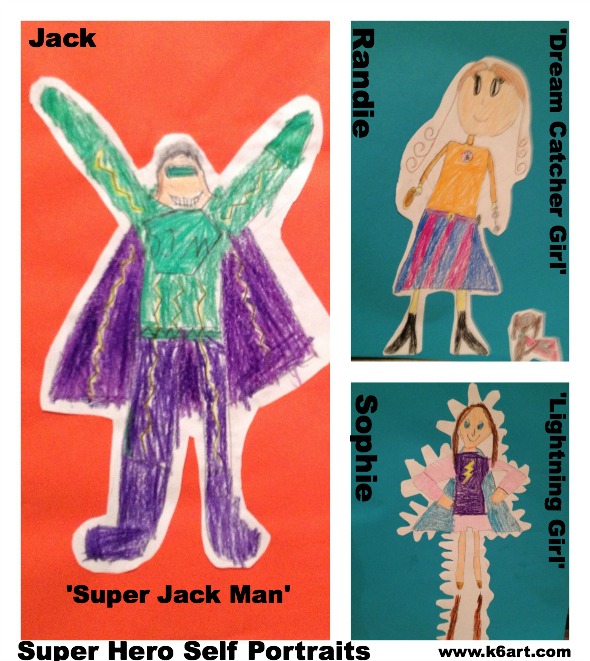
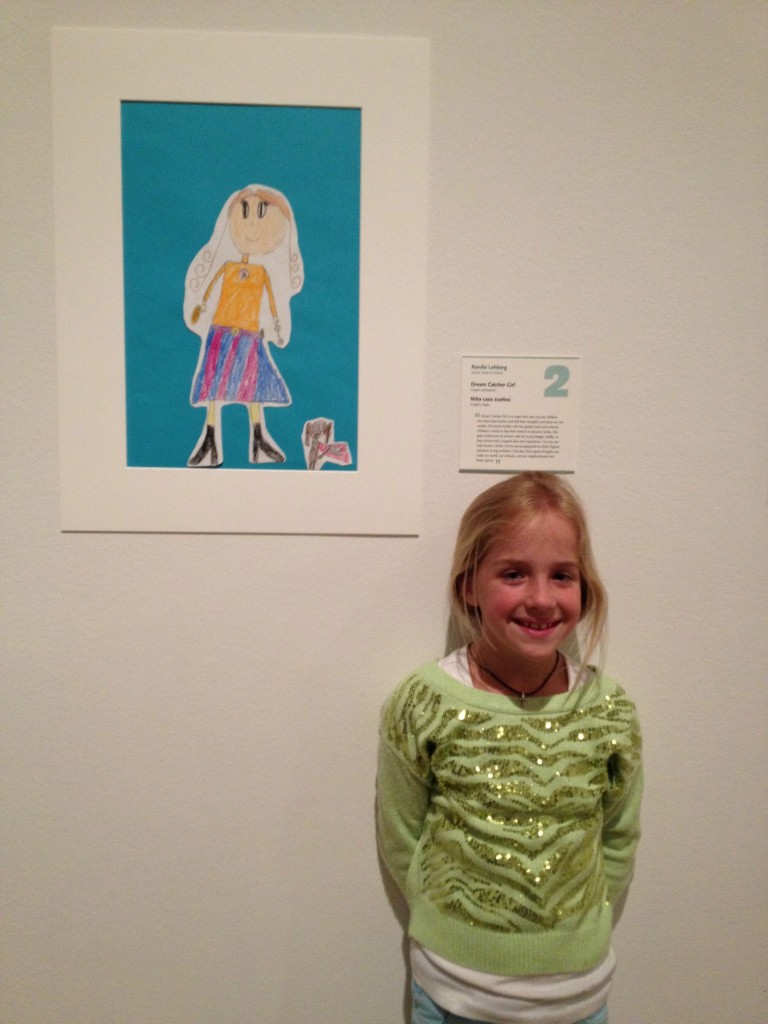
Our school had a record 12 pieces in this year’s show. Congratulations to all our young artists! Here are all their fabulous projects, arranged by grade:

First Grade: Clay Self-Portraits

matt and grace

 First Grade: Royal Self Portrait

L. and her royal self-portrait

L. and her royal self-portrait


Second Grade: Super Hero Self Portraits

super hero collage young art

Dream Catcher Girl

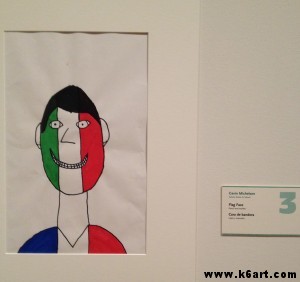
Third Grade: Heritage Self Portrait

Gavin’s heritage self-portrait, ‘Flag Face’, incorporates the flags of France and Italy.

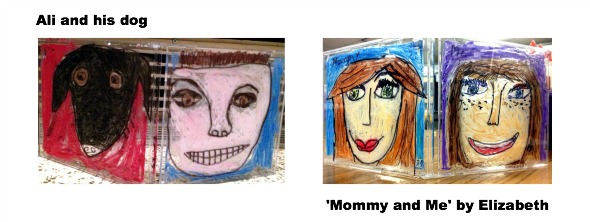
Fourth Grade: CD Case Double Portraits

cd case portrait collage


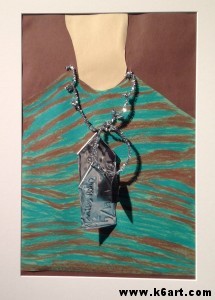
 Fifth Grade: Charm bracelets and dog tags

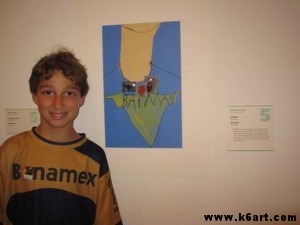
Mo and his charm necklace

Mo’s self-portrait is a T-shirt and neck chain, with charms for skiing and Spiderman.


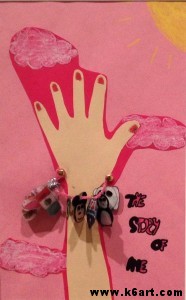
Bella's charm bracelet has charms for Mexico, swimming, Disneyland and more.

Bella’s self-portrait charm bracelet includes charms for Mexico, swimming, and Disneyland.

Jacob's salute to his family's military background includes a camouflage shirt and individual dog tags for family members in the service.

Jacob’s salute to his family’s military background includes a camouflage shirt and individual dog tags for family members in the service.


Well done artists!!!! The show is up until May 26, 2013. Hope you can visit!

Thanks to the fabulous art education team at SDMART for making Young Art happen. Our community truly appreciates all your hard work.

Enjoy!


Related Posts Plugin for WordPress, Blogger...