CD Case Portraits

CD case portraits

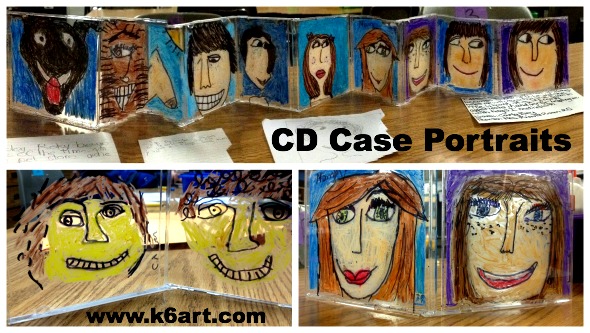
Do you remember those old-fashioned lockets with little portraits inside? Our fourth graders made modern-day double portraits using recycled CD cases, Sharpies and oil pastels.

Materials:

  • Clear plastic CD ‘jewel’ cases, with trays removed
  • Sharpies
  • pencils/erasers
  • oil pastels (we used Crayola Oil Pastel Sticks plus a few Pentel Oil Pastels for the skin tone)
  • paper for sketching
  • baby oil + q-tip (for correcting oil pastel mistakes)
  • rubbing alcohol + q-tip (for correcting Sharpie mistakes)

We began by looking a pictures of lockets from Google images.

lockets

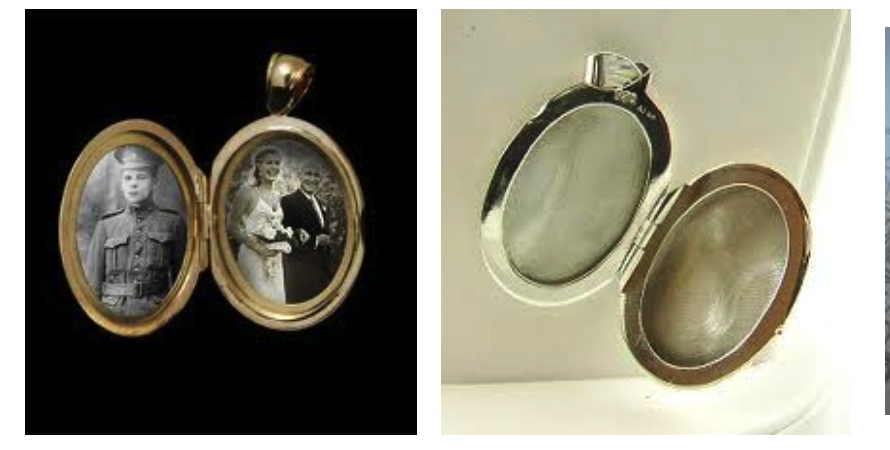
We talked about how you could only put a couple of photos into your locket.  You had to choose carefully. Our students then sketched two portraits to fit their CD ‘lockets’: one self-portrait, plus one portraits of someone very special.

tracing the portrait in sharpie

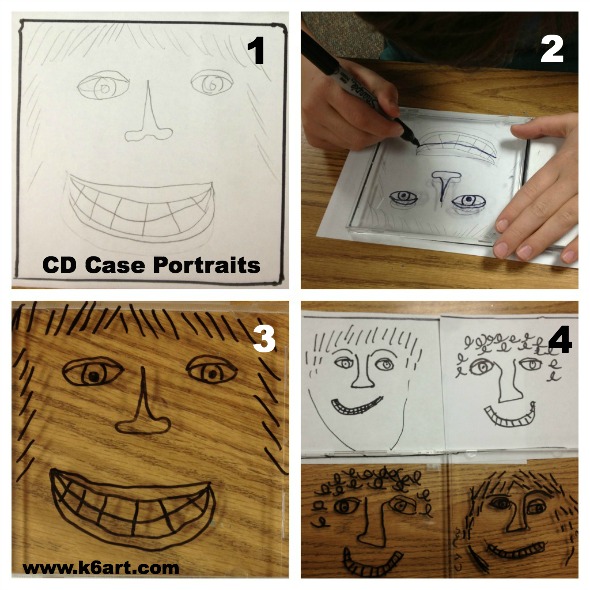
  1. Trace around CD case with Sharpie, then sketch a portrait in pencil.
  2. Place sketch under CD case. Trace lines in Sharpie on OUTSIDE OF CASE.
  3. Completed line drawing of single portrait.
  4. Completed line drawing of double portraits.

It was really wonderful to see who the students drew for the second portrait. Most drew a parent or a sibling. Several drew their current or late pet. A couple of students drew religious portraits. My intention was to do an identity project, and I do believe we got a better idea of the student based on who he or she selected for that second portrait.

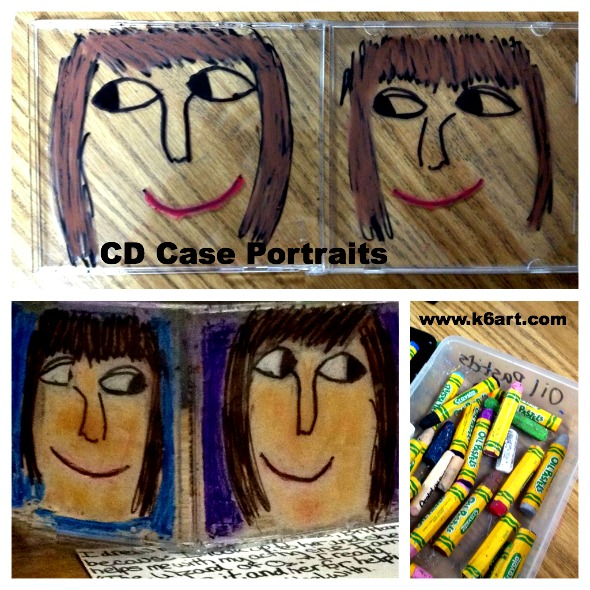
The last step was coloring with oil pastel INSIDE OF THE CASE . The oil pastel is messy and can smear – by putting the pastel on the inside we can trap that mess for tidy storage.

Tips for success:

Sharpie on the outside of the case, oil pastel on the inside of the case. Erase Sharpie mistakes with a little alcohol and a cotton ball; erase oil pastel mistakes with baby oil and a cotton ball or q-Tip.

color with oil pastel on the inside


The project took three 40-minute classes, including writing an artist statement. It was lots of fun and extremely successful. These look great displayed accordion style on a table, especially with a light coming through from behind. I think the 4th graders will be very proud to show their families their very special double-portrait ‘lockets’.

This would also be a great recycled art or Earth Day project. It would also be a GREAT Mother’s or Father’s Day gift!

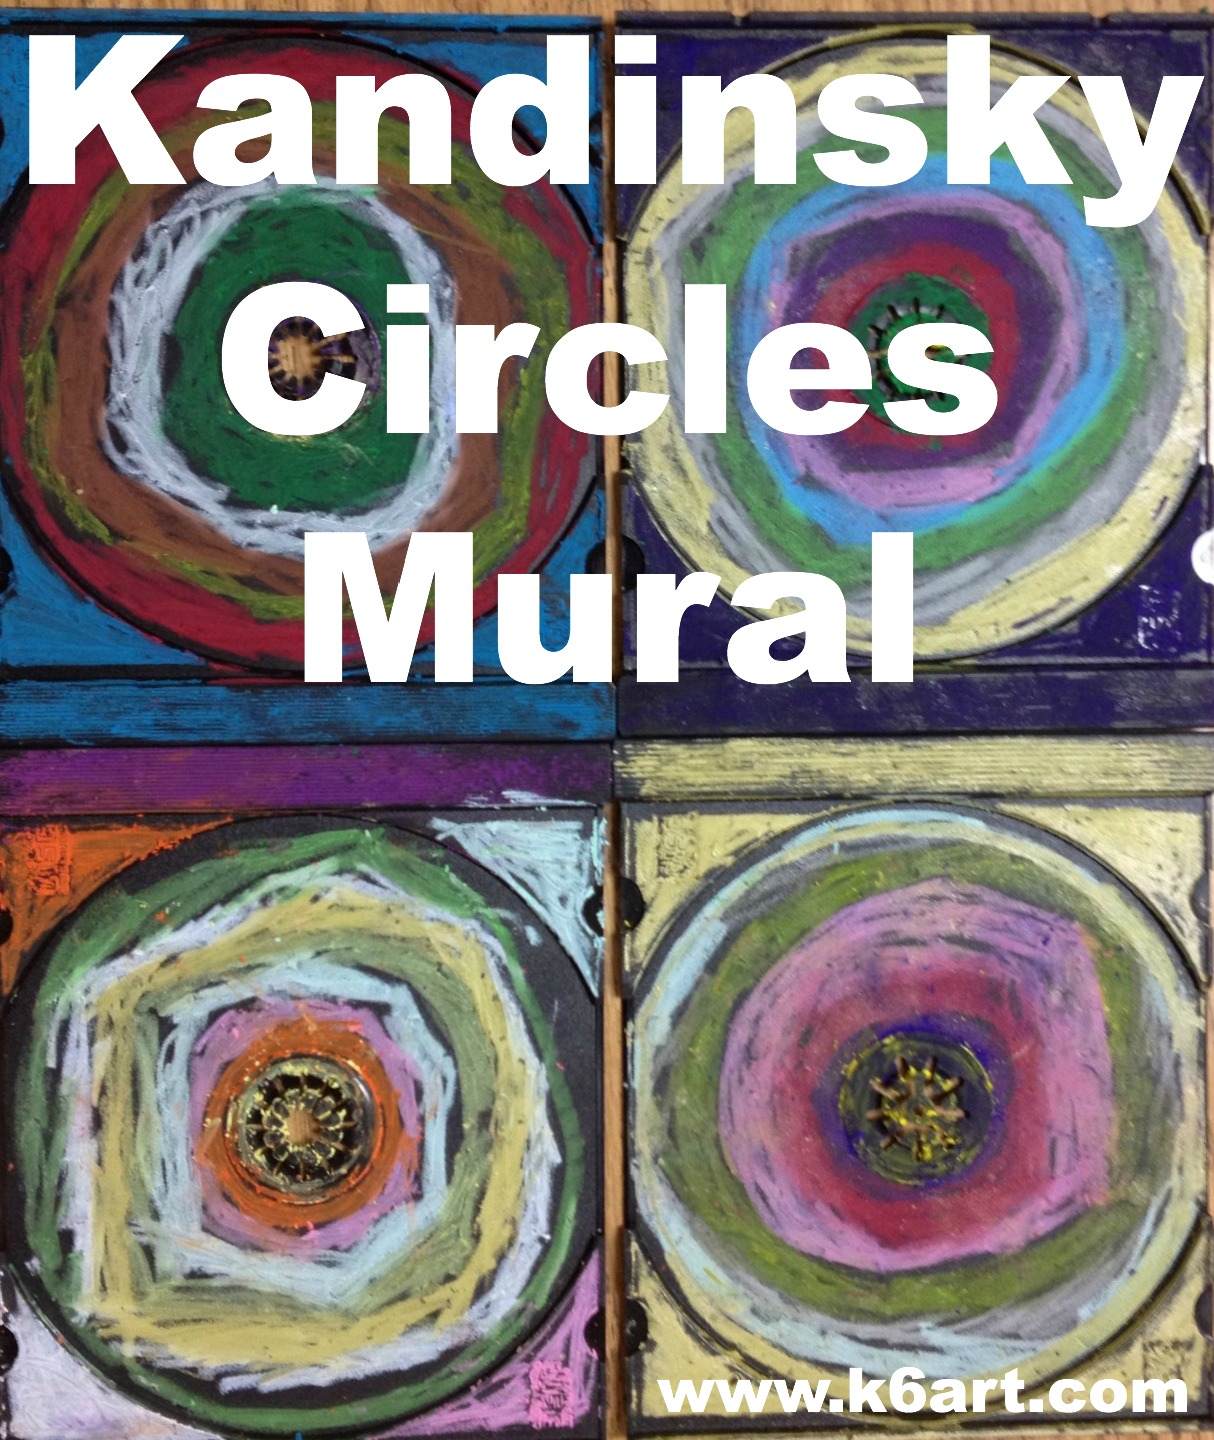
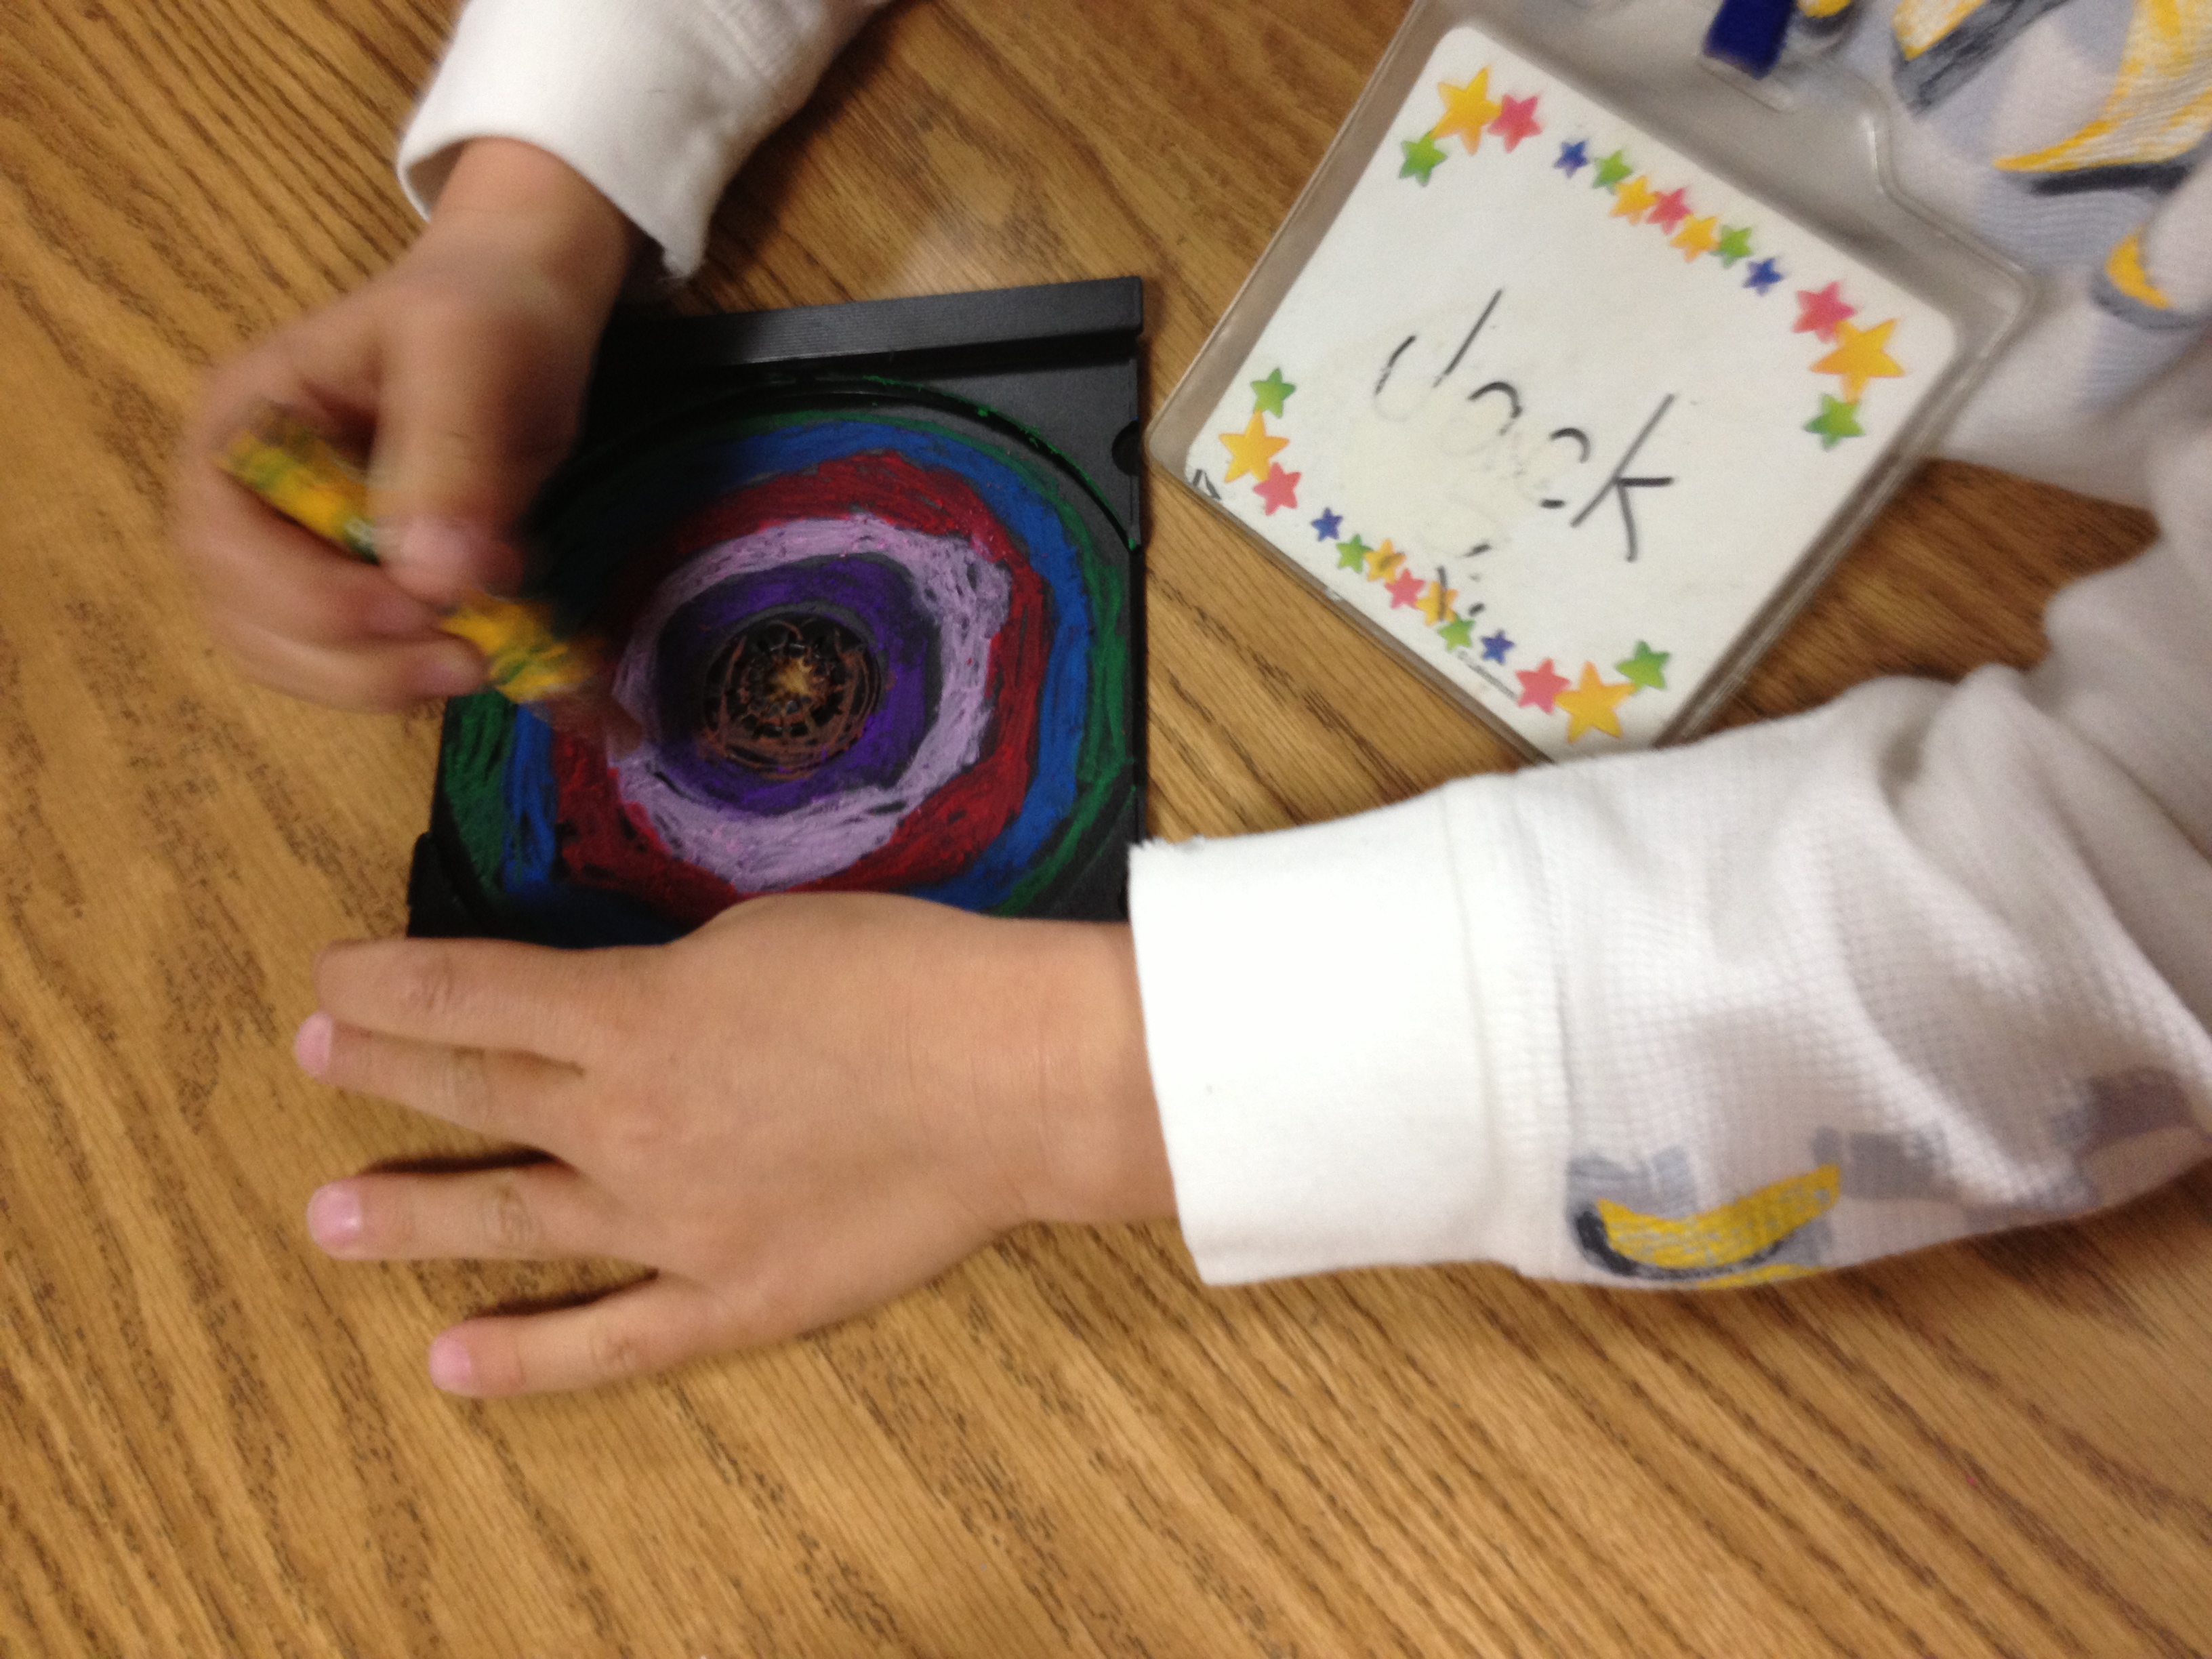
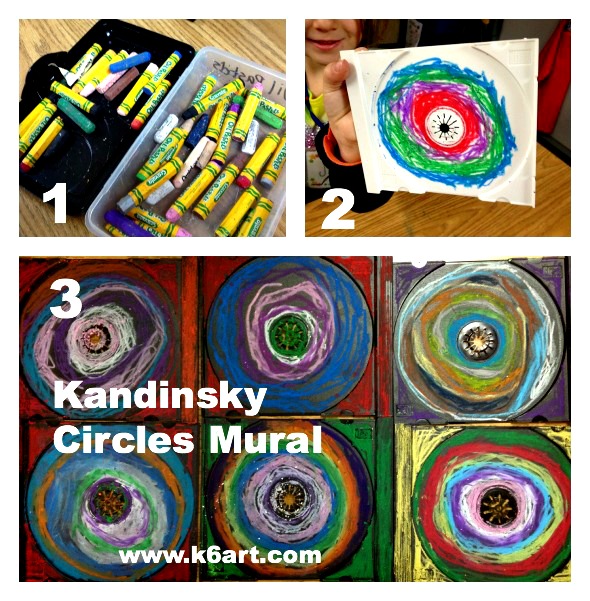
P.S. I got double duty out of my 250 donated CD cases! Here is a Kandinsky circles project made from the discarded CD trays.


Notan for Fifth and Sixth Grades

notan for 5th and 6th gradesOur 5th and 6th grade students did a quick 40-minute cut paper notan collage project. Our inspiration came from these beautiful notan artworks at the MiniMatisse blog. If you are unfamiliar with notan, it is a Japanese design concept of dark and light. Notan cut paper projects are great for teaching a lot of concepts including contrast, positive and negative space, symmetry, and geometric vs. organic shapes.

This was the very first time I taught notan. I found two really good resources that gave me confidence: 1) a great video that shows the notan process and 2) a great illustration showing single and double cuts.

Each student started) with a 6″ square of red construction paper and a white format (background) paper . The minimum assignment was to make four single cuts – one cut from each of the square’s sides. Double cuts were optional (about half the students tried them). Cut pieces could be geometric (hearts were popular) and/or organic shapes.

Our students really liked this project. Some made Valentines and wanted to take them home immediately. I think they turned out great. I also think that their second attempts will be even better. Definitely a project to repeat!

Fifth and Sixth Grade Results:

more notan

notan valentines

notan names

The next two designs contain cut pieces that were rotated incorrectly. But you know what? I consider the artworks successful. They are beautiful designs, even if they don’t fully fulfill the assignment. They still illustrate the concept of positive and negative space although they are in places asymmetric.

not notan

Although we did these red paper notans in honor of Valentine’s Day, they will look great displayed as a group any time of year.

I would LOVE to find an iPad app or interactive website that illustrates notan. If anyone knows of one, please leave a comment!!

Enjoy!

Have you even tried notan with your students?

Do you have any tips to share?


Newspaper City Collage for Kindergarten

newspaper city collage for kindergarten

Are you looking for a fun collage project for kindergarten? This newspaper city collage project engages students with a discussion about their city, then lets them use their cutting, gluing, coloring and painting skills.

When asked, “What do you see in a city?” kindergarteners named all sorts of things:  houses, roads, tall apartment buildings, garages, and even boats in San Diego harbor. One girl talked about her recent trip to the city hospital, another about what she saw on vacation in New York City.

Materials:

  • black construction paper
  • newspaper
  • scissors
  • glue stick
  • construction paper crayons, plus black crayon
  • watercolor set

Day 1: Cut and glue newspapers. Emphasize shape: squares, circles, triangles, rectangles etc. Add details with crayon.

Day 2: Paint with watercolor.

newspaper city collage assembly

Kindergarteners make cut paper city collages from newspaper, then color with crayon and watercolor. Allow two 40-minute classes.

Aren’t they wonderful?

newspaper city collage 1

newspaper city collage +

newspaper city collage 2

New York City collage before and after crayons and watercolor. Do you see the Statue of Liberty?


As much as the kinders enjoyed the project, I would do things a little differently next time:

  • Use smaller black construction paper . Students had difficulty filling the 12″x18″ paper we used within the class time frame. So this class took three 40 minute classes – I want to shorten it to two.
  • Skip the front page of the newspaper!  It took extra time to eliminate inappropriate ads and articles. Next time I will try the white pages of a phone book, classified ads or financial/stock listings.

This lesson was inspired by this lesson by CCE Art Happenings.

Do you have a favorite collage project for kindergarten?

Heritage Self-Portraits

heritage self portraits

Thinking about a self-portrait project? This project starts as a basic self portrait but turns into a family ancestry art project when students add in national flag designs. This lesson uses basic materials and takes just two 40-minute classes. It comes straight from the wonderful Artisan Des Arts blog.

Materials:

  • White drawing paper, 12″x18″
  • Pencils and erasers
  • Chisel-tip markers (we used Mr. Sketch)
  • reference photos of national flags

We began by looking at the great student examples on the Artisan Des Arts blog post. Then I asked the students, “Where does your family come from?” After a quick discussion,  Next we looked at flags of the world. Then the students drew their portraits in pencil.

Because most of our students have mixed heritage, they had the option of using multiple flags in their design.  It was up to them to figure out their own designs. The most common choice was to have one flag design on the face and a second on the shirt.

As a final touch, students had the option of cutting out their self-portraits and mounting them to construction paper.

I really look forward to our next art show.  I think the parents will be THRILLED to see their heritage honored in this project.

heritage self portrait 2

heritage self portraits 1

heritage self portrait 3

What a fabulous lesson plan! I will definitely repeat next year. Thanks to Aly at Artisan des Arts for sharing this great project.

Do you have a special twist on a portrait project?

Kandinsky Circles Mural

kandinsky circles mural

Here is a twist on the popular Wassily Kandinsky circles project: a group art mural made from recycled CD case trays. This project is perfect for Earth Day, but it does require advance planning.

Kindergarteners use oil pastels to draw concentric circles in CD inserts. Allow one 40 minute class, plus time to assemble mural.

Kindergarteners use oil pastels to draw concentric circles in CD trays. Allow one 40 minute class, plus time to assemble mural.

Materials:

  • CD Jewel Case insert trays, preferably donated, one per student
  • Oil Pastels (we used Crayola)
  • glue and backing for mounting (see below)

Prep:

  • Source CD jewel cases. I got 250 CD jewel cases via the ‘for sale – free’ section on Craigslist. Like many others, the donor had switched from CDs to MP3s and didn’t want the old CD cases going to a landfill. Score!!!! Free art materials AND trash kept out of the landfill.
  • Pry off the colored plastic CD trays from the clear jewel cases (a parent volunteer helped me with this step). Save the clear cases for another project.

The Art Lesson:

I introduced Wassily Kandinsky to the kindergarteners. We looked at several of his famous artwork including Color Study: Squares with Concentric Circles. We noticed Kandinsky liked to make paintings with bright colors and shapes – not landscapes or paintings of people. Here are two brief YouTube videos I showed the kinders.

http://www.youtube.com/watch?v=Pa6WK6IWrkU


kandinsky circles how to

The Art Project

The art project couldn’t be easier:

1. Pass out oil pastels and CD case insert trays. Flip trays so central ‘bump’ is up.

2. Students start by coloring a fat ring around the center bump. They trade colors with a neighbor, then color another concentric circle. Repeat until the entire plastic circle is colored. Finally, they color the edges.

3. Group completed insert trays and mount

So easy and fun!  100% of kindergarteners had success with this project.

Mounting:

I plan on using four glue dots per CD tray and mounting on foam core.

UPDATE: The glue dots failed immediately. I had better luck with strong spray glue (3M Super 77 Spray Adhesive – use it outside or in a well-ventilated area). One week after the art show, I was able to remove the plastic circles to hand back to the kids.

However, you may choose to use a different adhesive and base depending on the number of circles you have, and the length of time you want the mural on display. Because I have 45 circles and only want the mural on display for one week, I am creating a display that can be easily dissembled.

UPDATE:  If you want to a more powerful adhesive for long-term mounting, try 3M Scotch Heavy Duty Mounting Tape. I created CD case mural using the mounting tape, and sent it off to a museum show. The mounting tape worked beautifully.

 Another option: keep the plastic insert inside the jewel case. Color, then close and mount each case to display surface (I separated the insert tray from the jewel case because I needed the clear cases for another project).

This would be a great activity for an Earth Day event – each participant can make a square for the mural. The entire activity, including the videos and clean up, took only 40 minutes.  I also see this as a fun art activity booth at an art fair or school carnival.

Enjoy!

Do you have a great resource for free art supplies?

 Do you have a favorite recycled art project?

Related Posts Plugin for WordPress, Blogger...