Fun Foam Prints: Quick and Easy!


Love printmaking? Try making your own stamps with self-adhesive fun foam stickers. It’s quick, easy, NEAT, inexpensive and 100% successful.

Materials:

  • cardboard squares, 3″x3″
  • self-adhesive foam stickers in various shapes such as these
  • scissors
  • hole punches
  • water-based markers (we used Crayola)
  • water-based stamp pads
  • paper for printing (we used copy paper)

Design the stamp:

Students began by tracing their cardboard square three times on a sheet of copy paper. Then they arranged their foam pieces within the squares until they found a pleasing composition.

Students rearrange cut-up craft foam stickers until they find an arrangement they like. Don’t peel the stickers yet!

I had a random assortment of stickers on hand – letters, animals, stars, ovals….I encouraged the students to cut up/hole punch their stickers so that the stickers no longer resembled their original shapes. No letters or numbers allowed! Once they found a good arrangement, they peeled their stickers and stuck them on the cardboard squares.

Assignment 1: print with colored markers

Next students inked their stamps with Crayola markers and printed on a clean piece of paper.

Ink the foam with markers. Use a variety of colors.

Print! Then re-ink and print again. You go over the stamp with another color of ink for subsequent printings.

Inking plate with multiple colored markers allows students to make some beautiful color combinations.

Triceratops print.

Assignment 2: Radial design print

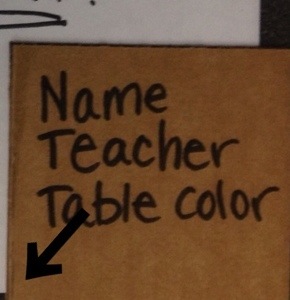
Place on dot in the center of a clean piece of paper. Flip stamp over to back and draw arrow on cardboard pointing to one corner.

Ink stamp with stamp pad. Print so arrow points to the center dot. Re-ink and print again, rotating stamp so arrow always points towards center dot.

Pac Man

Thumbs up!

Color radial print.

The galaxy.

So much fun! 100% of sixth graders had success with this project. I think third graders and older could succeed with this project.

20121111-062923.jpg

30-Minute Collograph Printmaking


Want to try a printmaking project that is quick, fun, versatile and inexpensive? Try collographs.


Maxi Moraga leads collograph workshop in NCM’s art education room.

I took Maxi Moraga’s fabulous collograph workshop last month at San Diego’s New Children’s Museum. This workshop tied in to the NCM’s current exhibition, TRASH, so we used lots of recycled/discarded items to create our printing plates.

Materials:

  • cardboard rectangles (we used corrugated)
  • bits of textured fabric, including mesh and screening
  • yarn
  • cardboard
  • masking tape
  • glue sticks
  • white glue
  • scissors
  • printer’s ink in assorted colors
  • brayers
  • trays for ink
  • paper for printing (cardstock is OK)
  • colored pencils

We began by creating printing plates. We collaged various items to our cardboard rectangles (note: Maxi strongly encouraged us to use glue stick).  Here are some of the plates:

Collograph plates. Yarn is simply wrapped around the plate.

Tip: after completing plate, ask students to flip plate upside down on their chairs and sit on them for 60 seconds! Now your plate is really glued down and ready to print.

Next, we applied printer’s ink to our plates using these mini-brayers and recycled plastic trays. I love that the tray has a lip to keep the brayer constrained. Great when you are printing with young children!

Apply printer’s ink with a brayer.

We didn’t use a press. We simply put the paper over the inked plate and rubbed the paper carefully with our hands.

Options:

  • use a paper towel to selectively remove ink from the plate before printing.
  • create a print using two or more colors of ink
  • color the paper before and/or after printing.

My favorite piece is the masking tape collograph made with corrugated cardboard.

Because of the emphasis on recycled materials, this would be a nice Earth Day project as well!

Whether you are a parent or a teacher, be sure to check out the New Children’s Museum when you visit San Diego. The museum offers art-making activities for children EVERY DAY. I wrote more about the museum in this post.

Do you have a favorite printmaking project?

UPDATE: 12/16/13: Check out my new post – ‘Holiday Collagraph Crayon Rubbings’

Enjoy!

Mask Day

Our fifth graders are starting their mask unit, just in time for Halloween. We kicked off the project with ‘Mask Day’: the kids tried on my entire international mask collection, plus an assortment of  student-made masks.

I placed masks on all the tables and the kids rotated through. To keep the students even more engaged, I asked them to guess which materials were used to make the various masks. It turns out the hardest to identify were 1) the bark cloth on the Peruvian jaguar mask and 2) the coconuts on the round Indonesian masks.


We are now building our own plaster masks.  You can see last year’s mask-making process and final results in this post, this post and this post. Kids look forward to this project for years – it is messy but so totally worth it. Stay tuned for updates!

Kindergarten Birthday Cake

We all know kindergarteners love birthday parties. Cake, presents, decorations – what’s not to love? So it was no surprise that this  birthday cake art project was super-popular with the kinders.

Day 1:

Kindergartens started by viewing my birthday cake powerpoint  (note: if art class is before lunch your students will say they are hungry!). We discussed the lines and shapes we saw on the cakes, and in the frosting and decorations.

Cake drawing emphasizes lines and shapes.

Kinders drew the cakes with crayon. I emphasized that they didn’t have to color the large areas with crayon because we would paint the cakes next week. However, they should use crayon to color in the small areas such as candles, flames, balloons, numbers, etc.

Day 2:

We added cut paper birthday gifts with glue stick, then painted with regular and metallic pan watercolors.

Kindergarteners painted their crayon drawings with regular and metallic pan watercolors. Allow two 40-minute sessions.

Completed birthday cakes:

This would be a great end-of-the-year lesson to celebrate all the ‘summer’ birthdays that occur when school is out of session. This could also be a nice project for a Wayne Thiebaud lesson.

How about adding a book to the project? When I was little, Dr. Seuss’ Happy Birthday to You! was one of my favorite books and I still remember reading it on my 6th birthday (I also remember Baskin-Robbins clown cones plopping all over the back yard at the birthday party, but that is another story).

I’d love your suggestions on a book to read along with this project.

Do you have a special birthday-themed book for primary students?


Embossed Foil Name Art

Sixth grade just finished their sparkling foil name art projects.

Materials:

  • cardboard
  • yarn
  • scissors
  • white glue (such as Elmer’s)
  • foil (I love Pre cut foil sheets >)
  • Sharpies or other permanent marker, black and colored
  • spray glue
  • small squares of felt
  • q-tips
  • pencil/erasers
Students began by writing their names in pencil on cardboard. They traced their names in glue, then yarn.

Students write their names in glue and yarn.

Next they added decorative glue/yarn lines. I sprayed the plates with spray glue and slapped on a piece of pre-cut foil.

Students carefully polished the foil with felt squares. This helps the foil adhere to the cardboard and smooths the foil. A q-tip is good for polishing tight areas. Finally, they got to the best part: coloring in with jewel-tone colored Sharpies. Black sharpie looks good too! Remind students to avoid coloring the raised yarn lines.

Caroline

;

Erika

Trey

This project was inspired by this post at Fine Lines and this post at We Heart Art.

Related Posts Plugin for WordPress, Blogger...