If you have extra time after gluing, you may want to read a book to the class. I like the website www.wegivebooks.org. It features full length, full color children’s books online to read for free. It works great with the computer and projector in my art room. We recently read Tinga Tinga Tales -Why Lion Roarrrs!
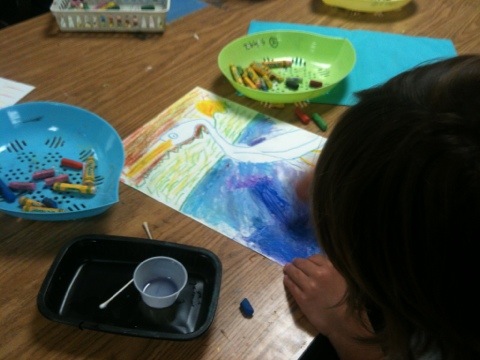
Want to amaze and engage your students? Try oil pastel ‘painting’. The colors are vibrant, set up and clean are a breeze and students love the process.
Materials
Oil pastels
Q-tips
Baby oil
Small cups for oil
Watercolor paper
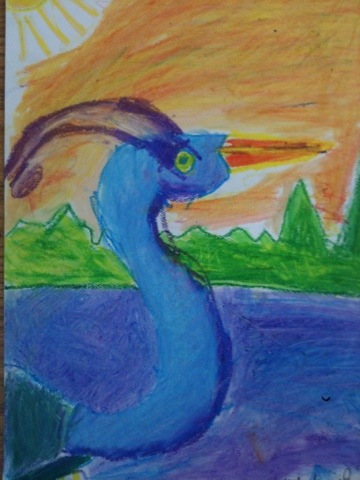
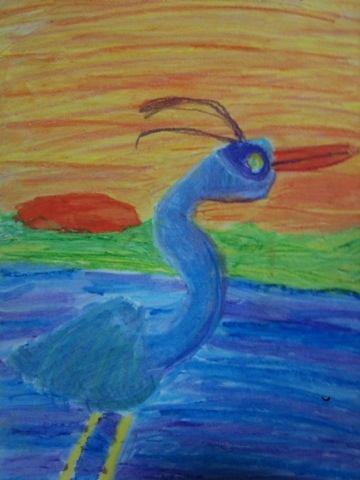
We did a directed draw of a great blue heron. We grouped our oil pastels so that they would blend nicely. This was a good opportunity to review warm and cool colors and analogous colors.
Heron: cool colors (purple, blue, green)
Water: purples and blues (analogous colors)
Sunset sky: warm colors ( red, orange, yellow) and pink
Hills: green and yellows (analogous colors)
Students make short strokes of oil pastel. Use two or three colors side by side. Then dip a q-tip in baby oil and blend the colors. A little oil goes a long way!
Dry on a drying rack.
Tips:
Use watercolor paper. Construction paper is too thin and oil will soak the paper.
Blot excess oil with tissue.
Armed with camera-equipped iPads and iPods, our fourth graders spread out in our school garden in search of alphabet letters. Each student was assigned a letter to photograph.
Letter O
It was interesting to see how they completed the assignment: some students found letters in the branches of trees, some created letters from stones and twigs. Some poured water on the pavement to draw their letter. If they were absolutely stumped (get it?) , I let them use a letter from the garden signs. I asked students to take 5-10 photos of their letter.
I am happy to report the fourth graders LOVED looking for letters. They were completely engaged, and helped each other. I heard a lot of shouts of “I found a T! Who has T?”
This week, students used their devices and the Pic Collage app to turn their best photos into a photo collage. I asked them to zoom in so that we could really see the letter – aim for making a letter so clear a kindergartener could recognize it. They emailed me their files and we reviewed them as a class.
Great work fourth graders!
Our fourth graders are in a pilot 1:1 iPad program, and it is a huge success. The goal is to turn all the photos into a free digital book downloadable through Apple’s iBooks store.
Inspiration for this project came from www.alphabetphotography.com.
UPDATE: see the completed whole-alphabet collages in this post.
This week fourth grade finished their foil sea creatures. If you have never tried tooling foil repouseé, you simply must! It is so much fun. If you are unfamiliar with repouseé, check out this excellent post at A Faithful Attempt blog.
We talked about the repouseé process. We are going to use a pencil to shape and press lines and patterns into our foil. We will make texture. For practice, I gave kids a piece of heavy aluminum foil and we folded it four times. The number one rule: always keep the foil on the newspaper pad. The pencil will bend the metal down into the pad.
We practiced drawing different lines (wavy, straight, zig zag) and patterns on our test foil. I showed kids how to flip the foil to the back and press lines into the back of the foil. Once kids got used to working the foil front and back, they really enjoyed the process.
Day 2
I passed out square paper sketch sheets and templates (optional – I encouraged kids to make their own design so long as it filled the square). Goal: create a sea creature with a textured body and textured background. When the sketch was approved, I gave them a square of foil. They taped the sketch to the foil and retraced their lines. then they turned over the foil and pressed more lines into the back.
Optional templates ruled to fit foil squares.
Pencil sketch and completed art
Day 3:
Color with colored Sharpies. The color makes our repouseé art looks like jewels of the sea!
Here they are on display in the school lobby for our annual Ocean Week
Options:
Skip the background. Cut out the textured sea creature. Color on both sides and hang as a mobile.
Skip the pre-cut squares and do the project on folded heavy foil.