Monoprinting with Shrinkable Plastic

mono printing with shrinkable plastic pin

Isn’t it wonderful when you have time to make your own art? I experimented with mono printing this week as part of my homework for the Artsy Book Club. I used Shrinky Dink shrinkable plastic for my printing plate. It worked beautifully as a plate, plus I got to shrink it in the oven after I was done!

Materials:

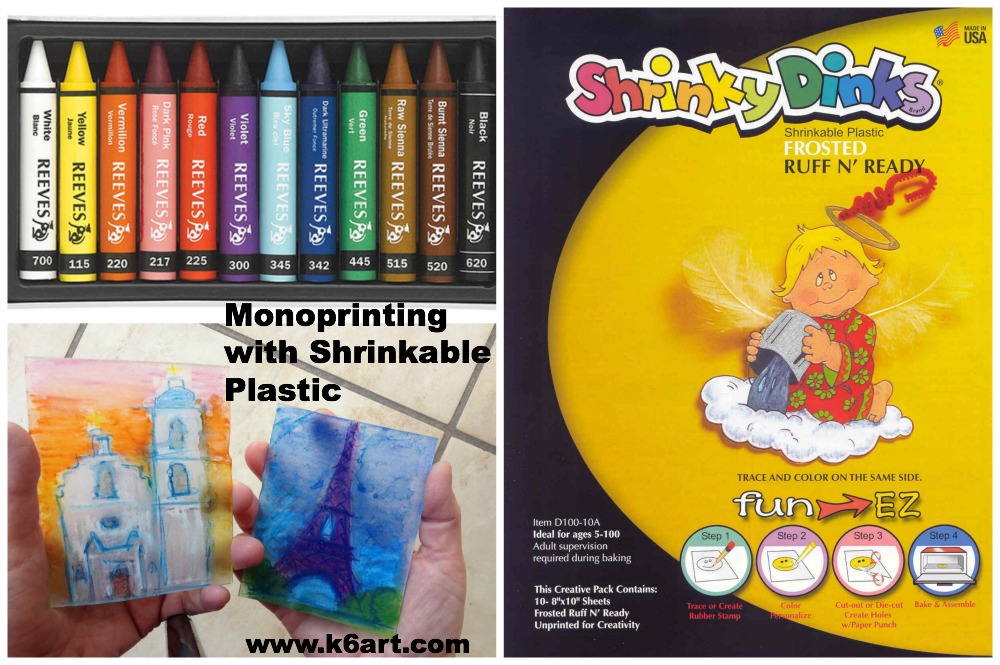
You'll need wax pastels, frosted Shrinky Dinks, watercolor paper, and an oven.

You’ll need wax pastels, frosted Shrinky Dinks, watercolor paper, and an oven.

Directions:

  • Make a sketch on copy paper
  • Place the shrinkable plastic (AKA the printing plate) on top of the sketch
  • Trace sketch with wax pastel, then color background/negative space
  • Brush plastic with wet paintbrush to blend colors
  • Dampen paper in dish pan of water, blot in towel
  • Place dampened watercolor paper on plastic
  • Rub
  • Pull the print
  • Add more wax pastel (in select areas) to the wet print.

You can re-use the full size shrinkable plastic plate over and over; just re-color for every new mono print.
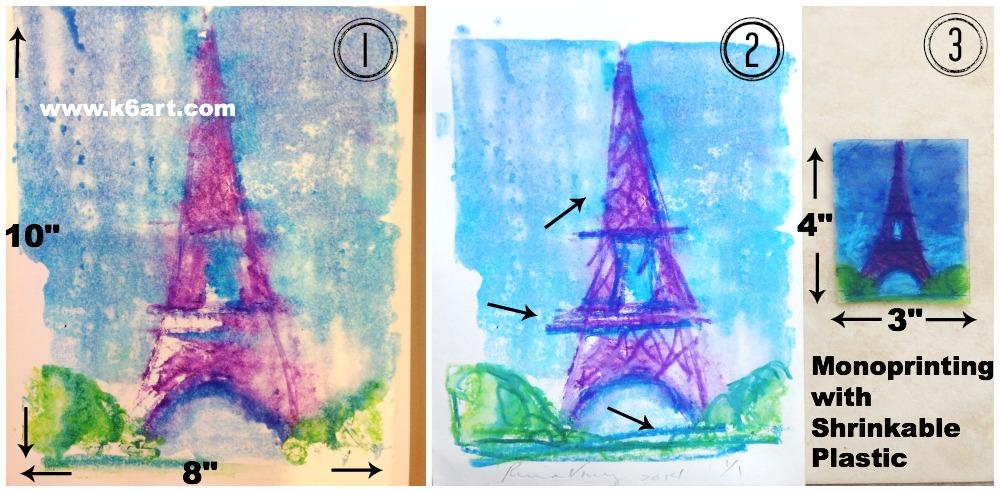
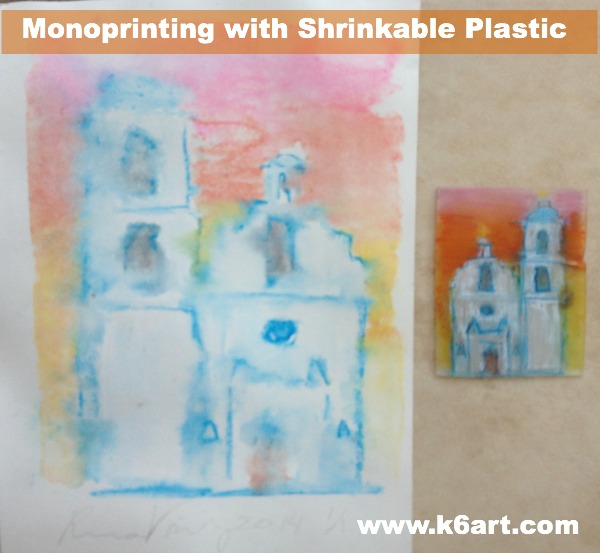
1. Monoprint onto watercolor paper. 2. Rework wet print with wax pastels 3. Rework plastic plate and shrink in oven.

1. Monoprint onto watercolor paper. 2. Rework wet print with wax pastels 3. Rework plastic plate and shrink in oven.

Shrink the printing plate

Ready for even more fun? When you are done printing, re-color the Shrinky Dink printing plate and shrunk it in the oven.

Yes, that’s right: I shrunk my printing plate in the oven. It’s beautiful! The colors are concentrated and rich. Just follow the directions on the Shrinky Dink package.
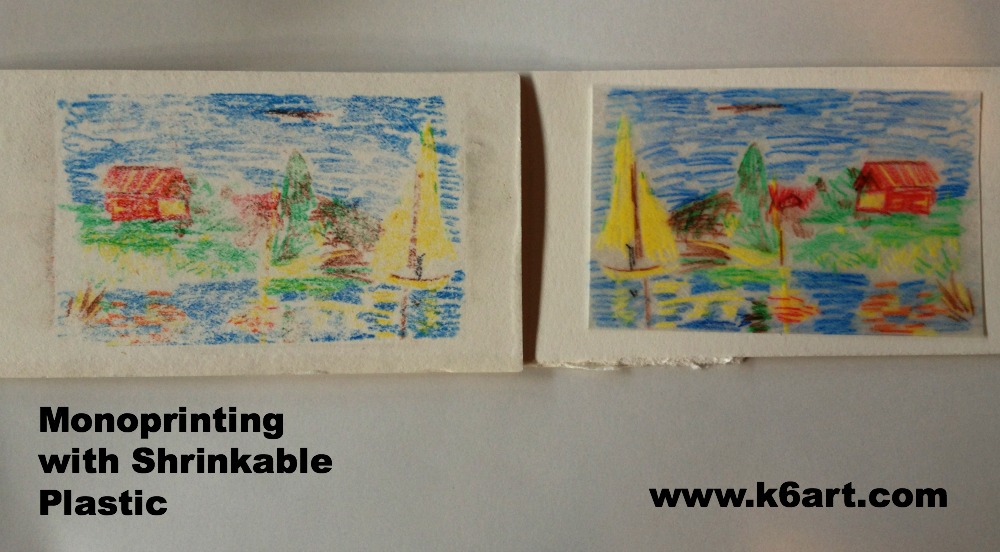
This mono print was made with watercolor pencils onto a scrap of dampened mat board.

This mono print was made with watercolor pencils onto a scrap of dampened mat board. Time to shrink the printing plate!

Monoprinting with watercolor pencils

I used Reeves Watercolor Pencils to trace an impressionist painting onto my frosted Shrinky Dink plate. Then I printed onto a scrap of dampened mat board.
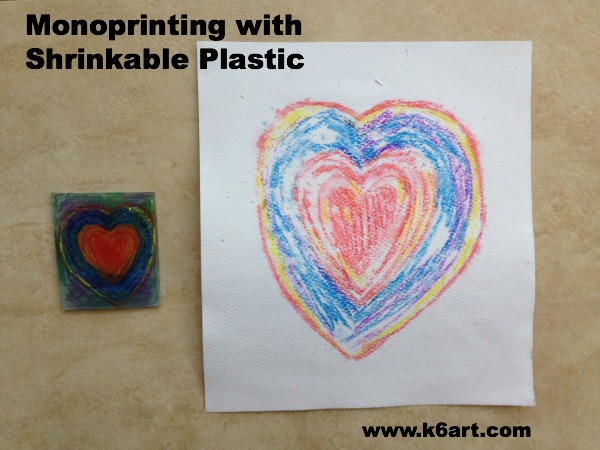
The printing plate started as a 1/4 sheet (4"x5") of Shrinky Dink plastic. After printing, the plate shrunk to 1.5"x2"

The printing plate started as a 1/4 sheet (4″x5″) of Shrinky Dink plastic. After printing, the plate shrunk to 1.5″x2″  Student work.

Try a mini monoprint with the kids

I used a full 8″x10″ sheet of Shrinky Dink plastic for my architectural mono prints, and I had to shrink each plate individually. This is not practical at school. Instead, try a 1/4 sheet of shrinkable plastic for the printing plate. I can shrink about 7 at a time on a full size cookie sheet. This is also a great way to use up scraps of watercolor paper.

Relax and enjoy the process…

These mono prints are somewhat experimental. You never know exactly what you’ll get. Try not to get caught up in perfectionism. If a print is less than perfect, rework it.

Thanks to Col Art for the samples of Reeves Watercolor Pencils and Reeves Wax Pastels. Thanks to awesome art teacher/blogger Cassie Stevens for creating our Artsy Book Club!

Enjoy!

What is the weirdest printing project you’ve ever tried?

note: this post contains affiliate links.


Wyland Ocean Mural

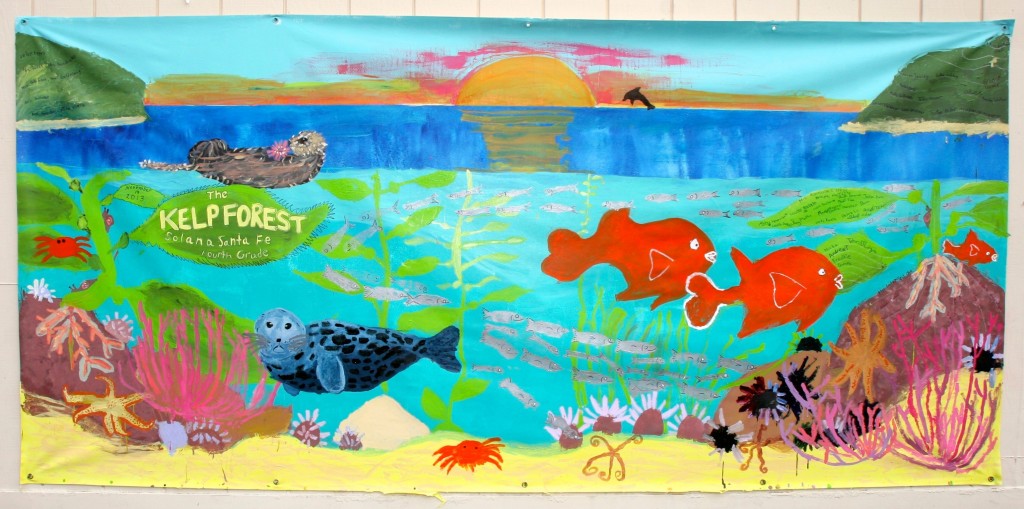
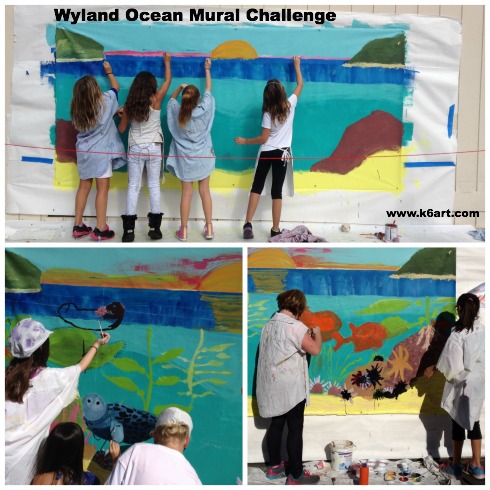
Inspired by aquatic artist Wyland, our fourth graders recently completed a great big ocean-themed mural. We recreated the California kelp forest for the Wyland Foundation’s ‘Water is Life’ Mural Challenge.

Our entry in the Wyland mural challenge

The completed kelp forest mural. Dimensions 5’x10′

Who is Wyland?

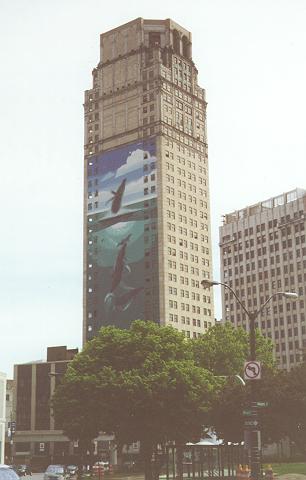
Wyland Whaling Wall in Detroit.
Photo source: Wahkeenah via Wikimedia Commons

Wyland is an American artist best known for creating life-size whale murals. He painted 100 of these ‘whaling walls’ around the world, as well as many more paintings of  aquatic life. As seen in the whaling wall photo, Wyland often paints a ‘two worlds’ view of the ocean (both above and below the sea). Wyland’s art is very popular and he is commercially successful.

Materials

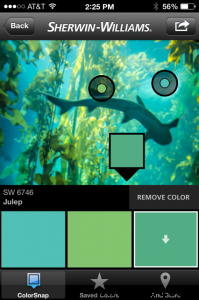
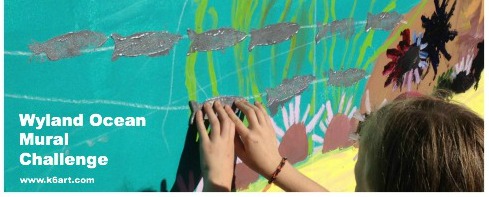
The Wyland Foundation provided us with a free kit, containing instructions, acrylic paints, brushes and a 5’x10′ Fredrix Paint It Yourself Classroom Mural Cotton Canvas Roll. We also used acrylic house paint and rollers. Blue painter’s tape was essential for getting a clean horizon line. We used Sharpies to sign the artwork and to add small details. We used soft-kut blocks and lino cutters to create fish stamps for our school of silvery fish. Tip: I matched our background paint to an undersea photo with the free Color Snap app.

The free Color Snap app is great for matching paint to a photo.

The free Color Snap app is great for matching paint to a photo.

Mural Process:

Brainstorming:

Students used their iPads to research the kelp forest and Wyland’s art. Students posted their  favorite images, plus  suggestions to an online board on Edmodo.

Painting:

We painted the mural in stages. Day 1: background, days 2 and 3 were for sea life and details.  A maximum of eight kids painted at one time; the rest made sea creature drawings at the adjacent lunch tables while they waited their turn to paint. We used several tricks to create the illusion of space in our mural, including size, placement, value, warm/cool colors and (most especially) overlap. This video shows six tricks artists use to show illusion of space.

We also had small teams of students on special assignment: team seal, team sea otter, official photographers, and fish stamp carvers.

Fourth graders add marine life to the kelp forest mural.

Fourth graders add marine life to the kelp forest mural.

Each student stamped a fish on the mural, creating our own school of Pacific Jack Mackerel.

Each student stamped a fish on the mural, creating our own school of Pacific Jack Mackerel.

Although we didn’t win the Wyland Challenge, we created a beautiful mural.  Everyone is so proud of it! We learned about the kelp forest, and how to create depth in art.  Thanks so much to the Wyland Foundation for all the art materials, and to our parent volunteers for all their help.

Want to learn more about Wyland? Watch 2007 video from the CBS Early Show.

Enjoy!

The mission of the Wyland Foundation is to help children and families around the nation rediscover the importance of healthy oceans and waterways through public art programs, classroom science education, and live events. Click here to see the winning 2013 murals and to find out about the 2014 Wyland ‘Water is Life’ Mural and Art challenge.

60-Minute Holiday Collagraph Crayon Rubbings

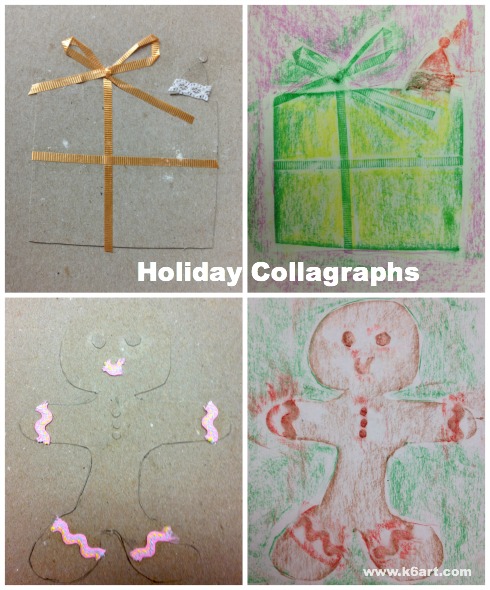
Textured curling ribbon tied in a bow looks great on this wrapped gift. The gingerbread man is trimmed in rick rack.

Textured curling ribbon tied in a bow looks great on this wrapped gift. The gingerbread man is trimmed in rick rack.

Need a fun and flexible holiday project? Try making you own collagraph crayon rubbings, using cardboard and scraps. The project takes about one hour and is adaptable to all sorts of holidays like Valentine’s Day and birthdays.

Materials:

  • light cardboard, 8.5×11″, two per student
  • scissors
  • pencil
  • glue stick
  • textured fabric trim such as ribbons, rick rack and lace
  • optional: hole punch
  • optional: ‘wavy’ craft scissors (like these scallop Fiskars Paper Edgers)
  • copy paper 8.5×11″ or other thin paper
  • peeled crayons

Create the collagraph rubbing plate

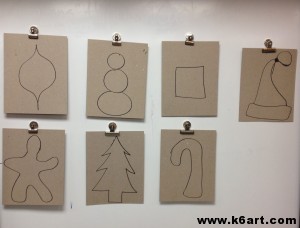
Students drew one holiday shape on cardboard, then cut it out.

Students drew one holiday shape on cardboard, then cut it out.

Select one holiday shape for the main part of the collagraph. Draw the shape on the first piece of cardboard and cut it out (note: for those students creating their own designs, emphasize that the design needs to be simple and stretched to the top and bottom of the page).

Glue the cut-out shapes to the second piece of cardboard using glue stick. You have now created a collagraph rubbing plate.

Now for the fun!

Cut decorations for your collagraph plate from your cardboard scraps and from fabric trim. Experiment with the craft scissors and the hole punch. Glue these decorations on top of and around your main shape. LAYERING IS GOOD! TEXTURE IS GOOD!

Now flip over the collagraph plate and place it face down on your chair. SIT ON THE CARDBOARD AND COUNT TO 30.  (It is so fun to do this step!) Now all the pieces are glued down are we are ready to rub.

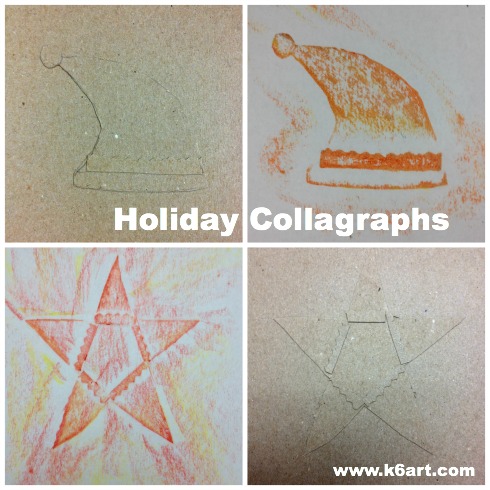
Santa hat and star, decorated with cardboard cut with Fiskar paper edgers.

Santa hat and star, decorated with cardboard cut with Fiskar paper edgers.

Creating the crayon rubbing

Place your collagraph face up on the table. Cover with the copy paper. Rub with a peeled crayon (note: it is helpful to have a partner hold the plate while the student rubs). Repeat with another crayon color.

Now trade collagraph rubbing plates with your neighbor. Or rotate tables so everyone comes away with a set of holiday cards.

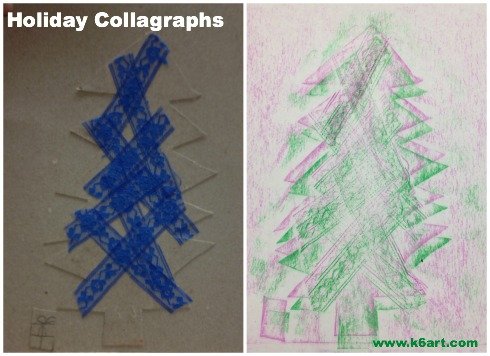
This students glued lace to her tree for texture. She did two rubbings with green and magenta crayons.

This students glued lace to her tree for texture. She did two rubbings with green and magenta crayons.

This technique would make awesome cards for birthdays – imagine a collagraph layer cake with rick rack candles. Imagine a textured doily rubbing plate for Valentine’s Day cards.

If you want to take this project a step further, you can roll printer’s ink on the collagraph and pull some prints. You can also color or paint the collagraph plate so it become an artwork.

Want more ideas? Check out my previous post on 30-minute collagraph printmaking.

Enjoy!


Do you have a fun way of making holiday cards?

Symmetric Butterflies

symmetric butterflies pinable

Here is a nice butterfly watercolor resist project that teaches symmetry. It was very popular with the kindergarteners and first graders.

Materials:

  • white paper, 9″x12″
  • oil pastels in bright or dark colors (NO yellow, light pink, light blue, white, etc.)
  • rubbing tool – optional (I use the flat side of a beginner pencil)
  • watercolors
  • Optional: scissors, glue stick and colored paper for mounting

Discuss symmetry

Introduce symmetry. We talk about how our faces are symmetric. Then we look at butterflies and identify the line of symmetry.

Create 1/2 butterflies:

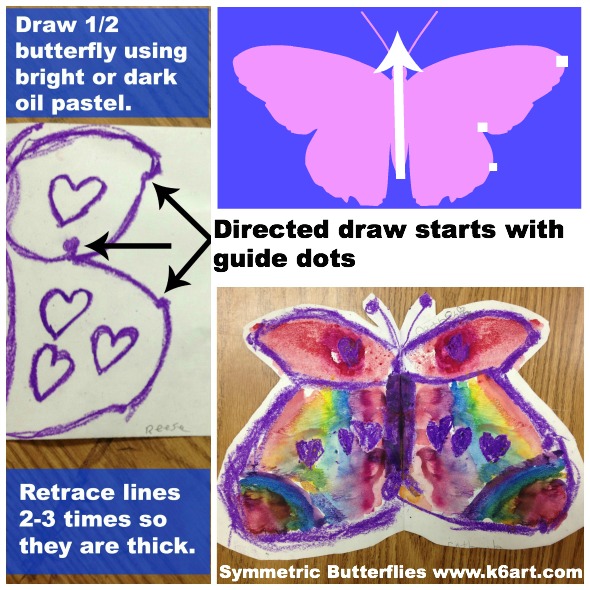
Students fold paper in half ‘the short way’ (aka hamburger fold). Do not unfold paper. Using oil pastel, direct students to create a series of dots on ONE folded half. The students then connect the dots to make a 1/2 butterfly.

Now ask students to trace their lines two more times using that same oil pastel. Students should press hard – oil pastel lines should be thick and dark.

Students can add some simple decorations such as shapes and lines to their 1/2 butterflies. Remember, each decoration must be traced a total of three times.

Ready to rub:

Now students close up their papers so the color is on the inside of their ‘books’. Time to rub HARD. I have students stand up so they can put their whole bodies into it! We use the flat side of a beginner pencil for this. You could use the flat side of a popsicle stick as well.

symmetric butterfly instructions

Now open the ‘book’. Students should see a ‘ghost’ image (faint lines) opposite their oil pastel drawing. You will hear oohs and aahs of amazement!

About 75% see the ghost image the first time they try this. If the oil pastel didn’t transfer, it means a) the students didn’t retrace their lines hard enough and/or 3)the students didn’t rub hard enough. I ask neighbors to help their friends out at this point. On their second try, the remaining students all succeeded.

The next step is to retrace the ghost lines with that same color of oil pastel.

Paint

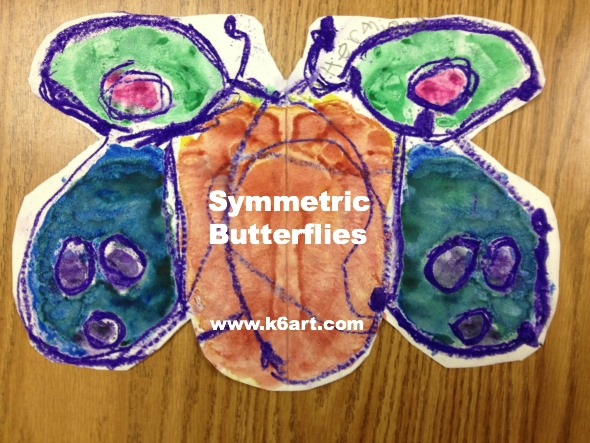
Finally, paint the butterflies with watercolor. Encourage students to keep their butterflies symmetric – match up the paint colors on the right and left sides of the line of symmetry.

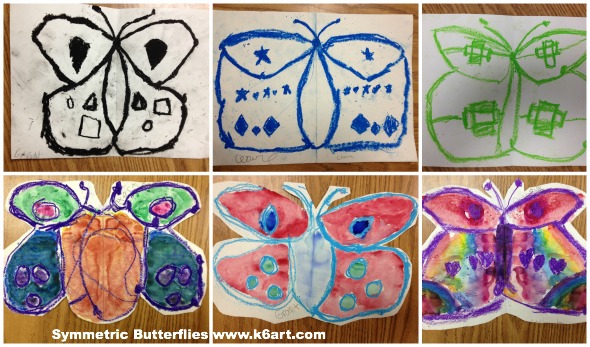
Kindergarten and first grade results

symmetric butterflies before and after

Options for finishing the project: cut out the butterflies, mount on construction paper. Or just trim and stick onto your window or bulletin board.

Enjoy!


Eiffel Tower Art Project for Bastille Day!


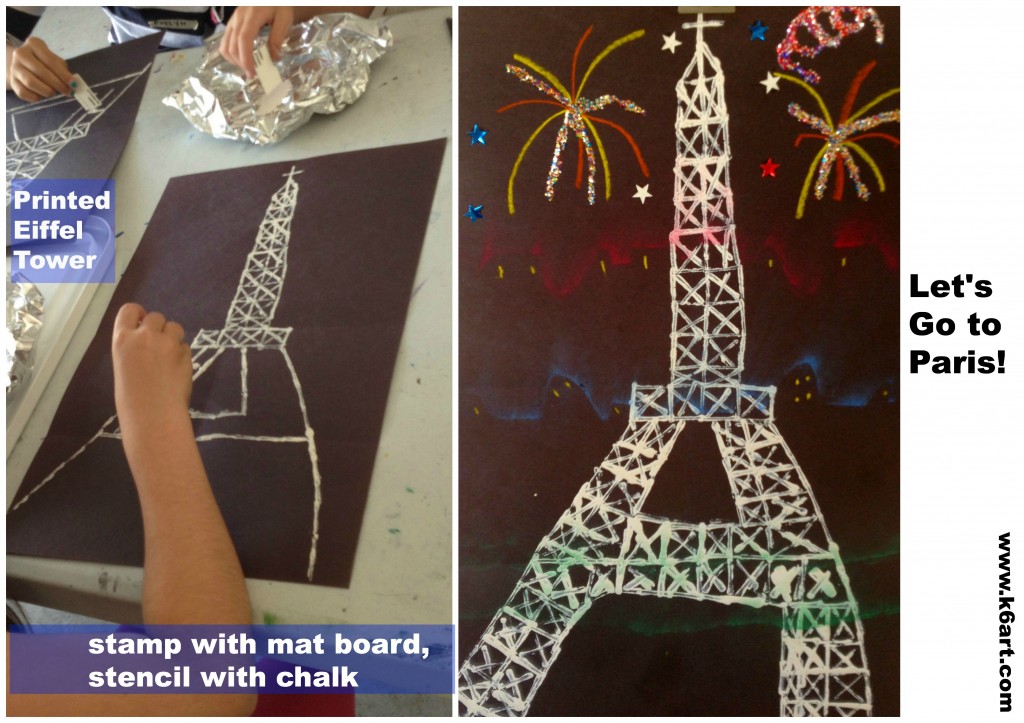
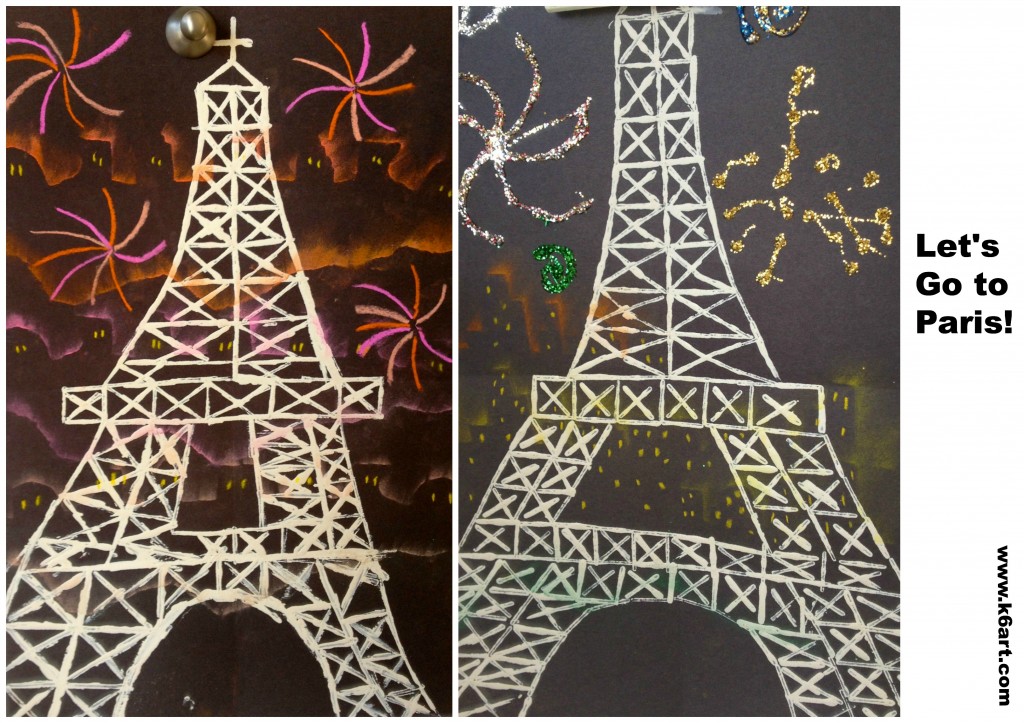
printed eiffel tower 3


I just finished my Paris-themed art and cooking camp. The kids loved to make these printed Eiffel Towers. The project is inspired by this fabulous post at the Cassie Stephens blog (please check out the post – it has excellent directions!).

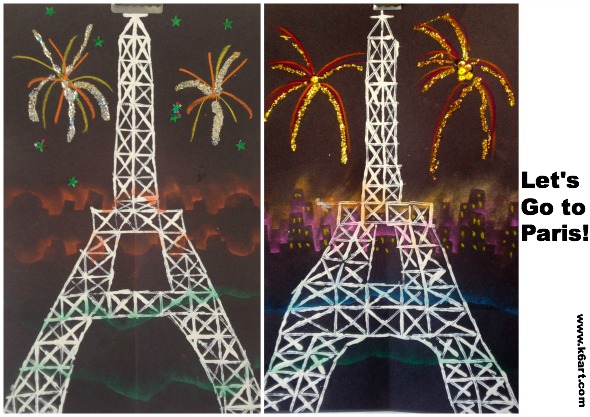
We used white craft paint and 1″x2″ pieces of mat board to print our Eiffel Towers. When dry, we added detail with chalk pastels and hand-made stencils.  Finally we added pastel fireworks outlined with glue and glitter.  Some kids stuck on gummed stars to make the Parisian night sparkle.

Just in time for Bastille Day on July 14!

printed eiffel towers 1

printed eiffel towers 2


The kids loved this brief video of fireworks at the Eiffel Tower.

In my one week Paris-themed art + cooking camp, we made crepes, meringues and madeleines! Click here, here and here to see our other art and food projects (with recipes).

Au revoir!

Enjoy!

Related Posts Plugin for WordPress, Blogger...