Wayne Thiebaud Ice Cream Cones Roundup

wayne thiebaud ice cream cones


Summer is almost here. Why not try a warm-weather twist on Wayne Thiebaud with an ice cream art lesson? Check out these ice cream cone lessons using paint, collage, papier-mache and more.

thiebaud cones

cone collage

Directed Draw/Paint:

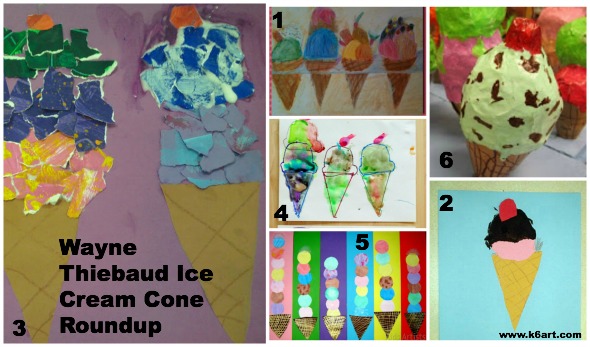
  • 1. I discovered an entire Wayne Thiebaud unit at the fabulous Danish Fru Billedkunst (“Mrs. Fine Art”) blog. Click here for her step-by-step ice cream cone drawing diagram.

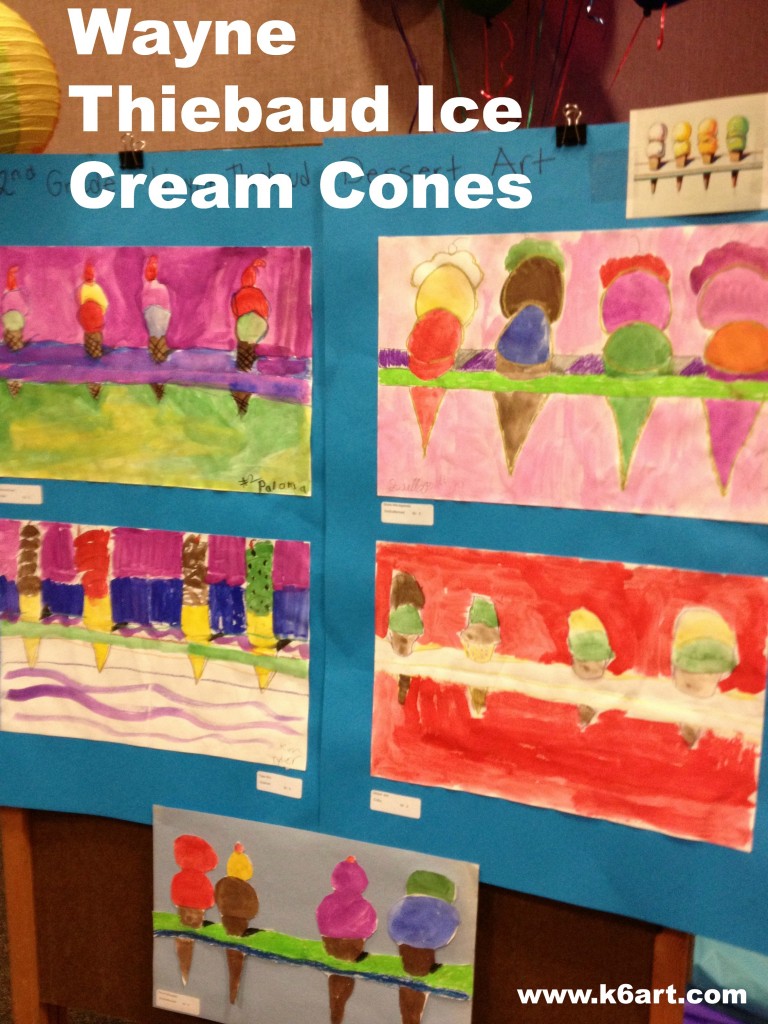
Our second graders began by folding their paper into quarters. The horizontal fold became the table edge. Students drew two cones on each side of the vertical fold. We used crayons and tempera cakes. Students had the option of painting a background, or cutting out their art and gluing it to construction paper. They looked so beautiful at our school art show (see photo at top of post).

Here are some more interesting ideas for Thiebaud-inspired ice cream fun:

Collage:

  • 2. Miss Young’s Art Room has a simple ice cream collage for kindergarten
  • 3. ARTASTIC! has a torn paper collage that would be great for using up all those paper scraps at the end of the year

Templates:

Group project:

  • 5. Kids Artists has a whole-class painted paper ice cream cone collage.

Papier Mache Sculpture:

  • 6. Phyl’s There’s a Dragon in My Art Room blog has an awesome papier-mache ice cream cone sculpture project using a paper water cone, newspaper, masking tape and art paste.

More resources

My Wayne Thiebaud Powerpoint includes repetition of simple shapes, variety, use of thick paint, horizon line and shadow.

I always show my ancient (circa 2000!) Behind the Scenes with Wayne Thiebaud [VHS] – it includes Mr. Thiebaud drawing an ice cream cone. Oh, why can’t I find a DVD or digital version??

Wayne Thiebaud video from CBS

Whatever project you choose, your students are bound to have fun!


Enjoy!


Do you have a favorite ice cream cone project?

LIFELIKE: Trompe L’oeil Sculpture (and More)

Trompe l’oeil means ‘fools the eye’ in French. Maybe you have seen a painting or sidewalk chalk art that looked so real you felt you could walk right into it. I just came from MCASD’s extraordinary LIFELIKE show which features trompe l’oeil sculpture (and painting) of everyday items. It is one of the rare museum exhibits I’ve seen that is perfect for children of all ages! Here are a few pieces.

Ai Wei Wei’s Sunflower Seeds:

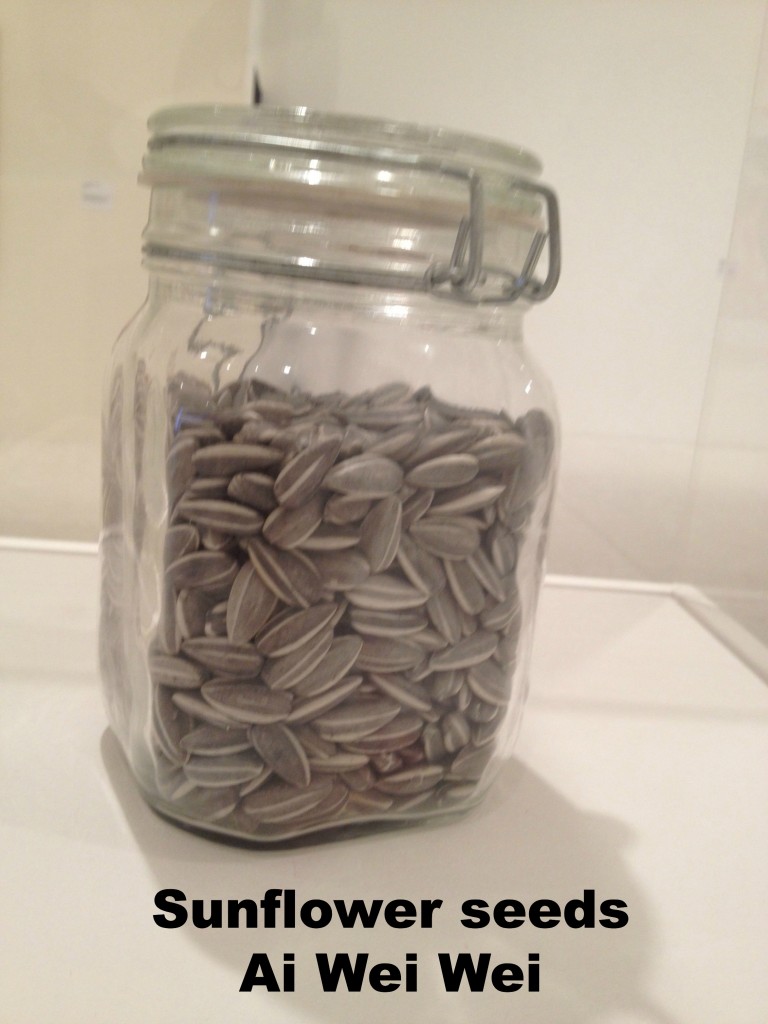
Ai Wei Wei's  porcelain sunflower seeds look absolutely real!

Ai Wei Wei’s porcelain sunflower seeds look absolutely real!

These sunflower seeds are unbelievably real, even close up. They are porcelain, hand painted with slip.

Not your everyday bag:

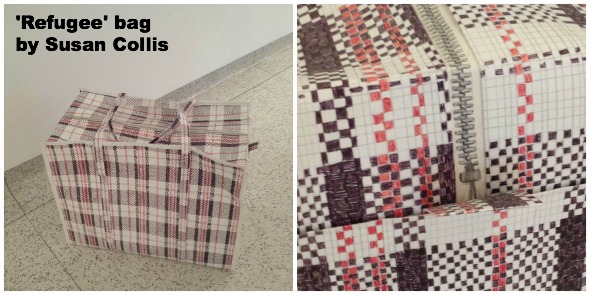
Susan Collis' 'Refugee' bag


Susan Collis’ bag looks so ordinary – something you’d use to carry your laundry. Look closely – it is not woven, but constructed of paper meticulously colored with ballpoint pen and graphite. WHOA.

Hyper-realism on a different scale:

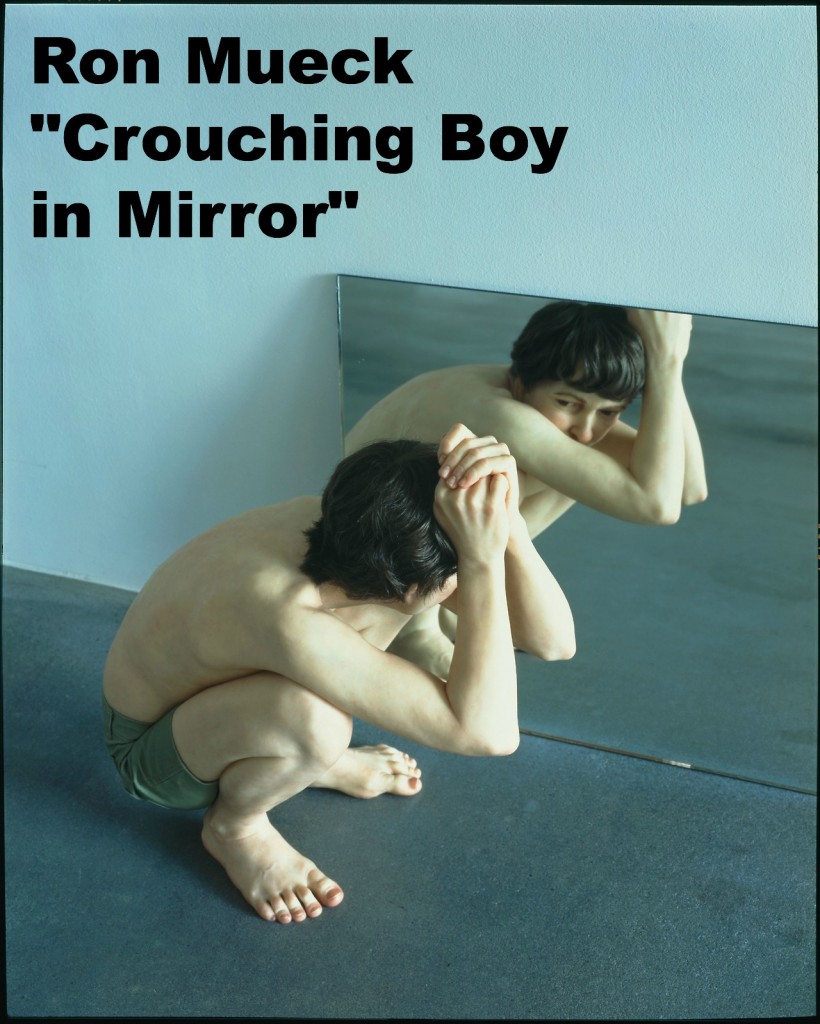
Mueck's unbelievably lifelike sculpture of a child. Photo source: New Orleans Museum of Art

Mueck’s unbelievably lifelike sculpture of a child. Photo source: New Orleans Museum of Art

Ron Mueck makes hyper-realistic sculptures of people. The scale is off – this crouching boy is too small. Mueck uses polyester resin for the skin – you can see every toenail and wrinkle.

A ‘working’ elevator:

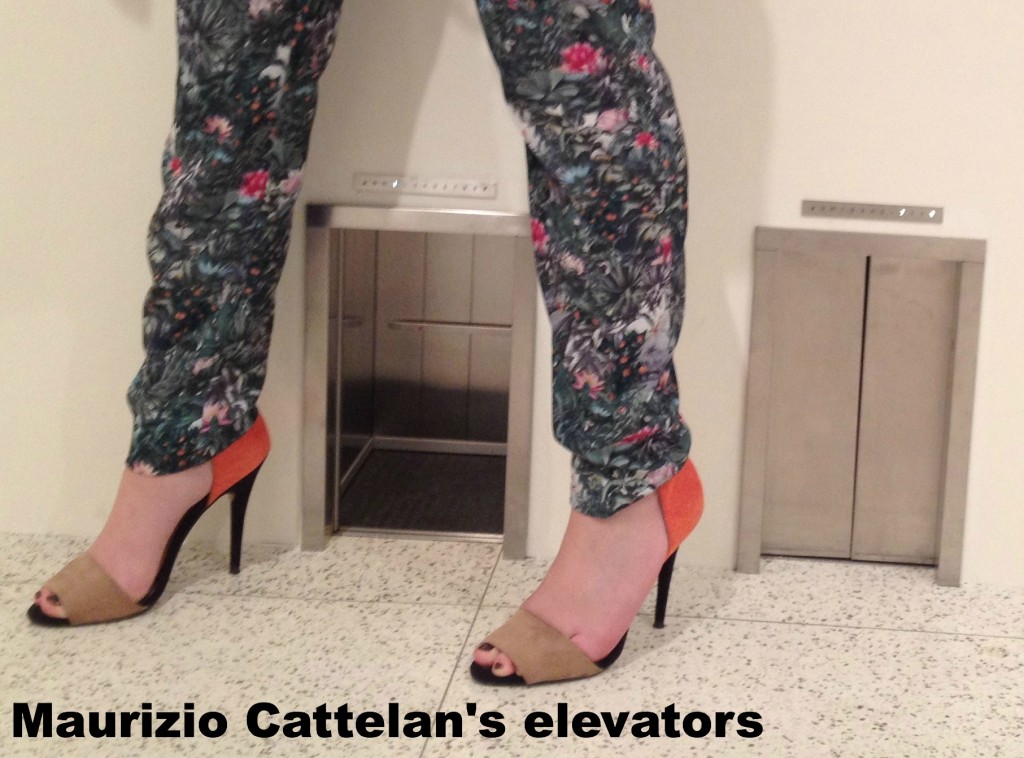
These tiny elevators' doors open and close.

These tiny elevators’ doors open and close.

Maurizio Cattelan’s tiny elevators are really popular. The doors open with a ding and close with a tiny thud. Folks were crowded around the artwork waiting for the doors to open.

LIFELIKE originated at the Walker Art Center in Minneapolis.  It closes at MCASD on May 27 and reopens in Austin, Texas in June. If you are in town, check out the museum AND TAKE THE KIDS!

p.s. to San Diegans: The Museum of Contemporary Art San Diego (MCASD) always has FREE admission to everyone under 25!

Want to see even more? Check out this 5-minute video.


Enjoy!


Four New Art Project Ideas for Grades K-6

Looking for new art project ideas? Here are four new (to me) art project ideas from my fabulous creative colleagues, Kelly and Nancy.

Kelly’s ‘Stained Glass’

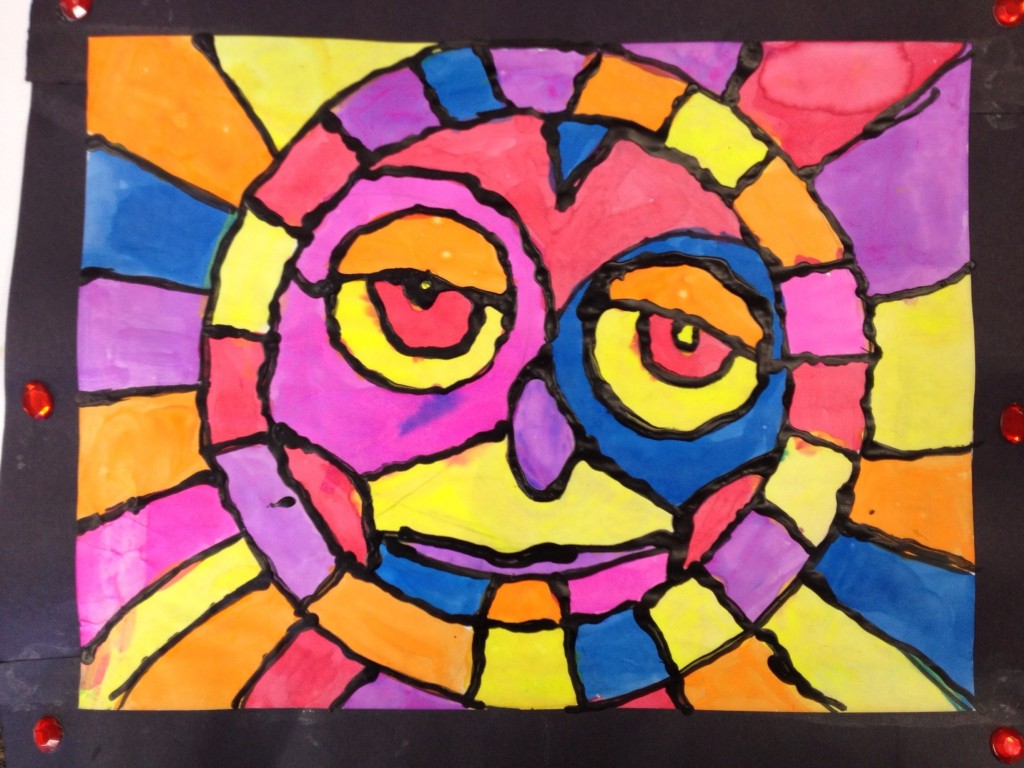
'stained glass' sun

Kelly’s ‘stained glass’ sun made with watercolors and black glue.

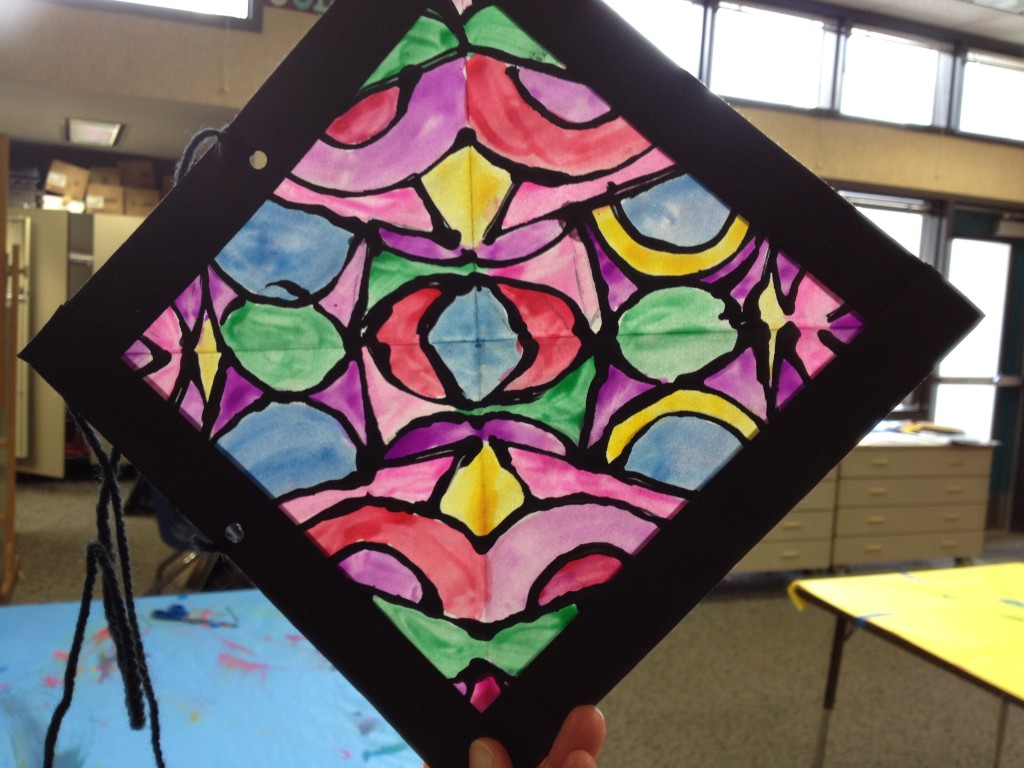
Kelly from Skyline School brought these beautiful ‘stained glass windows’ made with fluorescent liquid watercolor and black glue. As a final step, her students rubbed their artwork with baby oil and a cotton ball to make the paper translucent. Primary grades used a paper plate tracer to make the sun. Upper elementary made the geometric window (note: upper grade students used carbon paper to transfer their symmetric designs).

'Stained Glass' window 2

Kelly’s ‘Stained Glass Window’ made with watercolor and black glue.

A New Twist on Monet

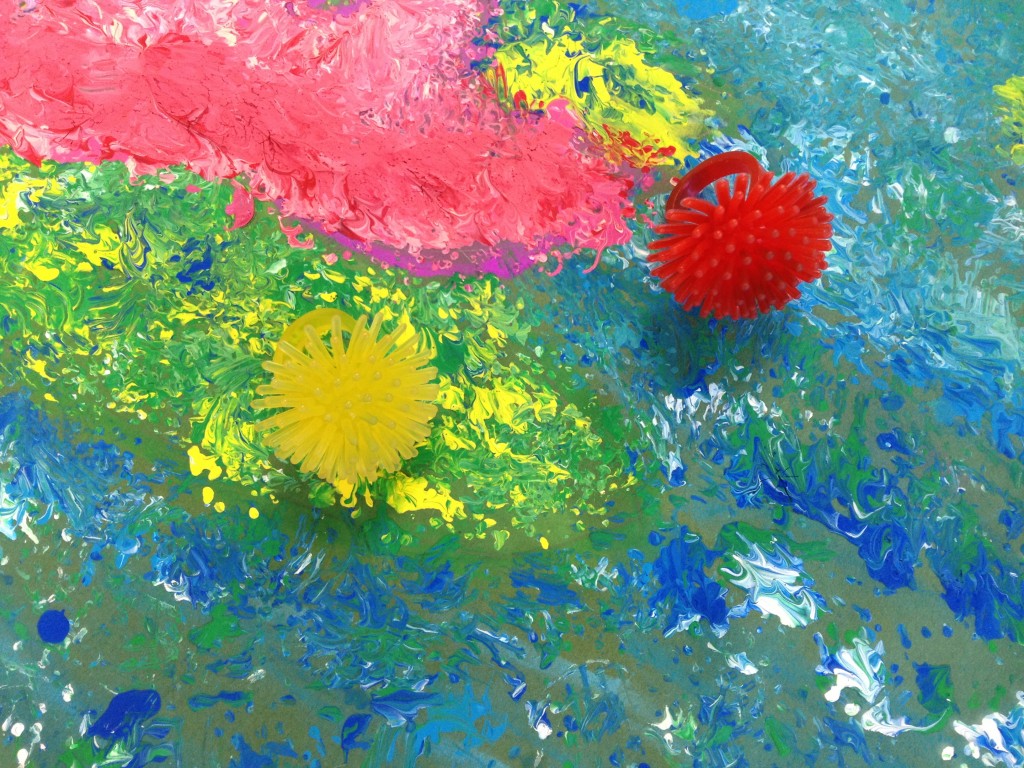
Kelly also brought these Monet water-lily paintings. Please zoom in on this painting – the paint texture is so interesting. Kelly didn’t offer a brush – her students applied paint with novelty rings purchased at Oriental Trading. These rings look like little sea urchins. If you try this, Kelly recommends pinching the ring instead of wearing it on her finger. Needless to say, her students LOVED this project!

Monet water lilies painted with novelty ring

Kelly’ s students painted their Monet-inspired art with a ring from Oriental Trading.

30-Minute Color Mixing

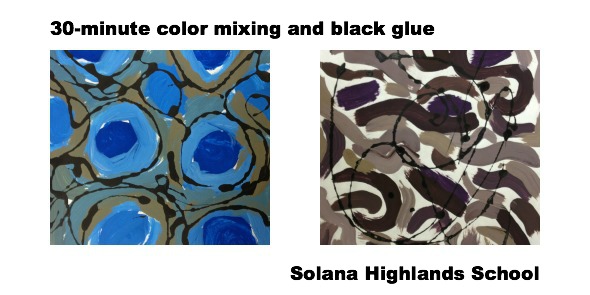
Nancy  teaches art at Solana Highlands School. She brought a color mixing project. Students used two colors plus black and white. After tinting, shading and creating a neutral, they drizzled black glue over the top. I love how much variety her students achieved. Some of these abstract compositions look like animal patterns. LOVE! Even more impressive: Nancy only has 30 minutes with her students. She does a lot of stations and table rotations to fit her projects in the tight time frame.

30-minute color mixing and black glue

Kindergarten Paper Quilts

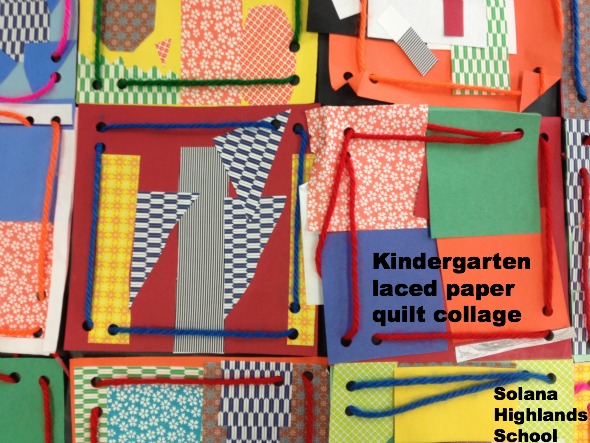
Nancy did these paper quilt squares with the kindergarten. The kindergarteners start with a 6″ square of paper. They collage first, then Nancy adds holes with a three-hole punch. Next class, the kindergartener lace the holes. Nancy glues the squares together into a quilt.

kindergarten laced paper quilt collage


As always, I am FLOORED by my colleagues creativity. They always have interesting, challenging, beautiful projects – and they teach them so well. Thanks to Nancy and Kelly for sharing your ideas.


Enjoy!


Analogous Color Chameleons

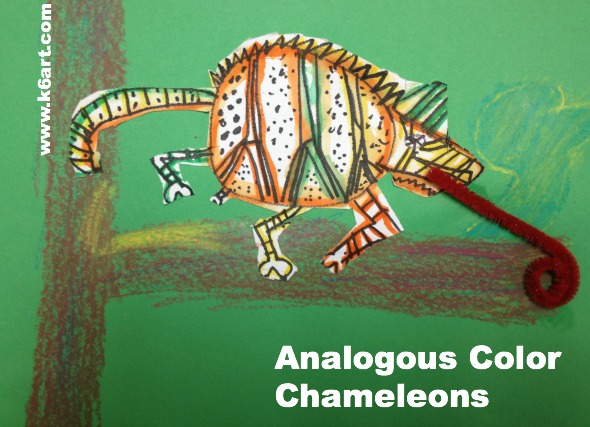
Analogous Color Chameleons


Are you looking for an engaging, NEAT color project? Try these analogous color chameleons, made with watercolor paper scraps and Crayola markers.

Materials

  • Color wheels
  • Watercolor (or drawing paper) scraps
  • Sharpies (or other black permanent markers)
  • Crayola markers (or other fine tip watercolor marker)
  • Brush
  • Water
  • Construction paper
  • Construction paper crayons
  • Pipe cleaners
  • White glue

We began by watching this FUN chameleon video

http://www.youtube.com/watch?v=KMT1FLzEn9I

We did a directed draw of the chameleon using Sharpie on watercolor paper. Second graders then added their own details – stripes, patterns, dots, horns, and spikes.

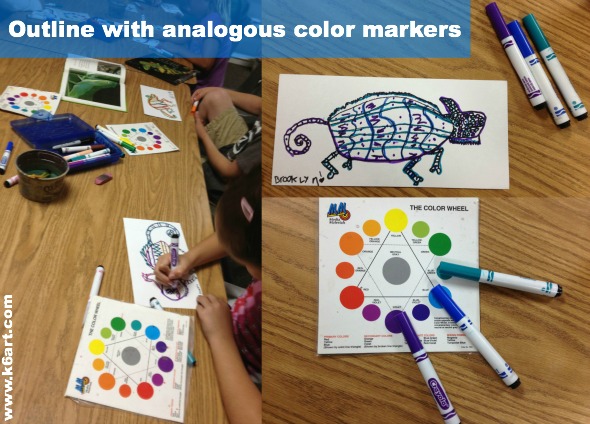
Next I passed out the color wheels and Crayola markers. We talked about analogous colors as ‘next door neighbors’ on the color wheel. I asked the students to select three analogous color markers and lay them out on their color wheels.

Students checked their neighbor’s work to make sure all the markers were analogous colors.

We used the ‘marker painting’ technique I learned on the fabulous Artisan Des Artes blog. Students outlined the interior of their their chameleons with the markers, then went over the lines with plain water and a small paintbrush. The kids LOVED it when their markers turned to ‘paint’ and spread through the watercolor paper.

analogous color collage

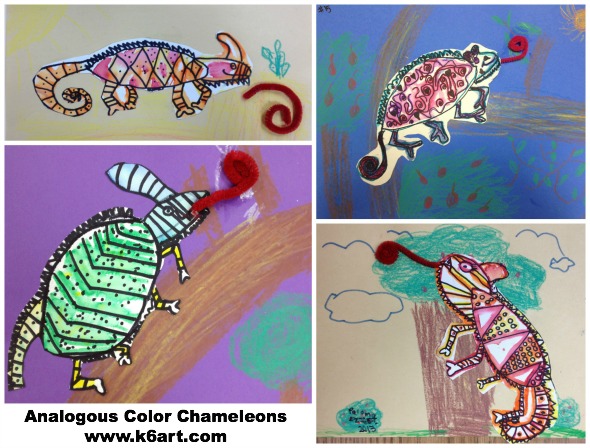
To finish the project, we cut out the chameleons and glued them to simple habitats drawn with crayon on construction paper. For a final touch, some student glued on a curled pipe cleaner for a tongue (I will skip that step next year!).

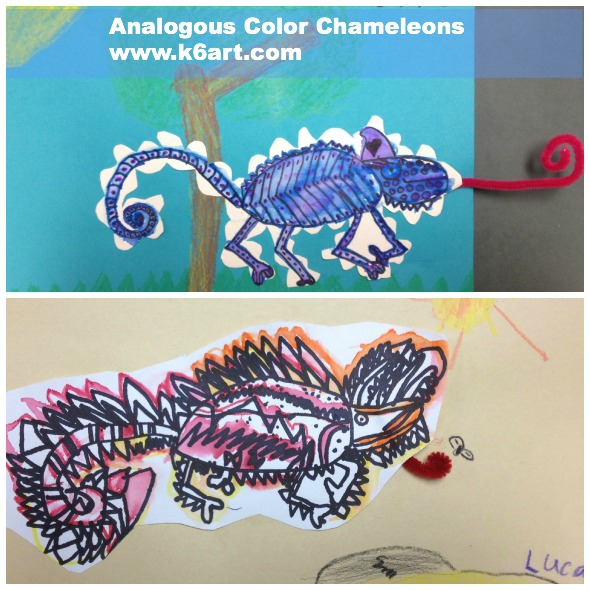
Second grade results:

analogous color chameleon collage 1

analogous chameleons


Guess what…….this project will work even if your markers are a bit dry! It’s a great project for end-of-year or anytime.

Enjoy!

p.s. Here are two books my students LOVED!


(note: this post contains compensated affiliate links).


Classroom Management in the Art Room

This year I tried a new classroom management system in the art room.  It worked so well I had to share it. If your classes are getting a little unruly as summer approaches, it maybe time to review your rules.

I have just six art room rules, which the students have to recite at the beginning of class. They are:

  • Rule #1: listen when your teacher is talking
  • Rule #2: follow directions quickly
  • Rule #3: work quietly
  • Rule #4: raise your hand
  • Rule #5: make smart choices
  • Rule #6: clean up after  yourself

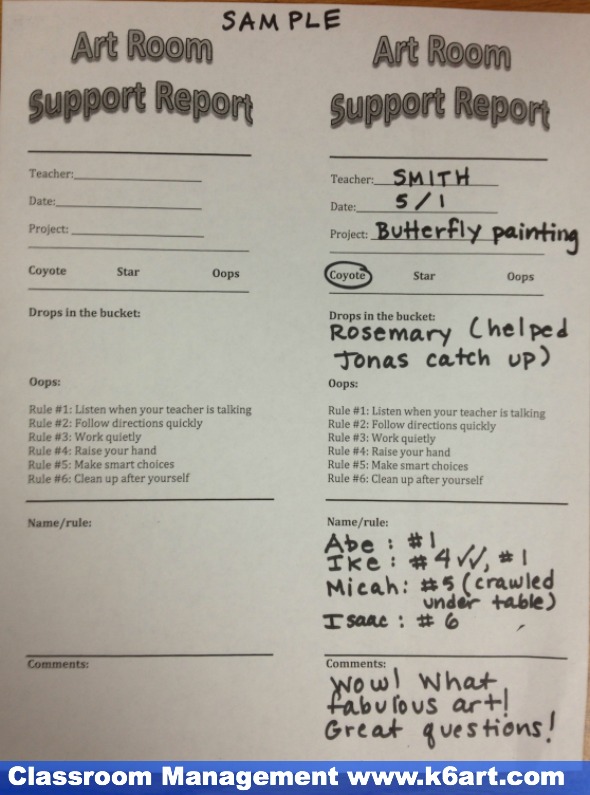
During class, I observe both individual and whole class behavior. Both are recorded and sent to the classroom teacher using my art room support report.

art room management

The form makes it super-easy to record individual behaviors as they occur, both positive and negative. All of our support teachers (music, science, P.E., media center and computers) use similar reports, although they have different rules.

Individual behavior:

Positive:

The section marked ‘Drops in the Bucket’ is for unsolicited extra-kind behaviors that make kids feel good. Helping struggling students or prepping work for a child who is absent are just two examples of behaviors. The entire staff gives out ‘drops’ which are then entered into a whole-school raffle for a prize. It is a really nice part of our school culture.

Negative:

If a student breaks a rule, I just write down the child’s name and the rule number. A check means the student broke the rule more than once. Rule #5 (‘make smart choices’) covers a lot so I have to specify the behavior.

Group behavior: smileys and frownys

I draw a smiley face (positive) and a frowny face (negative) on the whiteboard, and keep a tally. I give out lots of smileys, generally for listening, sharing, hard work, asking good questions. The rare frowny is almost always for noise.

(This is working well – the smileys have trounced the frownys all year!)

At the end of class, I rate the class behavior  ‘coyote’ (best), ‘star’ (good) or ‘oops’ (unacceptable).

The classroom teachers reward or give consequences based on the rating.

I like this because:

  • It is very specific, both in the rules and who broke them
  • The classroom teacher can reward the vast majority of kids who follow all the rules
  • I can try new strategies with the few who do not
  • It helps me communicate with the teachers

I’m not going to lie – I learned this system from a post on the Teaching Palette. A huge thank you to Katie Jarvis, art teacher for developing these rules.

Want to try it? Here is my art room rules PowerPoint based on Ms. Jarvis’ system.


Enjoy!

 Do you have rules or procedures that work well in the art room?


Related Posts Plugin for WordPress, Blogger...