All done!
I wrote about our first grade clay dragons in this post. They are all done!


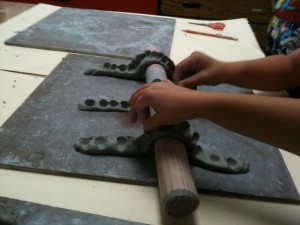
Little hands make clay dragons. Remind students to keep dragons 'fat' - they will break if they get too thin.
First grade made their clay dragons this week. How much fun is that?
Students began by rolling the clay into a fat coil (‘snake’).
Next they bent the snakes into a shape. Easy shapes include ‘C’ and ‘S’, or an open ‘O’ dragon chasing it’s tail. You can also drape the snake over a dowel to form a hump (trickier…).
(This year I simplified my life and wisely chose one shape per class. It is so much easier to sort the fired clay!)
Kids used fingers to pinch scales going along the spine. Use a blunt pencil or toothpick to poke holes for eyes and nostrils.
Snip the mouth open with an old pair of scissors.
Skip the feet (feet are overrated!).
An adult writes the student’s name (or number) on the clay with a toothpick.
Note: if you choose to try the ‘hump’ dragon, slide dragons off the end of the pin after only one day of drying and carefully load in the kiln in a damp state.
After bisque firing, we glazed the dragons. After brushing on three coats of glaze, kids could use a toothpick dipped in glaze to dot on some more decorations.