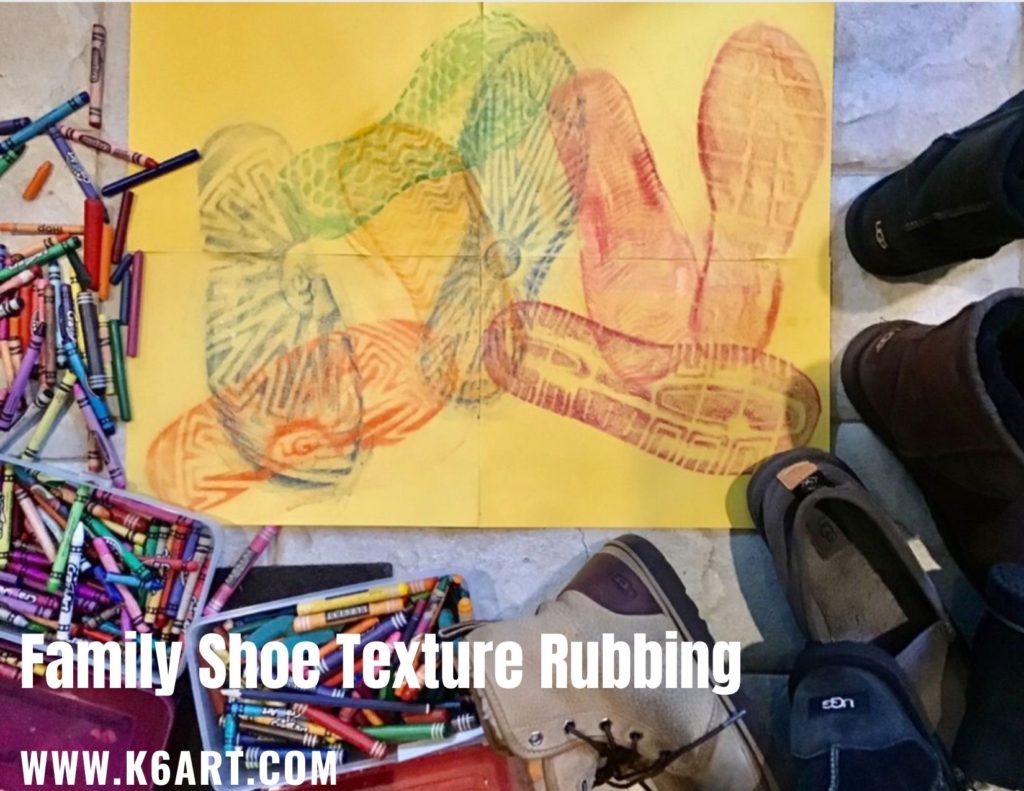
Here is an art project that teaches students about texture, is lots of fun and is perfect for both distance learning and the classroom.
Enjoy!
-Rina

Thinking about a mural project? If you want a mural that is engaging, beautiful and enduring, consider this rainbow footprint tile mural. I used Craig Hinshaw’s Rainbow Footprint Mural lesson from Pottery Making Illustrated July/August 2004.
We followed all the directions in the magazine article. The students were THRILLED to stomp their foot down onto a ball of clay.
Cutting the tile though the viewfinder opening was a bit of the challenge for the younger students. Instead of neat squares, we had a lot of irregular shapes. These tiles had to be remade, but it only took a few extra minutes. I had extra sixth grade volunteers on hand to help cut out the tiles for the kindergarteners.
We created text two ways: 1) large text was created by pressing magnetic letters into clay, and 2) small text was created by pressing alphabet pasta into clay. (Don’t worry – the pasta burns out in firing).
I did this mural with the students of Solana Santa Fe School. We prepared all the tiles and had them professionally installed on an exterior stucco wall. Eight years later, it is still standing and looking great!
Another school in our district did a twist on the same mural project. Artist (and parent) Christie Beniston create a rainbow footprint mural with the students of Skyline School. Click here to see this mural. Note the rectangular and circular tiles.
If you are planning a whole-school mural, consider this project. The kids LOVED making the tiles. Each tile is uniques, just like our students. They mural is beautiful to look it and fun to touch. After it is installed, kids will look for their shoe prints. It is a permanent reminder of unity in the school community.
Enjoy!
Here are some more photos from Art Show 2014. Thanks again to Devan, our art show chair (and party planning/layout genius) and all the AMAZING art show and art room volunteers who put this show together.
Sixth grade foil name art. Click here for lesson plan
Primary grade display
First grade clay self-portraits on table top. Click here for lesson. On skirt: marker and foam prints lesson plan at shine Brite Zamorano. Above on wall: baby oil and oil pastel herons. Click here for lesson.
Kindergarten Kandinsky CD Case Circles Mural
Click here for the lesson plan. The lesson went incredibly well. The mural was mounted on foam core using the 3M clear mounting tape.
Shoe Art and Sport Trophies:
On the table skirt: fourth grade shoe art. Click here for lesson. This is a 100% successful lesson.
Fifth grade sport trophies. Click here for lesson.
Want more pictures? Check out our first post from Art Show 2014. And check out Art Show 2013 and Art Show 2012! Click here for more on Devan’s space-saving displays.
Our volunteers are the best! Our school is blessed to have the help of parents year-round in the art room. We had some amazing, hard-working parents who hung this show in just three days.
It was our last show with Devan as chair. We will really miss her vision and energy. How fortunate we are to have had her help these past four shows.
Enjoy!!!!!
What’s your best tip for a successful art show?
The fourth grade recently completed their shoe art. We did a two part project.
Part 1: shoe drawing. We started with each kid taking off a shoe and putting it on the table. Kids traced the shoe contour onto white drawing paper. Then students moved into observational drawing mode and added the shoe stripes/logos/dots to the drawings. We colored the shoes – kids could use realistic or imaginative colors.
Part 2: sole texture rubbing. Shoe off and on the table! This time, we did a texture rubbing of the shoe sole. We used newsprint and peeled crayons. Kids were encouraged to to multiple rubbings of their shoe in different colors, and then trade shoes with friends. So much fun! It was like collecting autographs, but of your friends’ shoes….
Last step: cut out the shoe drawing from part 1 and glue it on the texture rubbing.
Wow!!! Super successful project. Just be sure do this one when its dry outside or you will have mud on the tables.
Inspiration for the shoe contour lesson comes from long, long ago, when I was a parent volunteer in Jenny Luce’s art room. The sole rubbing portion of the lesson comes from the book ‘Make Prints!’ by Kim Solga.